
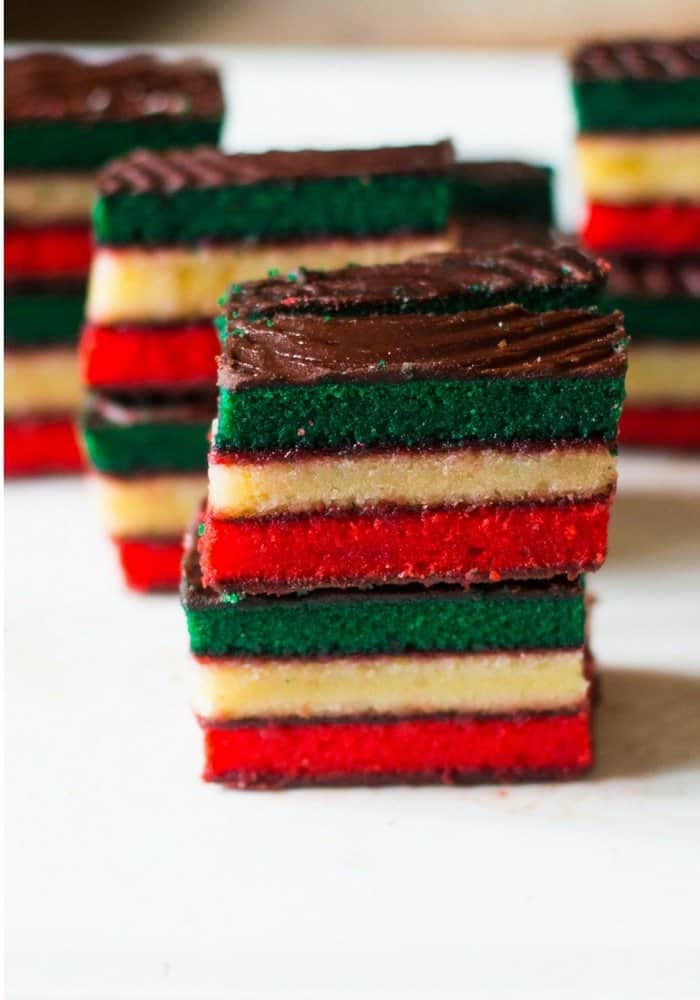
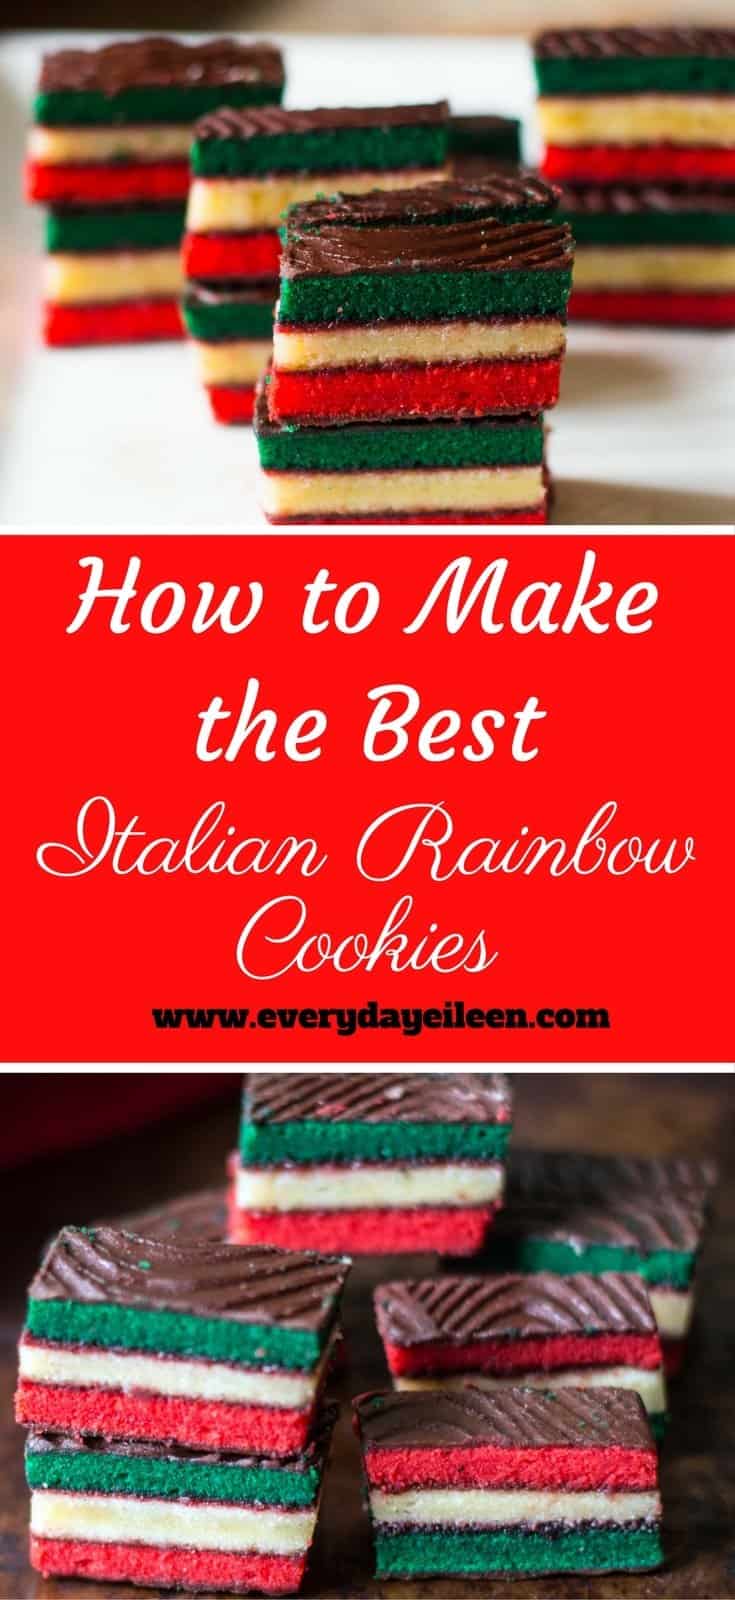
Ready to learn How to Make the Best Italian Rainbow Cookies, you have come to the right place. Easy and delicious with tips I have learned from many years of making these delicious Italian Rainbow Cookies.
Perfect year-round and always a hit at a Holiday Cookie Exchange! #ChristmasCookies
Italian Rainbow Cookies, are so popular and quite expensive in the bakeries in my area! As a child, I didn't love these cookies! I think because they were always store-bought!
I am no cookie snob but sometimes a cookie just has to be home-made! Many years ago, I was given an amazing batch of Homemade Italian Rainbow Cookies!
No joke, I heard Angels singing because I was in heaven over these cookies! Trust me, people, this is the perfect way to learn How To Make the Best Italian Rainbow Cookies!
FAQs about Italian Rainbow Cookies:
Where did the Italian Rainbow Cookies originate?
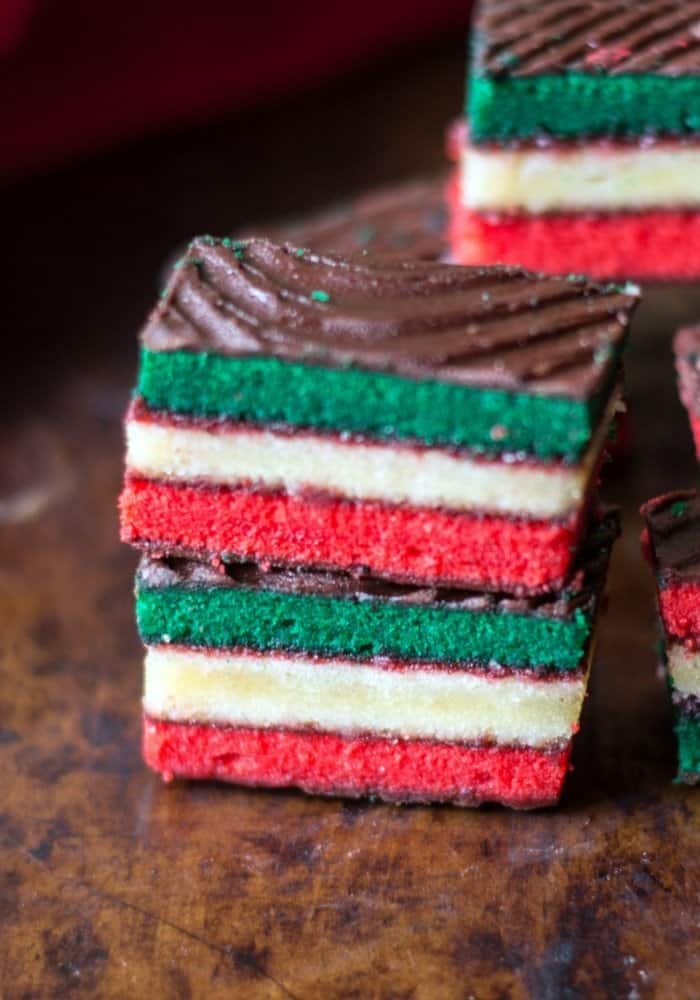
Italian Rainbow Cookies originated in the United States. Many say in a bakery on Long Island. The cookies represent the colors in the Italian flag.
What are other names these Italian Rainbow Cookies are called?
These Italian Rainbow cookies some call seven-layer cookies because jam is in between each layer. Others call these cookies Neapolitan cookies.
How long can Italian Rainbow Cookies be kept after they are baked?
Once the cookies are baked they can keep well covered in the fridge for 1 week.
Can Italian Rainbow Cookies be frozen?
Yes, I use my food saver to freeze them. I make these cookies to step three in the full recipe. Then freeze until ready to assemble to Italian Rainbow Cookies ahead. Defrost the layers and continue assembling the cookies.
This post contains affiliate links for your convenience (which means if you make a purchase after clicking a link I will earn a small commission which helps keep my blog up and running but it won’t cost you a penny more!) We are a participant in the Amazon Services LLC Associates Program, an affiliate advertising program designed to provide a means for us to earn fees by linking to Amazon.com
I also have a store where I am always updating great finds for not just cooking, I hope you check it out here, Everyday Eileen I will continue to update it regularly! Click here to read my full disclosure policy.
Thank you so very much for being apart of Everyday Eileen!
Tools you may need to Make the Best Italian Rainbow
- Food Scale: I highly recommend using a food scale to measure your dough in step 3 in the recipe card. Ensures equal portions.
- Almond Paste: This is the brand I use. If you cannot find it in the baking section of your grocer, you can order via Amazon.
Tips on How to Make the Best Italian Rainbow Cookies:
- Many recipes call for separating the eggs. I find it unnecessary, the batter gets worked enough when adding the food coloring.
- The cookies need to be weighed down for a bit, I use a cutting board to keep the cookies together.
- In between each layer, press down on each layer to help seal the layers.
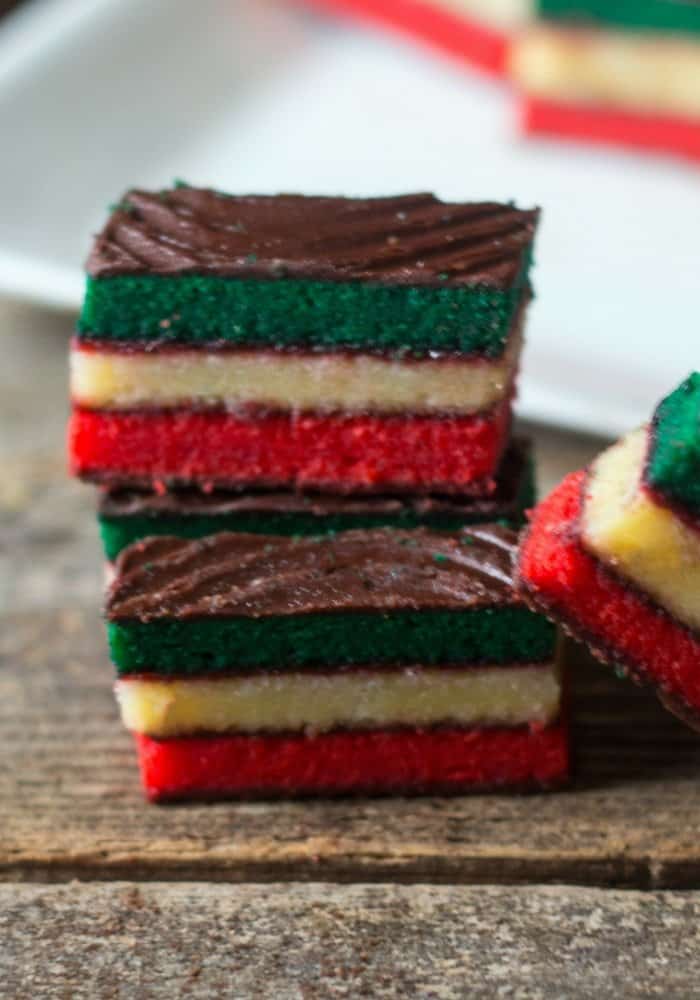
- If you have extra time, swirl the chocolate coating with a fork. This makes a great design.
- When slicing the ends to make an even side, freeze the extra pieces...a great addition to ice cream.
- I like to use an all natural food dye for these cookies, healthier option
How to Make Italian Rainbow Cookies:
How to Make the Italian Rainbow Cookies:
- Preheat oven to 350 degrees. Spray 3 9x13 inch pans with non-stick spray. Place parchment in each pan and spray with non-stick spray. Set aside.
- Use a stand mixer if possible, add in the almond paste, mix for a minute to break apart.
- Add in butter and sugar, cream together. Can take 4-5 minutes.
- Blend in eggs, separately. Mix well in between adding next egg.
- Add in almond extract and salt. Mix another 30 seconds.
- Mix in flour with wooden spoon. Blend well, do not overmix.
- Split dough into 3 equal portions, I use a food scale to measure the dough.
- Use red food coloring in one bowl, green in the second bowl, and leave the third bowl as is.
- Blend in the food coloring
- Spread each dough into prepared pans. Bake 10-12 minutes.
- Once baked, let cookie layers cool completely.
How to Assemble to Italian Rainbow Cookie:
- Use a large sheet pan, lay a large piece of plastic wrap down. (Large enough to cover the three layer cookie)'
- Place a large piece of wax paper on the plastic wrap. Ensures cake won't stick to plastic.
- Invert the green layer onto the wax paper.
- Cover with apricot jelly.
- Invert the plain layer on top of the apricot jelly.
- Top the plain layer with raspberry jam.
- Invert the red layer on the raspberry jam.
- Press down on the layers
- Wrap the cookie with the plastic wrap and place a large cutting board or something heavy to seal the layers together.
- Refrigerate for at least 4 hours or overnight with the heavy item on the cookie.
- Remove from the fridge and remove the wrapping. Trim edges to make them straight. ( eat those extra pieces: delicious)
Make the chocolate glaze:
- Microwave or use a double boiler to melt the chocolate.
- Carefully cover the cookie with the chocolate. You can use a fork to make swirls in the chocolate for a design.
- Place in the fridge until the chocolate is solid, about 30 minutes.
- Carefully flip cookie over and cover this side with the chocolate. You may need to melt chocolate again.
- Place large cookie back in the fridge to harden the second side of chocolate.
- Use a serrated knife to slice the cookies into one-inch pieces.
Other Favorite Holiday Cookies are Classic Holiday Spritz Cookies
The Best Pecan Crescent Cookies
Holiday Chocolate Rudolph Cookies
📖 Recipe
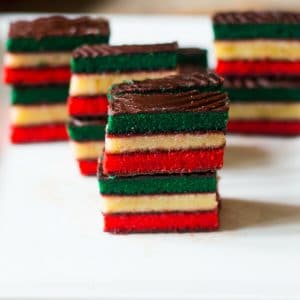
Italian Rainbow Cookies
Equipment Needed:
Ingredients
- 7-8 ounces almond paste *see note
- 1 cup unsalted butter
- 1 cup sugar
- 4 large eggs
- 1 teaspoon almond extract
- ¼ teaspoon salt
- 2 cups all-purpose flour
- 15- 20 drops red food coloring
- 15-20 drops green food coloring
- ¼ cup apricot preserves
- ¼ cup raspberry preserves
- 12 ounces semi-sweet chocolate chips
- non-stick butter spray
Instructions
To make the Italian Rainbow Cookies
- Preheat oven to 350 degrees. Spray 3 9x13 baking pans with non-stick butter spray. Line bottom of each pan with parchment paper and spray parchment paper with spray.
- In a stand mixer using the paddle (or a large bowl using a hand-held mixer) add in the almond paste and break apart into pieces. Add in the butter and sugar to cream ingredients together, About 4-5 minutes. Add in the eggs one at a time. Mix briefly after adding each egg. Add in the almond extract and salt. Mix another 30 seconds. Add in the flour and use a wooden spoon to combine flour into the batter.
- The dough needs to be split into 3 equal portions. I weigh the dough and then split 3 even ways. This can be done by the eye as well. Add red food coloring to the first bowl of batter and combine well. Add the green to the second bowl, again a well. Leave the third bowl as is.
- Spread each portion into the prepared baking pans. Bake about 10-12 minutes. The sides will be slightly brown and a toothpick should be inserted into the cookie and come out clean.
- Remove from oven, place on cooling rack for about 10 minutes. Remove from pan and place the cakes on the rack to cool completely.
Assemble the cookies
- On a large sheet pan, place a large piece of plastic wrap (large enough to cover all three layers of cake. On top of that place a slice of wax paper to place the large cookie on so they do not stick to plastic wrap.
- Invert green layer cookie onto the wax paper and cover with apricot jelly. Top with the plain cookie. Cover plain cookie with raspberry jelly. Invert and top with the red cookie layer.
- Wrap the large cookie with the plastic wrap and place a cutting board on top of the huge cookie. Refrigerate from 4-8 hours or overnight. Remove from fridge, remove the cutting board, plastic wrap and wax paper. Trim the sides all around to make straight edges. Set cookie aside.
Make the glaze
- Microwave the chocolate pieces about 1 minute. Stir to melt and smooth the chocolate. Or, use a double boiler. Fill bottom pan three fourths full of water and place chocolate pieces in the double boiler. Heat over medium heat, stirring often.
- Once the chocolate is melted, use a knife to spread half the chocolate on top of the cake. If desired, use a fork to make swirls in the chocolate. Place cake back in the fridge for about 30 minutes to harden chocolate. Remove from fridge and carefully turn cake over. Top with remaining chocolate and if wish, make the swirls with a fork or leave solid chocolate. Place back in the fridge for about 30 minutes to harden chocolate.
- To slice the Rainbow Cookies, use a serrated knife to cut the cake. Have warm water in a large cup ready to dip knife in for easy slicing. I prefer 1-inch slices.
Notes
- The almond paste, Odense comes in 8-ounce paste and others brands are in 7-ounce packaging. I have used both. If using 7 ounces. feel free to up the almond extract to 2 teaspoons.
- The cookie layers can be frozen after step 3 to Assemble the Cookie.
- When ready to eat, place frozen cookie layers the in fridge to defrost. Usually takes a few hours. continue with chocolate glaze step.
- Any nutritional data I provide is an approximation and actual dietary information can vary based on ingredients and portion sizes.
Nutrition
PIN ITALIAN RAINBOW COOKIES TO MAKE LATER HERE:
MAKE THIS RECIPE, TAG #EVERDAYEILEEN ON INSTAGRAM WITH YOUR PICS!
I LOVE TO SEE AND SHARE YOUR CREATIONS!
If you make these tasty treats, I'd love you to leave me a comment!
Let me know what you think or any questions about the recipe in the comment section below!
I hope you continue connecting with me on:
Instagram, Pinterest, Twitter, Bloglovin, Google Plus
Thank you for always sharing my passion and love for food and family!
It is my favorite week, it's Christmas Cookie Week for myself and a fantastic group of bloggers. This amazing week was organized by the very wonderful Ellen who runs Family Around the Table We are sharing amazing cookie recipes every day this week. Click through to check out all these amazing recipes!
- Alfajores (dulce de leche sandwich cookies) by Caroline’s Cooking
- Candy Cane Tassies by Cindy’s Recipes and Writings
- Cranberry White Chocolate Chip Cookies by The Bitter Side of Sweet
- Crystallized Gingerbread Chocolate Chip Cookies by Faith, Hope, Love, and Luck Survive Despite a Whiskered Accomplice
- Dutch Speculaas Cookies by Palatable Pastime
- Easy Sugar Cookies by Bear & Bug Eats
- Empire Cookies by Red Cottage Chronicles
- Gingerbread Gooey Butter Cookies by Making Miracles
- Gingerbread Men Cookies by The Freshman Cook
- Graham Cracker Chocolate Chip Cookies by Books n Cooks
- Holiday Sugar Sprinkle Butter Cookies by Family Around the Table
- Italian Rainbow Cookies by Everyday Eileen
- Loaded Festive Chocolate Chip Cookies by Daily Dish Recipes
- Makrut Macaroons by Culinary Adventures with Camilla
- Mocha filled Sandwich Cookies by Jolene’s Recipe Journal
- Peppermint Macarons by House of Nash Eats
- Oatmeal Raisin Peanut Butter Chocolate Chip Cookies by A Kitchen Hoor’s Adventures
- Pecan Caramel Turtle Bars by Tip Garden
- Pepparkakor (Swedish Ginger Cookies) by The Redhead Baker
- Peppermint Candy Canes by Karen’s Kitchen Stories
- Peppermint Crinkle Cookies by Strawberry Blondie Kitchen
- White Chocolate Dipped Ginger Cookies by Kate’s Recipe Box
- Peppermint Mocha Shortbread Cookies by Cooking with Carlee
- Peppermint Shortbreads by A Day in the Life on the Farm
- Pistachio Wedding Cookies by Soulfully Made
- Raspberry Filled Coconut Snowflakes by Making The Most of Naptime
- Raspberry Thumbprint cookies by Simple And Savory
- Rum Logs by Corn, Beans Pigs and Kids
- Vanilla Bean Pizzelles by Love and Confections


Rosetta
Great step by step directions. Turned out perfectly. Thank you
Tiffany
Can these be frozen once they are completed? We made them a little early and I want to serve them on Christmas. Thanks!
Eileen xo
I have frozen these cookies. I usually freeze them unfrosted. If you have frosted them already, place them on a baking tray in the freezer for about 1/2 hour. Then place the cookies in a freezer-safe storage bag. Defrost in the refrigerator, overnight. Any other questions, please feel free to let me know.
Karen Bradeen
Where did you find natural food coloring? Brand name?
Eileen xo
Hi Karen. I use a few since I have been doing a lot of baking. Adams used fruit juice https://amzn.to/2thaG5G McCormick also has a product I use https://amzn.to/39uAVq3.These are my Amazon affiliate links - I purchase on-line. I do not know the availability in-stores. Let me know if you have any questions.
Jenni
I made these for the first time on Christmas Eve. I’m not a baker but the recipe is perfect. Everyone loved them...thanks for the great and so easy to follow recipe!
Eileen xo
Awesome Jenni. You have made my day. I'm so glad you enjoy the cookies!
lisa
I made these cookies. The batter did not make enough for one pan, let alone three.
Eileen xo
I'd like to troubleshoot what went wrong Lisa. This recipe I've been making since I was a child and so many people have made the recipe with great results. Did you measure the ingredients? Did you use all the ingredients I've listed? I'd love to help you get a great result.
Nic
Similar issue. I still spread the dough out anyways but my layers were probably only 1/4 inch is that. I don’t think the 3 lays stacked together even made an inch.
Eileen xo
Hi Nic, did you measure your ingredients correctly? Are your pans 9 x 13? I've never had an issue with the height of the cookies.
Mark
Hi. I Just use 9 13 cookie sheets..they come out fine..hard to tell if a few spots are a little thin..but usually come out great..would just like the get the red darker..come out a tad pink..but still taste the same..funny though some people think the layers taste different due to the color..lol
Eileen xo
I'm glad you enjoy the cookies Mark. Have you tried colored gel? I recently started using them and the color comes out very well.
A2
I agree with Lisa! I'm an experienced baker, I followed all measurements correctly, and still.....the batter barely covered 3/4s of the baking 9x13 pans. They were still delicious (tasting just like the ones I grew up on in NYC) but the "incorrect" sizing was a confusing mystery!
Eileen xo
I am taking this under advisement and working on the recipe for the remainder of this week. I have made these many times without issue but I have not made them in some time. One of my daughters makes them for our family. I sincerely thank you for letting me know and I will be working to update and improve my recipe asap.
Debra L. Caraballo
I've made these cookies quite a few times now and have never had a failure! What I do, is layer the cakes in reverse, put chocolate on the bottom, let firm up awhile, then flip them over. Bottom is iced, no more turning. I also cover the sides.
These cookies are just so awesome and everyone is always so impressed!
Thanks!
Eileen xo
What a great idea Debra to layer in reverse and top with the chocolate! I am so happy you enjoy the recipe and everyone enjoys it! I am making a big batch this weekend too! Thank you so much for taking the time to leave a comment! I hope you have a great Holiday Season!
Mike
I just tested this but adapted it for a Halloween party! I used Black, Green and Purple. I also couldn’t find seedless jam, so I ran it through a mesh strainer and presto - sans seeds! I also used a little orange candy-melt to drizzl on top. They came out Great and I can’t wait to make another batch for the party!
Thanks for the recipe
Eileen xo
Awesome Mike! Ironically, I am also adapting this for a Halloween cookie too! I hope you tag me with your results in Instagram, I would love to see the final cookie! Enjoy and thank you so much for taking the time to reach out to me and let me know you have made these cookies! I very much appreciate the support!
Elena
These cookies look exactly like the ones we had in Italy a few years ago! Yum!
Eileen xo
I hope they deliver in flavor because these are my families favorite Italian cookie!
Karyl | Karyl's Kulinary Krusade
Loving the bold colors in this cake, and the jelly to separate the layers. These look so delicious
Eileen xo
Thank you Karyl! One of my favorite cookies..Worth a wee bit extra effort
Tina
I love how the colors are the Italian flag. Your cookies look amazing, I have yet to try this. Maybe now is the time.
Eileen xo
I hope you give these a go...a Holiday tradition for us
Ashley @ Big Flavors from a Tiny Kitchen
These are always such a stunning addition to holiday cookie assortments. Your layers look absolutely PERFECT!
Eileen xo
Thank you Ashley, I'm all about easy family cooking and living.. Once in a while, a little extra effort is so worth it and these cookies are the reason
Prasanna Hede
These are so beautiful ! Would have loved to try these !
Eileen xo
Why Thank you Prasanna! I hope you enjoy!
kate
Wow, these look just delicious! I can't wait to try them out. I love how colorful they are.
Eileen xo
Thank you Kate.I hope you let me know when you make them. I'm having one now!
Cathleen @ A Taste of Madness
These are so pretty!! I have always wanted to know how to make these 🙂
Eileen xo
Thank you Cathleen. Please let me know when you make them.. Love your feedback!
Leslie
These are so pretty - I'd have a hard time eating them just because I wouldn't want them to go away!
Eileen xo
I know, as I give them away..I always want to keep more for my family! But they should most definitely be shared
Helene
Eileen those Italian cookies are so perfect, you are super talented at this. The layers are clean and the color so deep, Those would please a few friends who are here the whole season until May, they are all Italians. 🙂
Eileen xo
Helene, Love you! You are so kind! I do hope your family get to make these! Although, they are with you and you have the most amazing recipes, they may not want anyone else's recipes :)~
Veena Azmanov
Oh these are so pretty and festive - definitely worth the extra bit of work.!! They would make perfect Christmas Cookie Gift Jars too!
Eileen xo
What an awesome idea to put these in jars for gifts! That is why you are one of the most talented bakers I know! Always thinking!
Ben Myhre
These are some pretty looking cookies!
Eileen xo
Thank you so much Ben!
Nicoletta @sugarlovespices
These look beautiful! I agree, there's always a reason and a reward for some recipes to be more laborious!
Eileen xo
Yup, I love easy peasy...but some recipes deserve the extra time!
Amanda
I just made 4 batches of rainbow cookies last weekend. 🙂 We put chocolate sprinkles over the top layer of chocolate. I love the swirl idea, too! Always a big hit on cookie trays.
Eileen xo
Oh I love the sprinkles on my Italian rainbow cookies too!
Karen
These are always so stunning. I love the swirl you got on the chocolate!
Cindy
Gorgeous!
Eileen xo
Thank you Cindy!
Liz @ Books n' Cooks
We love these cookies and make them every year. I only wish I could get photos as good as yours!
Eileen xo
Aw, thank you so much Liz! These are hard to get a good shot. So much appreciate the kind compliment
Wendy Klik
I want to try these cookies. They look wonderful.
Yijia
Hi Eileen - I have made these twice now and both times the layers have been a little thin. How tall are you able to get the final cookie to be?
Thanks!
Eileen xo
I have never measured their height but what you see in the photos is accurate to size. Are you using a 9x13 pan? I'm actually making these cookies again this week because I want to do some updating to provide instructional photographs for the cookies. I hope to have them updated by Friday.
Ellen
My Italian Mom loved these cookies but never made them! I will have to give them a go soon. They look so pretty and you make it sound so easy!
Bea
I have a question, I know these are called cookies but aren't they cake like petit fours? I'm so curious but I'm still making them tomorrow anyway!
Eileen xo
You know Bea, that is a great question. After thinking about these "cookies", they really are more cake like. They can be considered petit fours.