
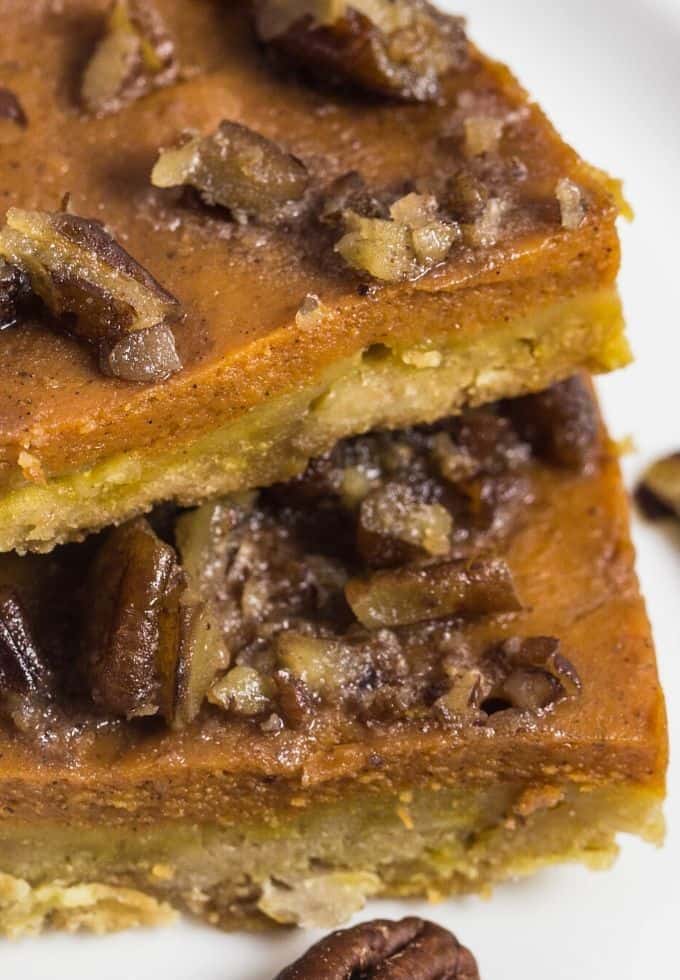
Pumpkin Pie Bars are going to rock your world. They have a quick and easy made from scratch buttery moist oat crust. The topping is a flavor-filled creamy interior filled with pumpkin flavors while being uncomplicated and decadent. The deliciousness continues with an over the top pecan crunch topping.
...Keto Oven Roasted Pork Loin with Lemon Herb Sauce
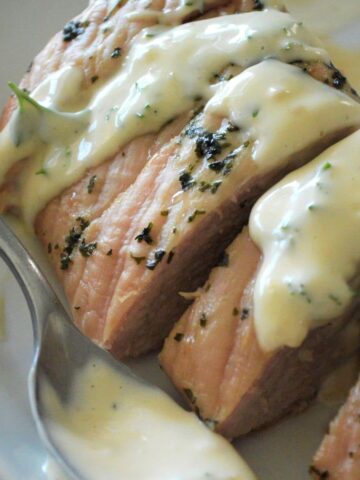
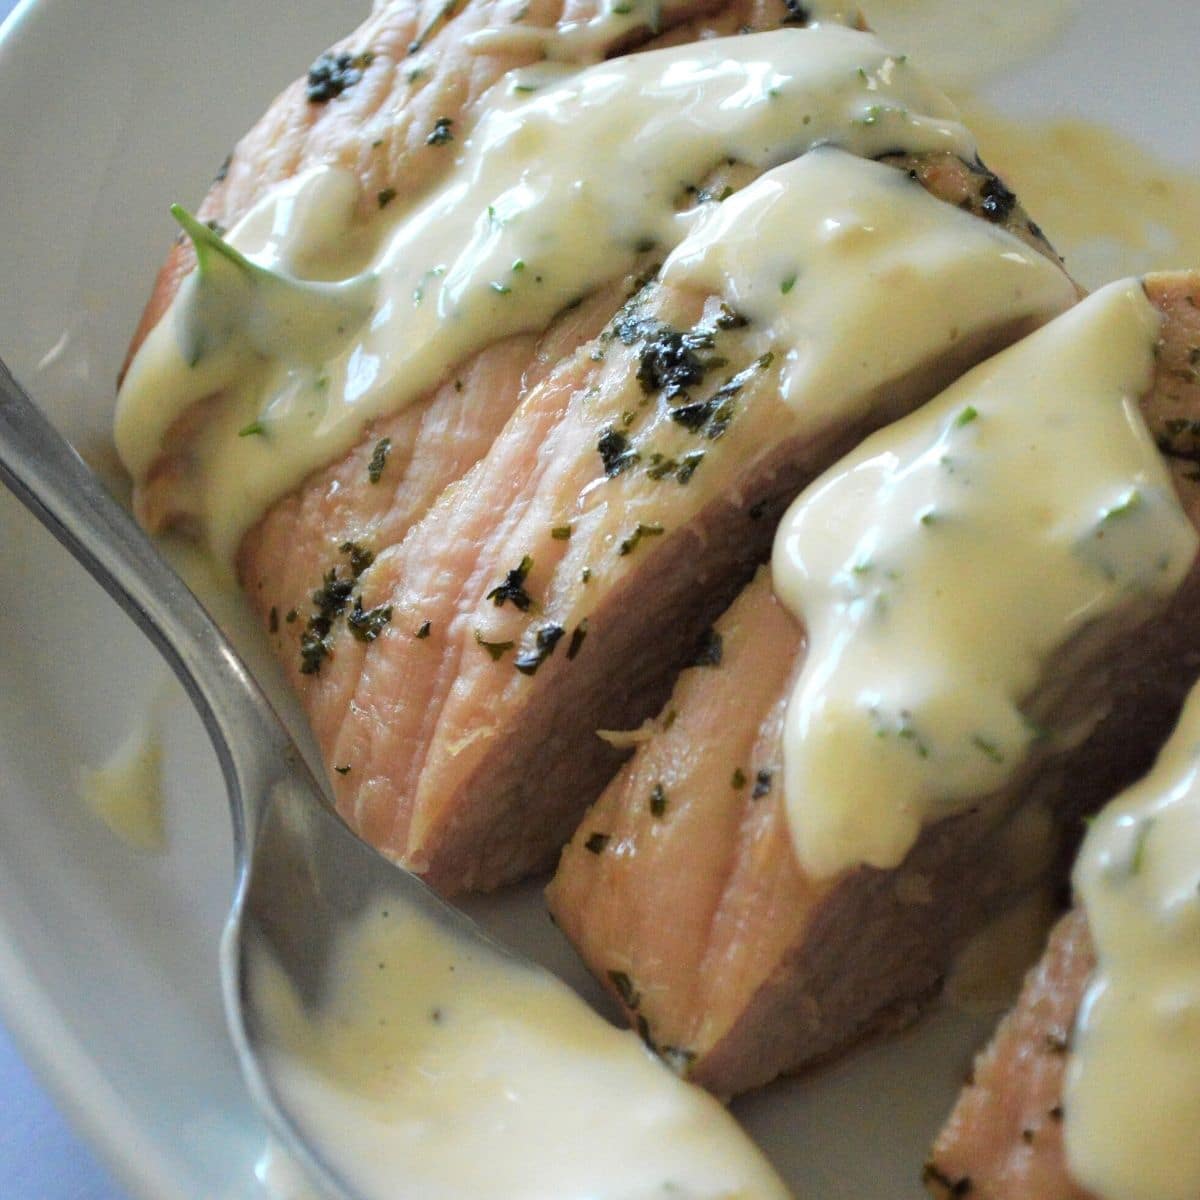
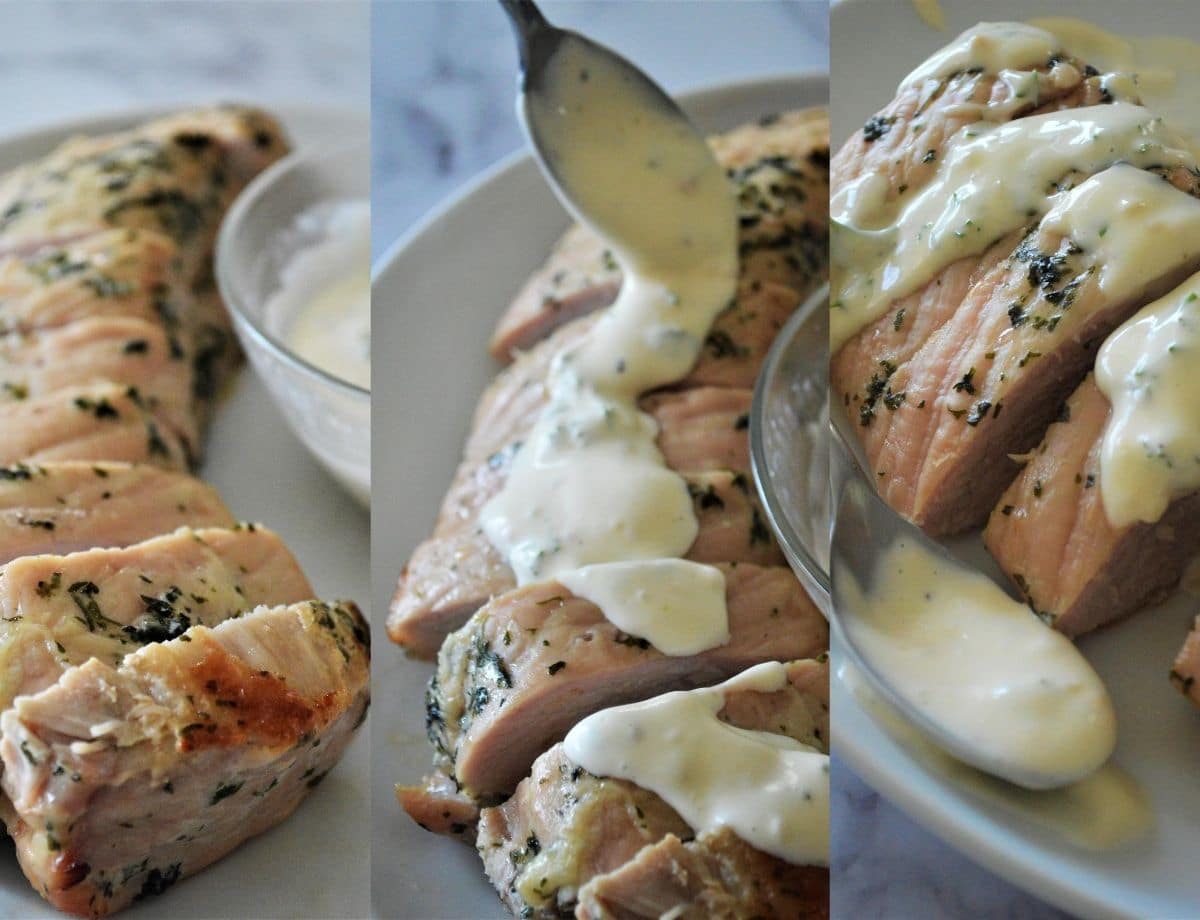
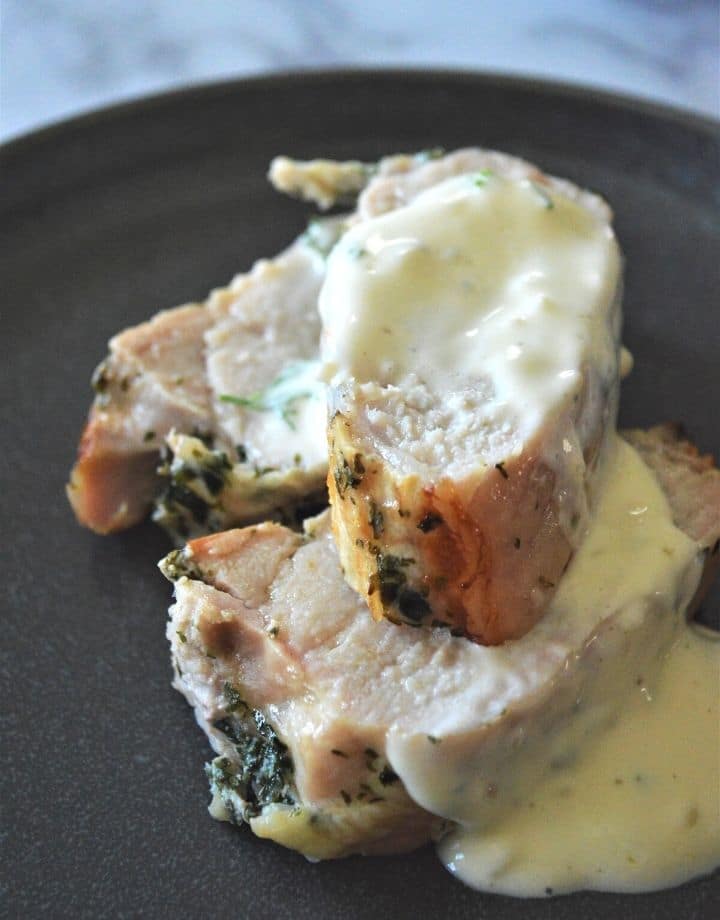
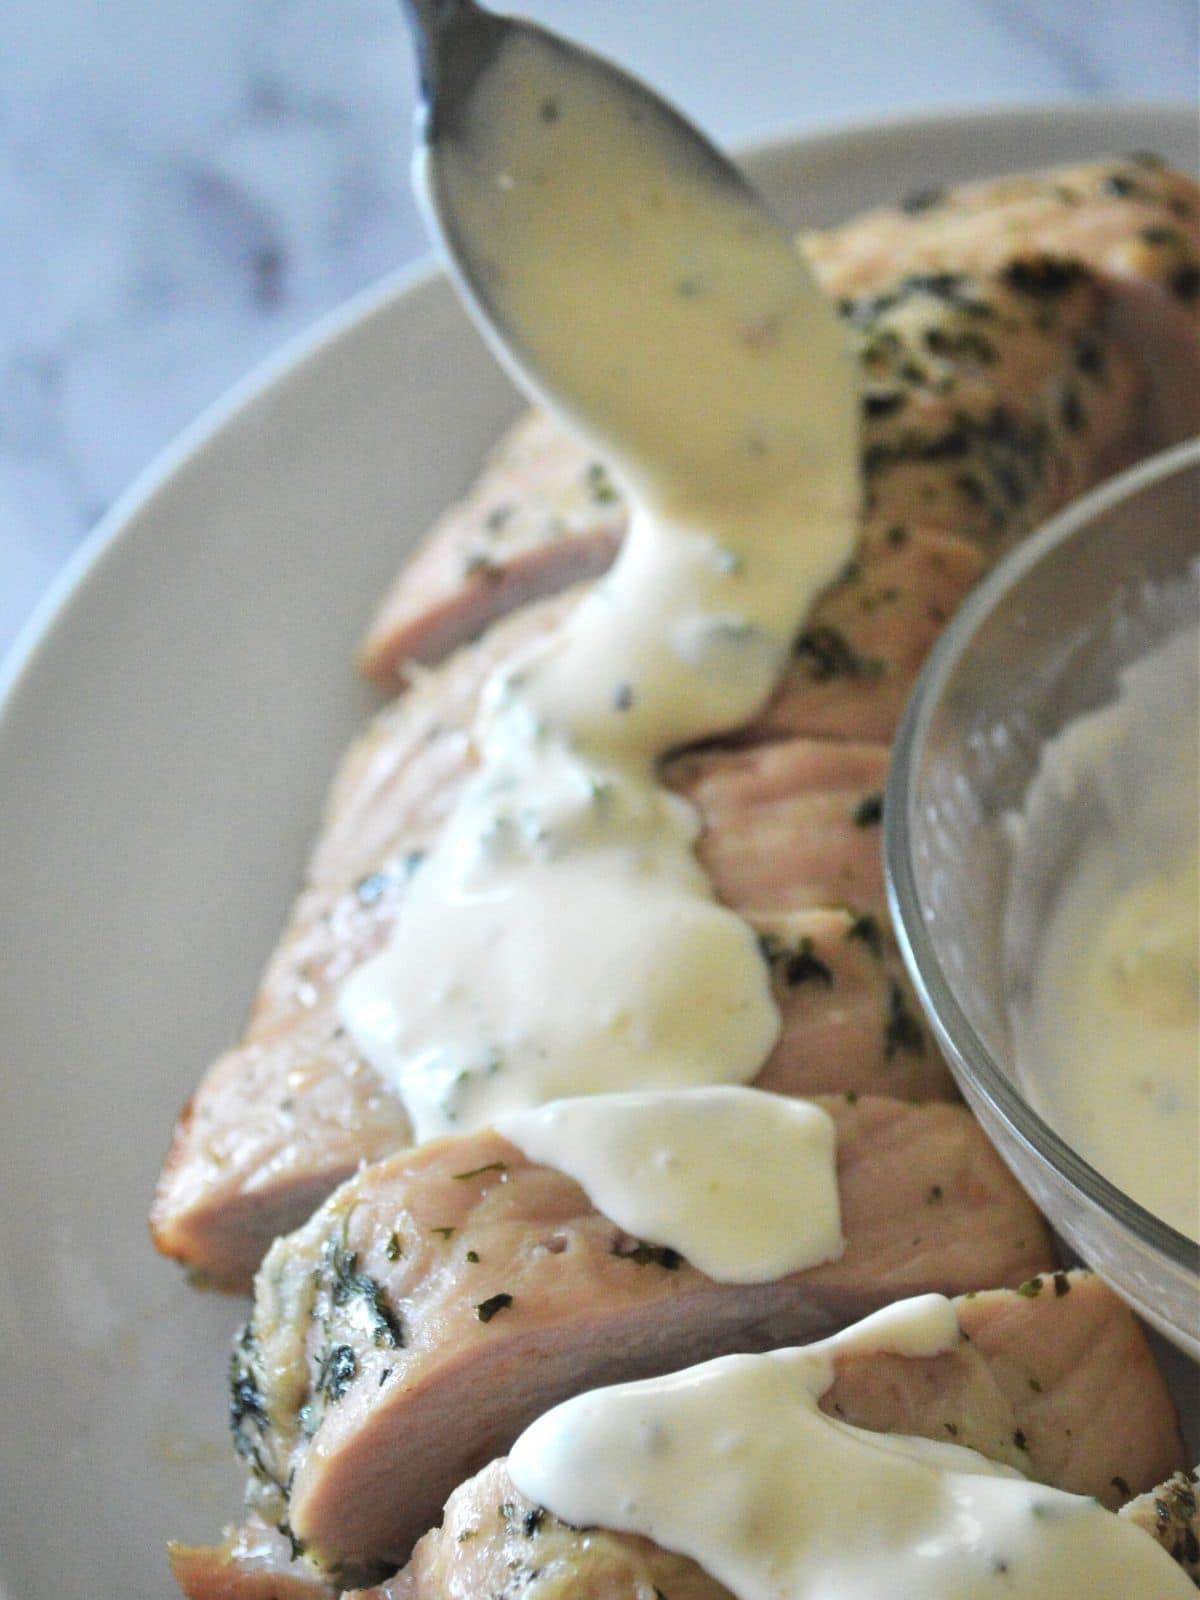
Are you ready for the most succulent, tender, perfectly seasoned oven roasted pork loin? The meat is luscious and cuts like butter. To take it one step further, the meat is drizzled with an exquisite lemon aioli. The sauce is both herbaceous and tangy. A wonderful addition to a keto, low-carb recipe repertoire.
You will flip for the aromatic flavors that pop in your mouth with every bite of this sumptuous meal.
Keto Oven Roasted Pork Loin Recipe
My love of pork runs deep. One of the first recipes I shared with you is my Pork Chops and Sauerkraut. It's quite popular and I do hope you try it. Today's recipe has become just as popular recipe with the hubs and me. So rich and tasty. The sauce is ah-mazing.
Main Ingredients
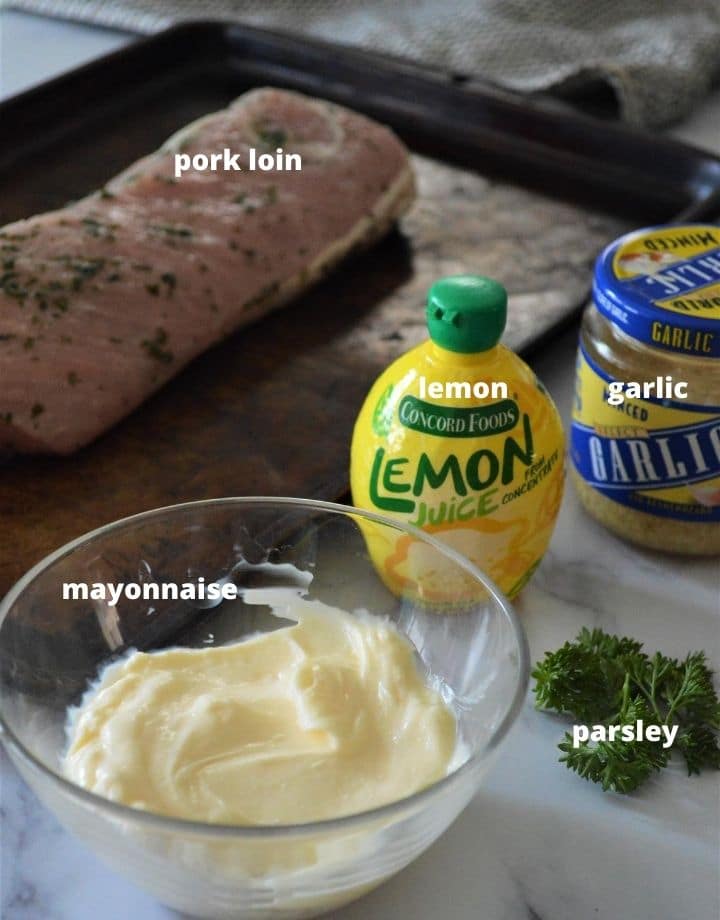
Pork loin is so easy to cook and can be served for a quick family dinner or an elegant dinner with family and friends. Use either a marinated lemon-herb pork roast or follow instructions in the recipe to add seasoning.
Mayonnaise will be the base of the aioli or lemon sauce. Obviously lemon is a must. Use either fresh or jarred juice. Fresh parley will add a tasty flavor to the pork and the sauce.
Garlic, my favorite ingredient, which can also be either fresh or jarred.
Equipment
As an Amazon Associate I earn from qualifying purchases.
- Digital Meat Thermometer: A must-have for accuracy.
- Roasting Pan: We use this one, the rack helps to get a good crust on meat and poultry.
How to cook a pork loin roast
This is an overview of the recipe. The full instructions are below in the recipe card.
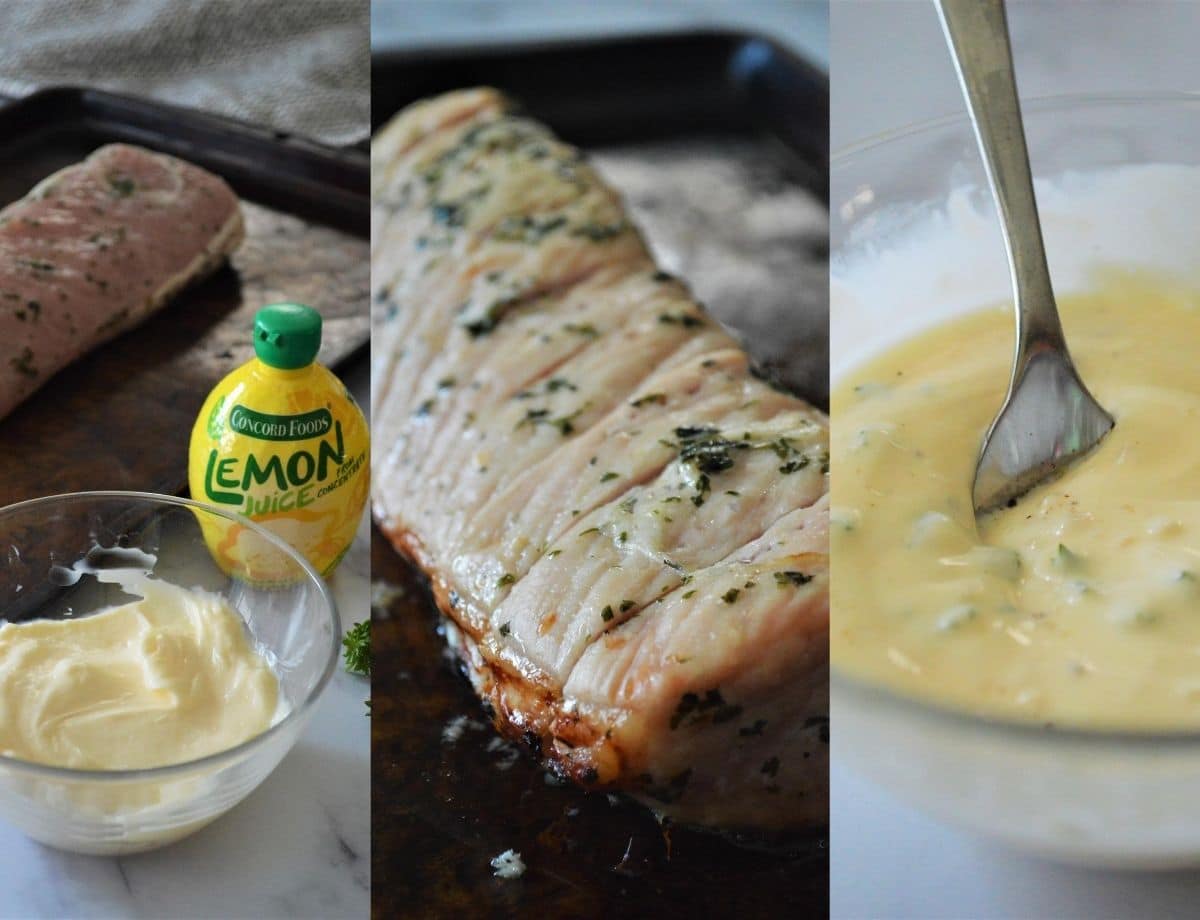
- Preheat oven to 400°F. Place the loin on a roasting pan or baking tray. If not using a marinated pork, make a quick rub of lemon juice, olive oil, minced garlic, and chopped parsley. Rub it on the meat.
- Roast the pork until the internal temperature is at least 145°F. This will take about 40-50 minutes.
- Make the lemon and herb aioli by combining mayonnaise, lemon juice, minced garlic, parsley, and pepper.
Recipe Tips and FAQs
- Pork is naturally keto-friendly and a great protein for a low-carb diet or on a low-sugar diet.
- Pork can be salty, therefore, I have not added salt to the seasonings. It is best to taste everything after it has cooked to see if salt is needed.
- Roast tender cuts of pork at higher temperatures such as 375°F so the meat cooks quickly and stays moist.
- Do not cover the meat with aluminum foil while cooking so the exterior gets brown and crispy.
- Use a digital meat thermometer to get an accurate temperature of cooked meat.
- Let the meat rest for about 10 minutes to allow the juices to set. This ensures a juicy roast, every time.
- Store leftovers in the fridge, covered, for up to 2 days.
The accurate temperature of cooked pork as per Pork Checkoff, cook your tenderloin to an internal temperature of at least a temperature of 145°F. On average, the pork will cook about 20-35 minutes per pound, depending on your preferred level of doneness, as per the very knowledgable pork.com
- Rare: 145°F - 150°F
- Medium. 150°F 155°F
- Medium Well 160°F - 165°F
- Well Done. 160°F
Variations
- This recipe is just delicious. For variety, vary the herbs in the aioli. Rosemary, thyme, tarragon, and basil would all be magnificent additions.
- Pork tenderloin can be used in the recipe in lieu of a roast. Tenderloin cooks very quickly and should be cooked through in about 25 minutes if using a 1 pound tenderloin.

Serving Suggestions
- Roasted Green Beans are absolute favorite side.
- Lemon Garlic Roasted Asparagus is another quick and easy recipe.
- Roasted Broccoli, quick and delicious.
- Mashed Cauliflower, always a favorite.
- Cauliflower Creamed Spinach, wow this is delish.
Similar Recipes
- Pork Chops and Sauerkraut, one of my first recipes and a crowd favorite.
- Mexican Grilled Pork Chops, quick and tasty.
- Low-Carb Chicken Piccata, lemony, and loaded with flavor.
- Foil Wrapped Salmon with Lemon and Herbs, under 30 minutes for an outstanding meal.
- Keto Jambalaya, Super-fast and flavorsome.
This post contains affiliate links for your convenience. We are a participant in the Amazon Services LLC Associates Program, an affiliate advertising program designed to provide a means for us to earn fees by linking to Amazon.com
Check out my shop, Everyday Eileen I share all my favorite finds.
When you make this recipe, take a pic and tag me on Instagram @everyday_eileen or #everydayeileen.
I love any comments or questions, please feel free to leave them below.
Keep up to date with recipes and posts by following me on:
FACEBOOK INSTAGRAM, PINTEREST, TWITTER
Love this recipe, it would be awesome if you give it a 5-star rating and share comments below.
📖 Recipe

Keto Oven Roasted Pork Loin with a Lemon Aioli
Equipment
- As an Amazon Associate I earn from qualifying purchases
Ingredients
- 3 pounds boneless pork loin roast Note 1
- 1 Tablespoon olive oil
- 1 teaspoon lemon juice
- 1 teaspoon fresh parsley
- ½ teaspoon garlic, peeled and minced
- ground black pepper, to taste
Herb Lemon Aioli
- ½ cup mayonnaise
- 2 Tablespoons lemon juice
- 1 teaspoon garlic, peeled and minced
- 2 Tablespoons fresh parsley
- ground black pepper, to taste
Instructions
- Preheat the oven to 375°F.
- In a small bowl whisk together olive oil, lemon juice, parsley, garlic, and black pepper. Use a pastry brush to brush the mixture onto the pork loin.
- Place the seasoned pork in the roasting pan. Preferable on a roasting pan with a rack so the entire pork develops a nice brown crust.
- Roast the pork, about 20 minutes per pound, for 1 hour and 10 minutes. The internal temperature of the pork must be at least 145°F. See Note 1, below.
- Once the meat has cooked, the interior of the meat will be slightly pink. remove from the oven. Lest rest 5 minutes before slicing.
- Serve, drizzled with the lemon aioli.
Herb Lemon Aioli
- While meat cooks, make the aioli.
- In a medium bowl, whisk together mayonnaise, lemon juice, minced garlic, fresh parsley, and black pepper. Refrigerate until ready to serve over pork roast.
Notes
- Rare: 145°F - 150°F
- Medium. 150°F 155°F
- Medium Well 160°F - 165°F
- Well Done. 160°F
Nutrition
Easiest Fresh Cherry Salsa Recipe
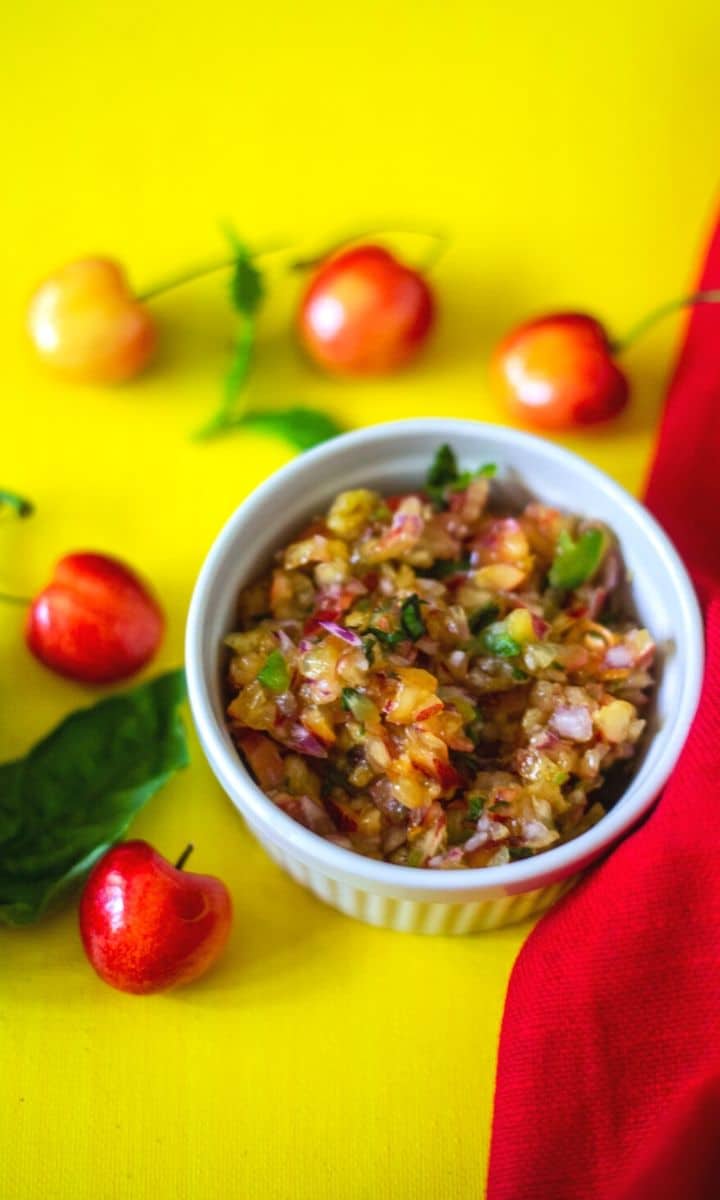
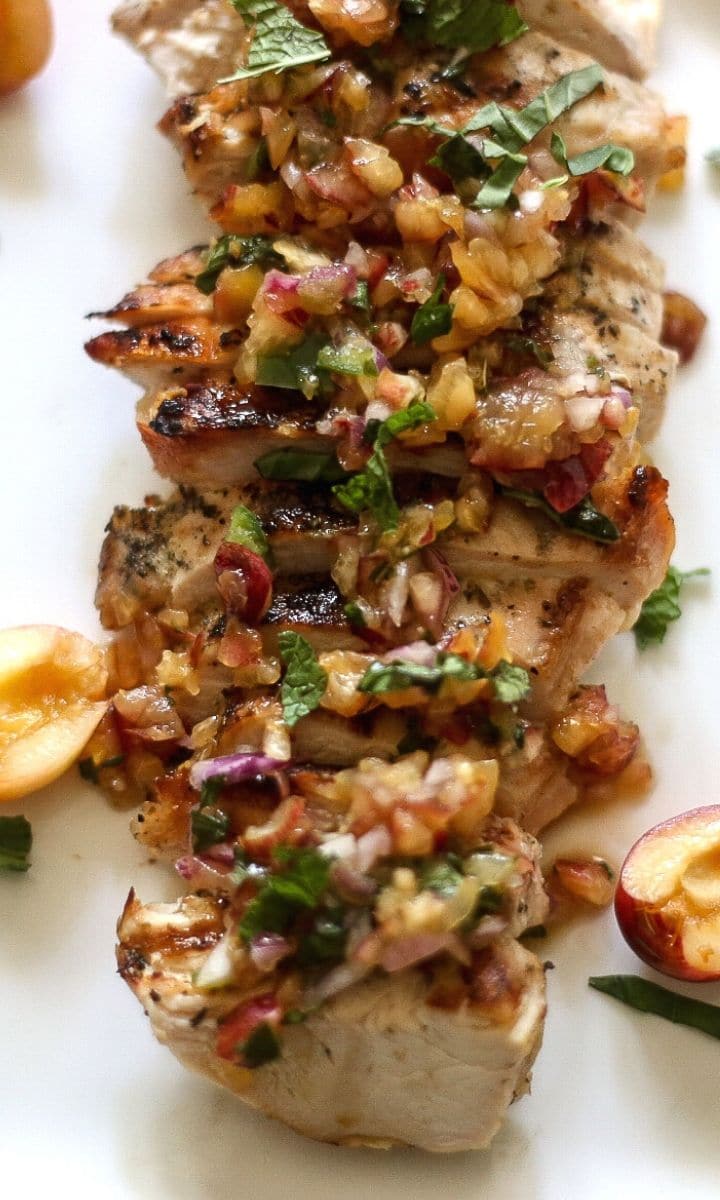
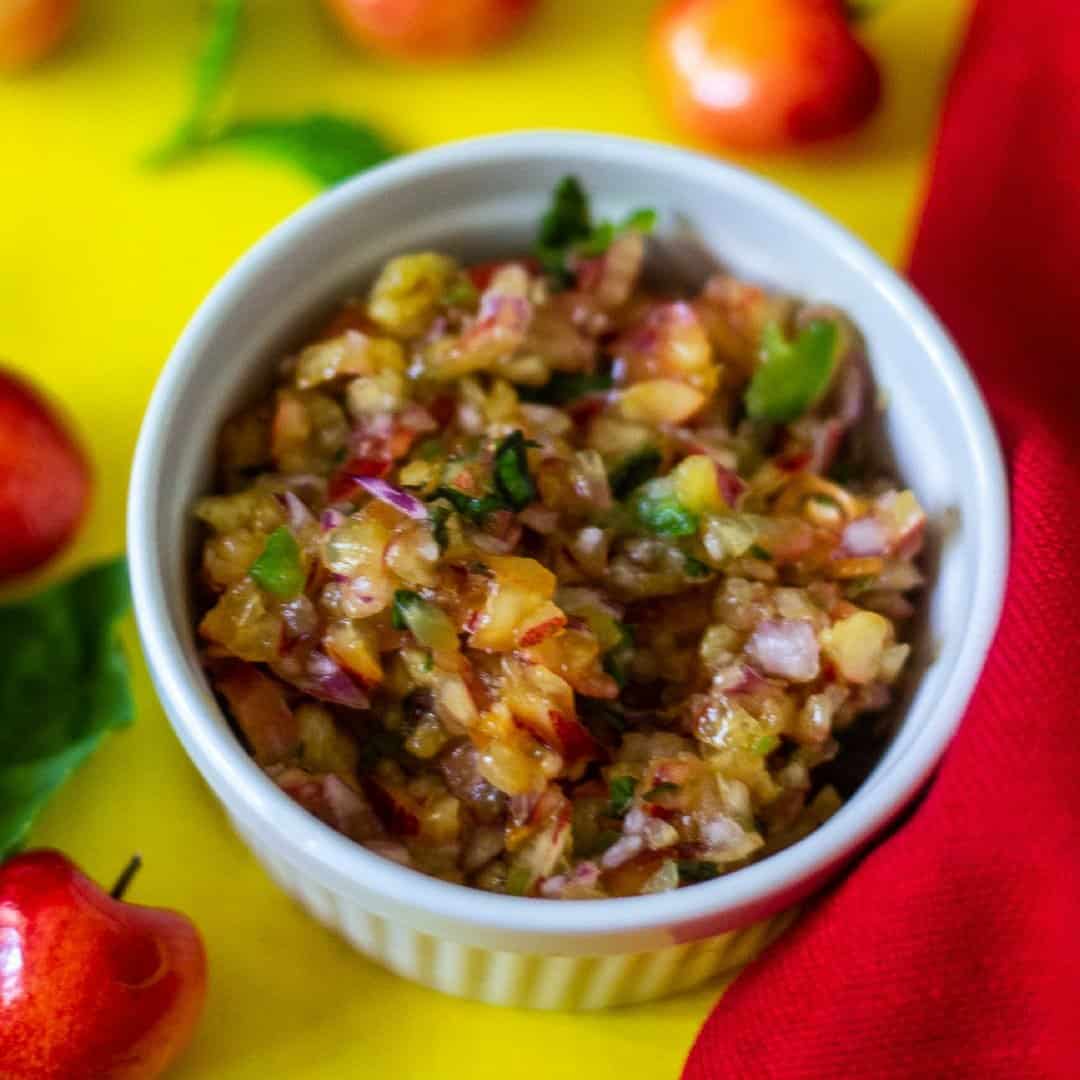
Today brings the easiest fresh cherry salsa recipe ever. The cherry and jalapeno combo combines sweet and spicy to make a super flavorful fruit salsa. A no- cooking needed snack that's perfectly paired with any grilled chicken, pork, or beef. Try this with crostini or as a dip with chips.
The Best Cherry Salsa
Cherry Salsa is a summer tribute that is super simple to prepare and full of flavor. This amazing salsa is so versatile and ready in just a few minutes.
It is most definitely the time to enjoy cherry recipes such as my very popular Cherry Chocolate Smoothie which tastes like a decadent Black Forest cake without the calories. Cherry Lime Ice Pop is sugar-free and made with just 2 ingredients.
Ingredients
- Skylar Rae® Cherries: I prefer to use this particular type of cherry for this salsa.
- Red onion: Shallots or a yellow onion can also be used.
- Jalapeno: A little goes a long way and adds a little kick to the salsa.
- Lime Juice: A nice balance to the jalapeno.
- Basil & Mint leaves: Herbs give great flavor.
- Salt/Pepper
Expert Tips/FAQs
- The easiest way to remove the pits from cherries is by using a cherry pitter. I have an affiliate link below. Very inexpensive and the pitter makes it so easy to make cherry recipes.
- Freeze cherries so you can enjoy this recipe year-round. Here is an easy way to freeze cherries.
- The recipe doesn't use or need sugar. The cherries I use are sweet. If using Bing cherries, you may need to add a sweetener such as honey, sugar, or a low-carb sweetener.
- Cherries are cholesterol-free, high in fiber, and contain a high amount of melatonin which is great for skin complexion.
- Skylar Rae® Cherries are at their best not cooked. They are sweet and would break down very fast. They are great to add to a salad or salsa.
What to pair with fresh cherry salsa:
- Foil wrapped salmon, just leave out the herbs for a perfect pairing.
- Dijon Lime Grilled Chicken is another fantastic choice.
- Grilled Citrus Chicken Kabobs, a yummy combo
- Another great choice is Grilled Pecan Crusted Pork Tenderloin.
If you like this recipe, you may enjoy these fruit salsas:
SHOP THIS RECIPE:
This post contains affiliate links for your convenience. We are a participant in the Amazon Services LLC Associates Program, an affiliate advertising program designed to provide a means for us to earn fees by linking to Amazon.com.
Cherry Pitter: I use this pitter. It is not expensive and it makes removing the pit a breeze.
Food Processor: A must for every kitchen as it makes chopping and dicing a breeze.
Check out my store. I am always updating great finds for not just cooking, I hope you check it out here, Everyday Eileen update it regularly!
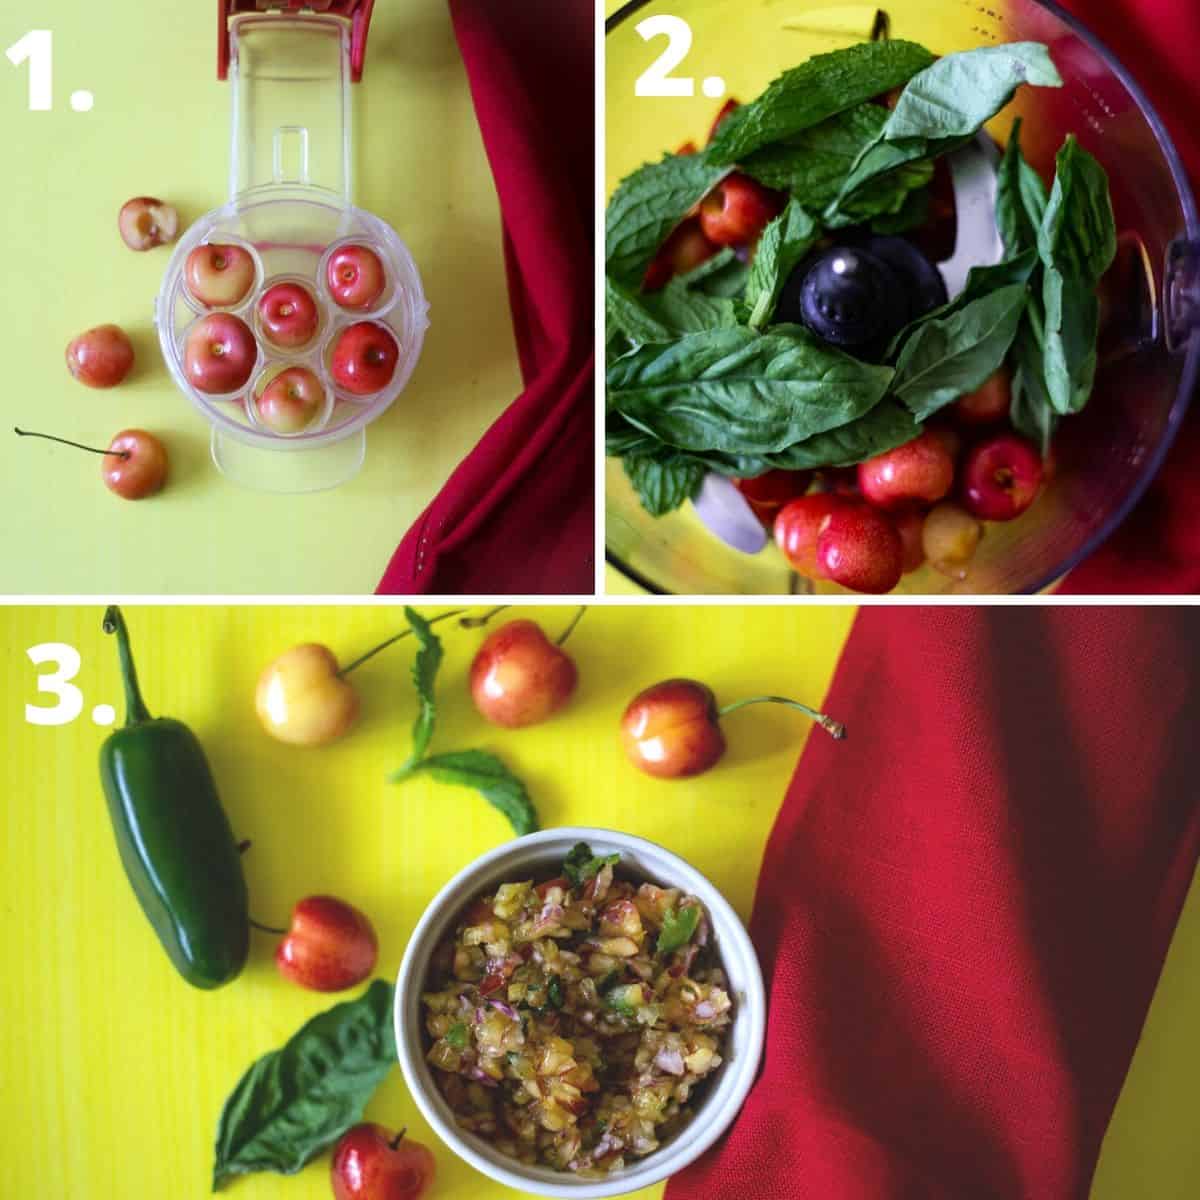
Step by step instructions:
- Remove pits from the cherries.
- In a bowl of a food processor, add the cherries, lime juice, lime zest, basil leaves, mint leaves, jalapeno, salt, and pepper.
- Serve with chips or as I have shown as a topping for any poultry, pork, beef, or shrimp.
When you make this recipe, take a pic and tag me on Instagram @everyday_eileen or #everydayeileen.
I love any comments or questions, please feel free to leave them below.
Keep up to date with recipes and posts by following me on:
FACEBOOK INSTAGRAM, PINTEREST, TWITTER
Love this recipe, it would be awesome if you give it a 5-star rating and share comments below.
📖 Recipe

Easy Fresh Cherry Salsa
Ingredients
- 1 pound Skylar Rae® Cherries, pits removed
- 1 small red onion, peeled and minced
- 1 medium jalapeño, seeded and diced
- 1 medium lime, juiced and zested
- 10 fresh basil leaves
- 10 fresh mint leaves
- salt and pepper
Instructions
- In the bowl of a food processor, add the Skylar Rae® cherries, red onion, jalapeno, lime juice, lime zest, basil leaves, mint leaves, salt, and pepper.
- Pulse to chop the ingredients about 4-5 times, you do not want the ingredients to puree. The cherries should be diced.
- Cherry Salsa can be served with chips. Served with poultry, pork, or fish.
- Refrigerate for about 1 hour to allow flavors to blend. Can be made ahead at least one day. Keep tightly covered in the fridge until ready to use.
Notes
- If you do not want to use a food processor, dice all the ingredients to make the cherry salsa.
- Any nutritional data I provide is an approximation and actual dietary information can vary based on ingredients and proportion sizes.
Nutrition
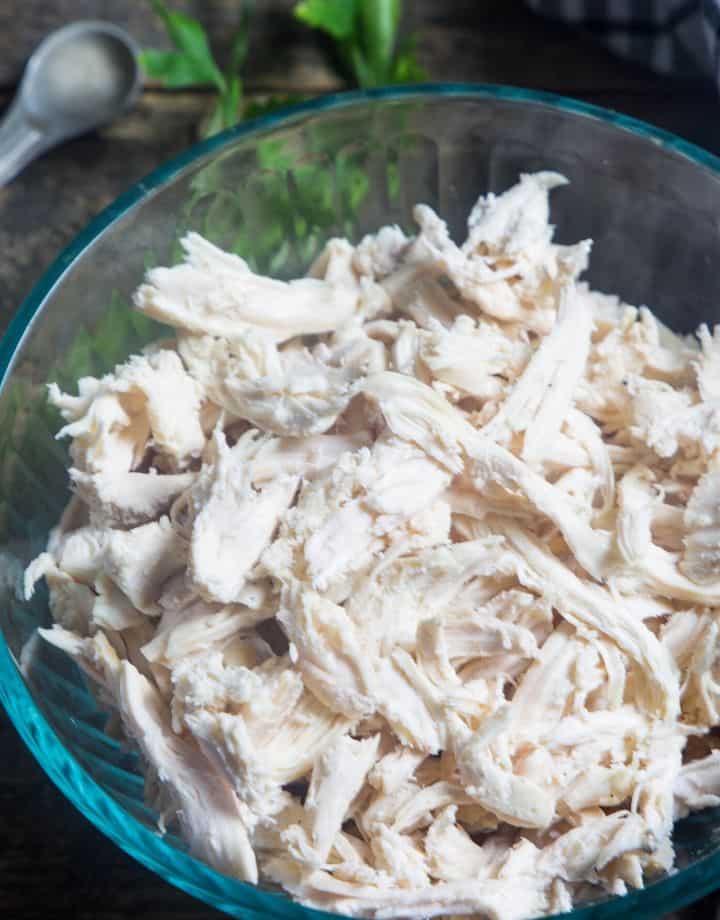
The Best Instant Pot Shredded Chicken
Instant Pot Shredded Chicken, the most tender and juicy meat that is ready in no time and can be used in so many recipes. Great for meal prepping as the poultry freezes very well. This will be your go-to recipe for getting succulent chicken every time. Use in quesadillas, chicken bacon stromboli, enchiladas, salads, and casseroles.
...
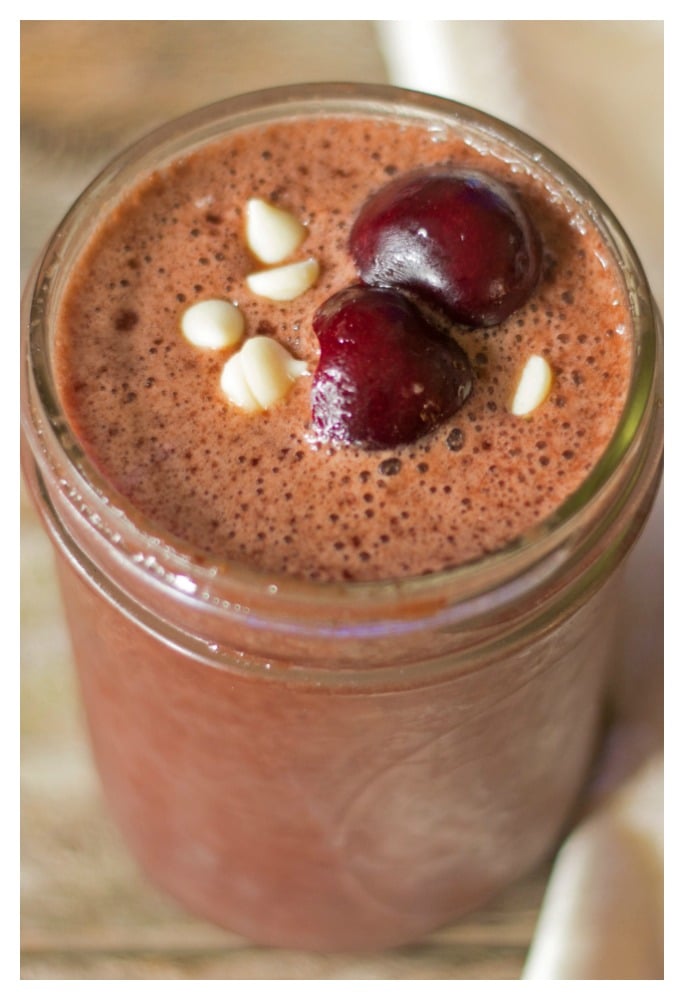
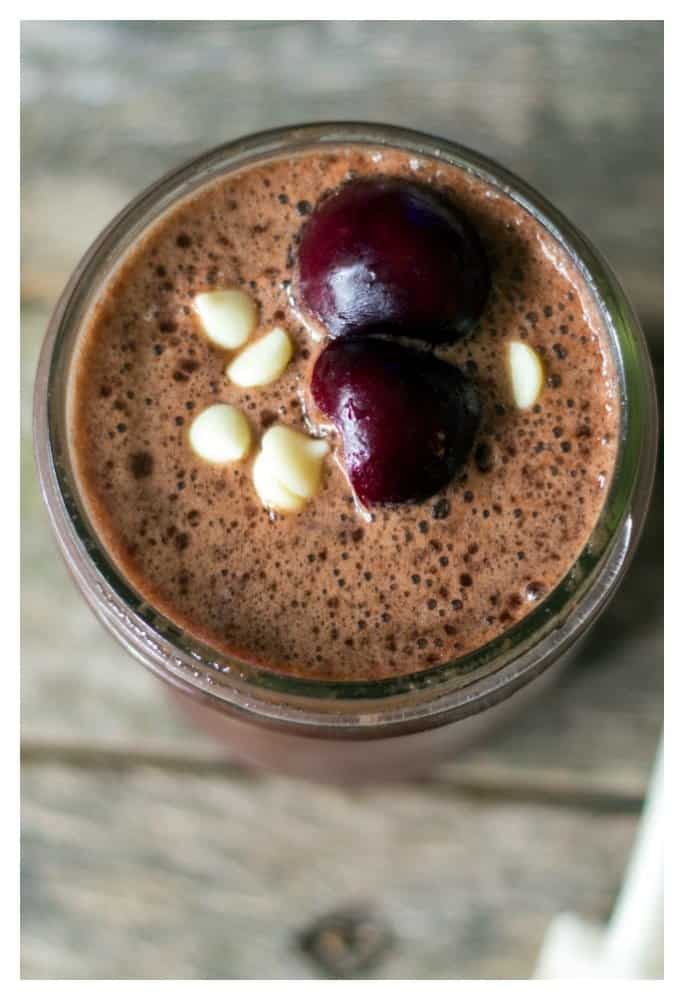
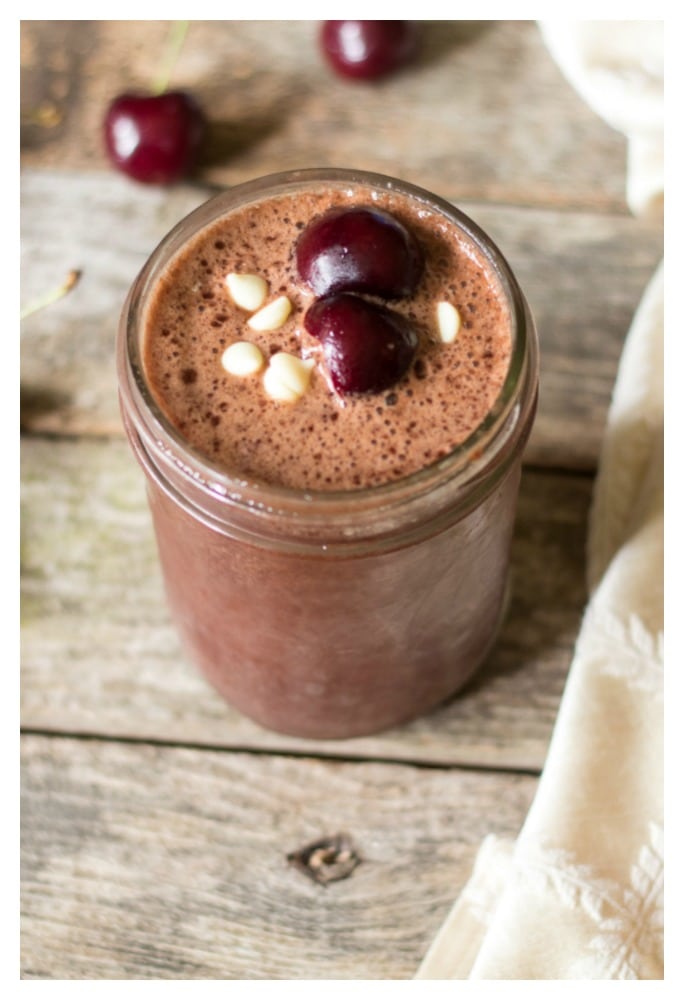
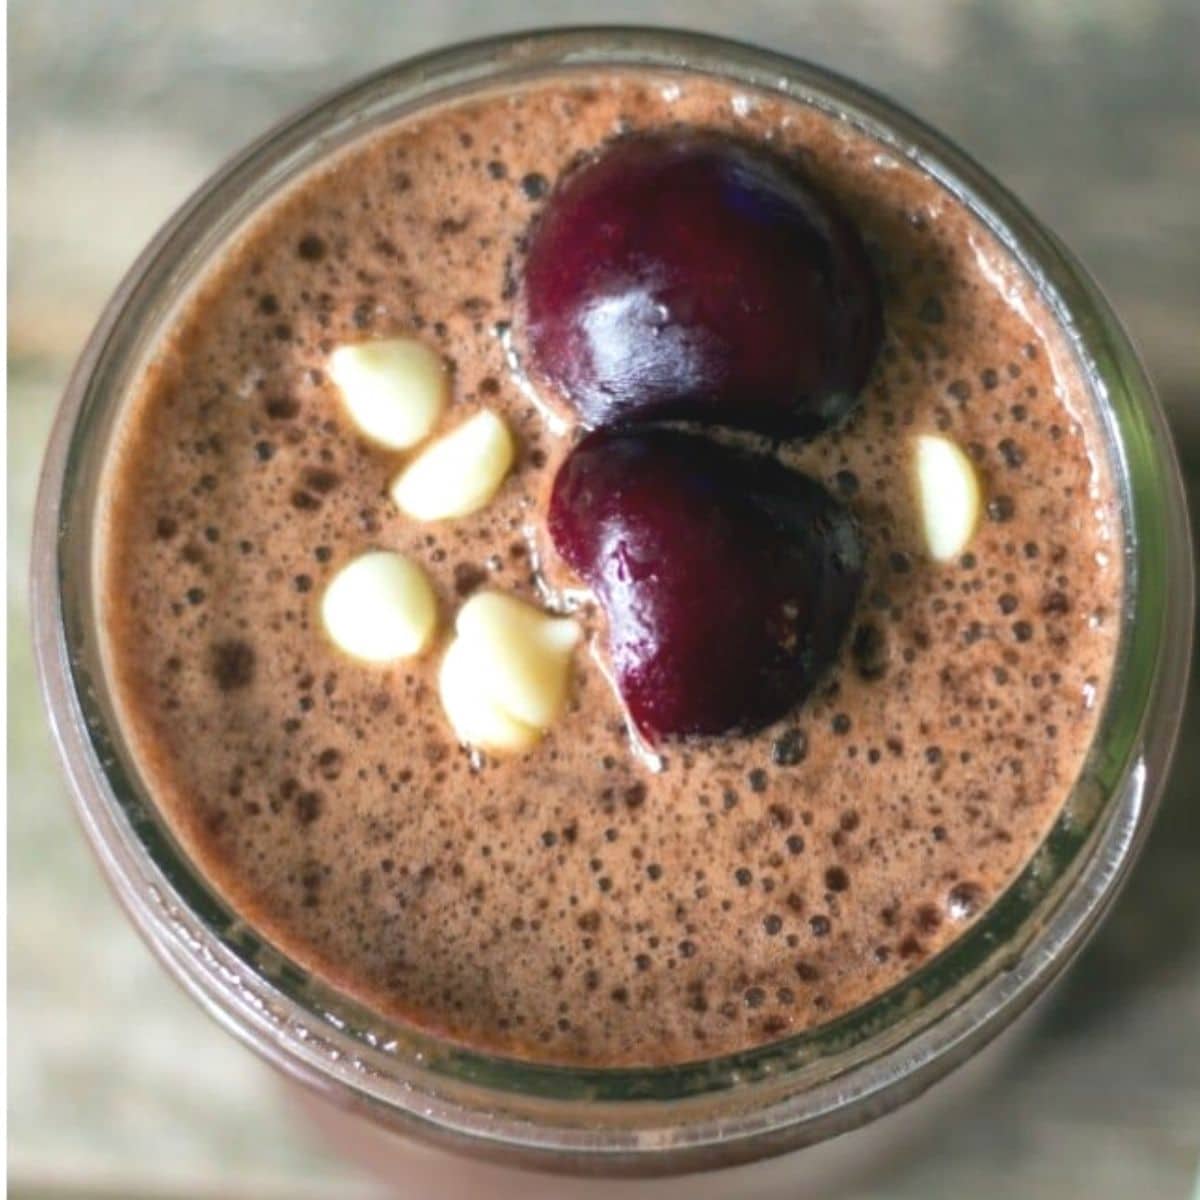
Easy Cherry Chocolate Smoothie
Enjoy a delicious Cherry Chocolate Smoothie. A 3-ingredient drink that takes just a few spins in the blender to create a most refreshing beverage. A great snack to enjoy in the morning, after a work-out, or a mid-day bump. Don't forget to make one for the kids too. Trust me, it's always a hit.

While you are at it, freeze a few batches of cherries to use throughout the fall and winter. You will want to make this smoothie year-round.
Ingredients
- Cherries: Use fresh or frozen. Please do not use cherry pie filling, which is high in sugar and shouldn't be used in a smoothie.
- Coconut Water: You will love it in smoothies and a tasty cucumber splash.
- Unsweetened Cocoa Powder
Variations:
We love this recipe as written. Looking to boost up your intake of veggies? Feel free to add 1 cup of either spinach or kale. This is a great way to sneak in extra veggies.
Tips and FAQs
I have been experimenting with cherries, and for this smoothie, fresh or frozen cherries work.
For chocolate flavor, use unsweetened cocoa powder, or for those looking for more protein, use chocolate protein powder.
How to freeze cherries:
- Cherries can be frozen with pits and stems attached, if doing so, rinse and dry cherries, leave the stem on as it retains oxygen in the cherries so they keep their color and will not break down.
- Lay cherries on a cookie sheet, make sure they are not touching and place in freezer for about an hour.
- Remove from the freezer and place them in a freezer bag. I generally separate into labeled and dated 1 cup, 1-quart bags for future cooking and smoothies.
- I have been in a rush and froze the cherries without first placing on the cookie sheet. Some stuck together, but the end results were fine!
Take a little time to freeze cherries so you can enjoy cherry salsa any time. It's delicious as a topping for grilled or baked chicken.
For a tasty sugar-free dessert, you will love these Cherry Lime Ice Pops
When you make this recipe, take a pic and tag me on Instagram with @everyday_eileen or #everydayeileen
I love any comments or questions, please feel free to leave them below.
Keep up to date with recipes by following me on:
FACEBOOK INSTAGRAM, PINTEREST, TWITTER
📖 Recipe

Cherry Chocolate Smoothie
Ingredients
- 2 cups fresh or frozen pitted cherries
- 8 ounces coconut water
- 1 cup ice
- 2 Tablespoons unsweetened cocoa powder
- chopped cherries optional garnish
Instructions
- In a blender combine 2 cups fresh or frozen pitted cherries8 ounces coconut water, 1 cup ice, and 2 Tablespoons unsweetened cocoa powderCrush/blend to combine all ingredients for about 1 minute. Serve immediately.
- Top with chopped cherries for an optional garnish.
Notes
Nutrition
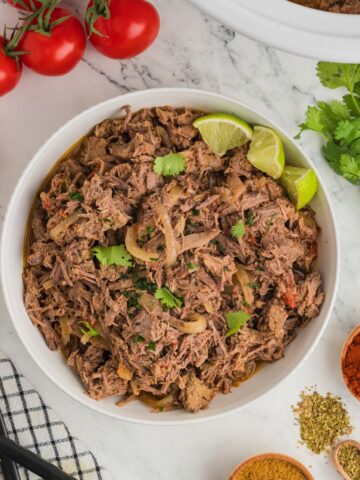
Slow Cooker Mexican Shredded Beef
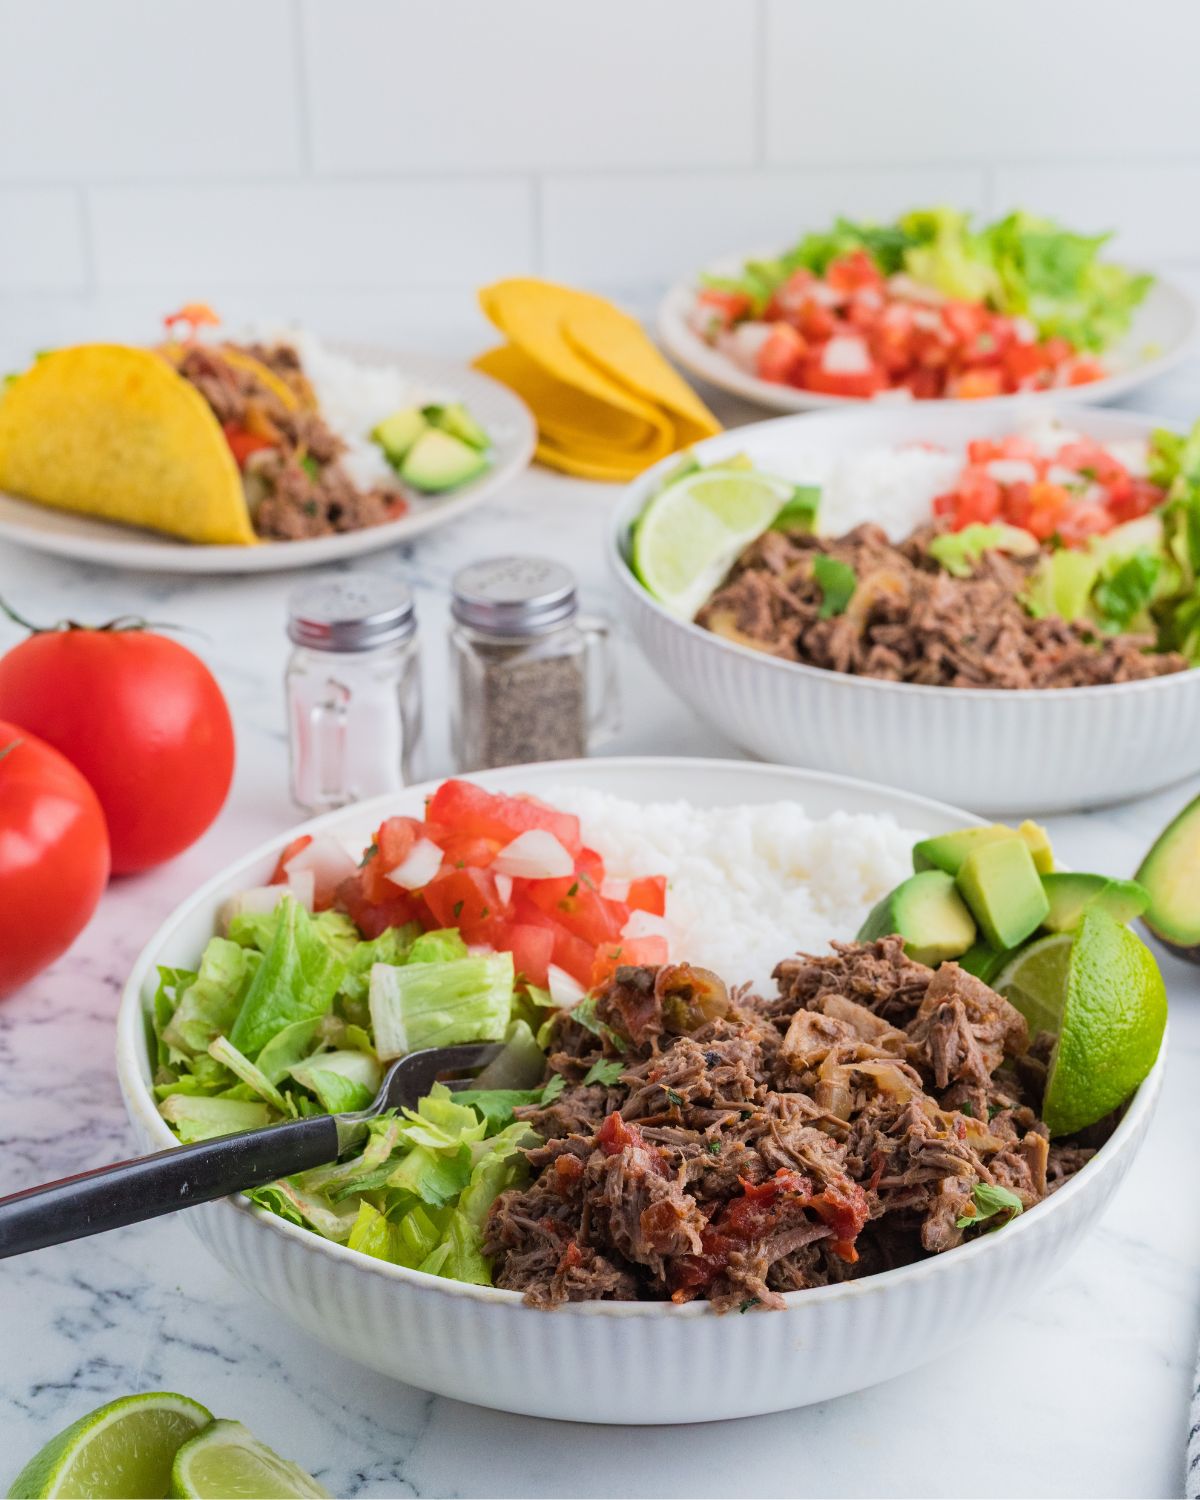
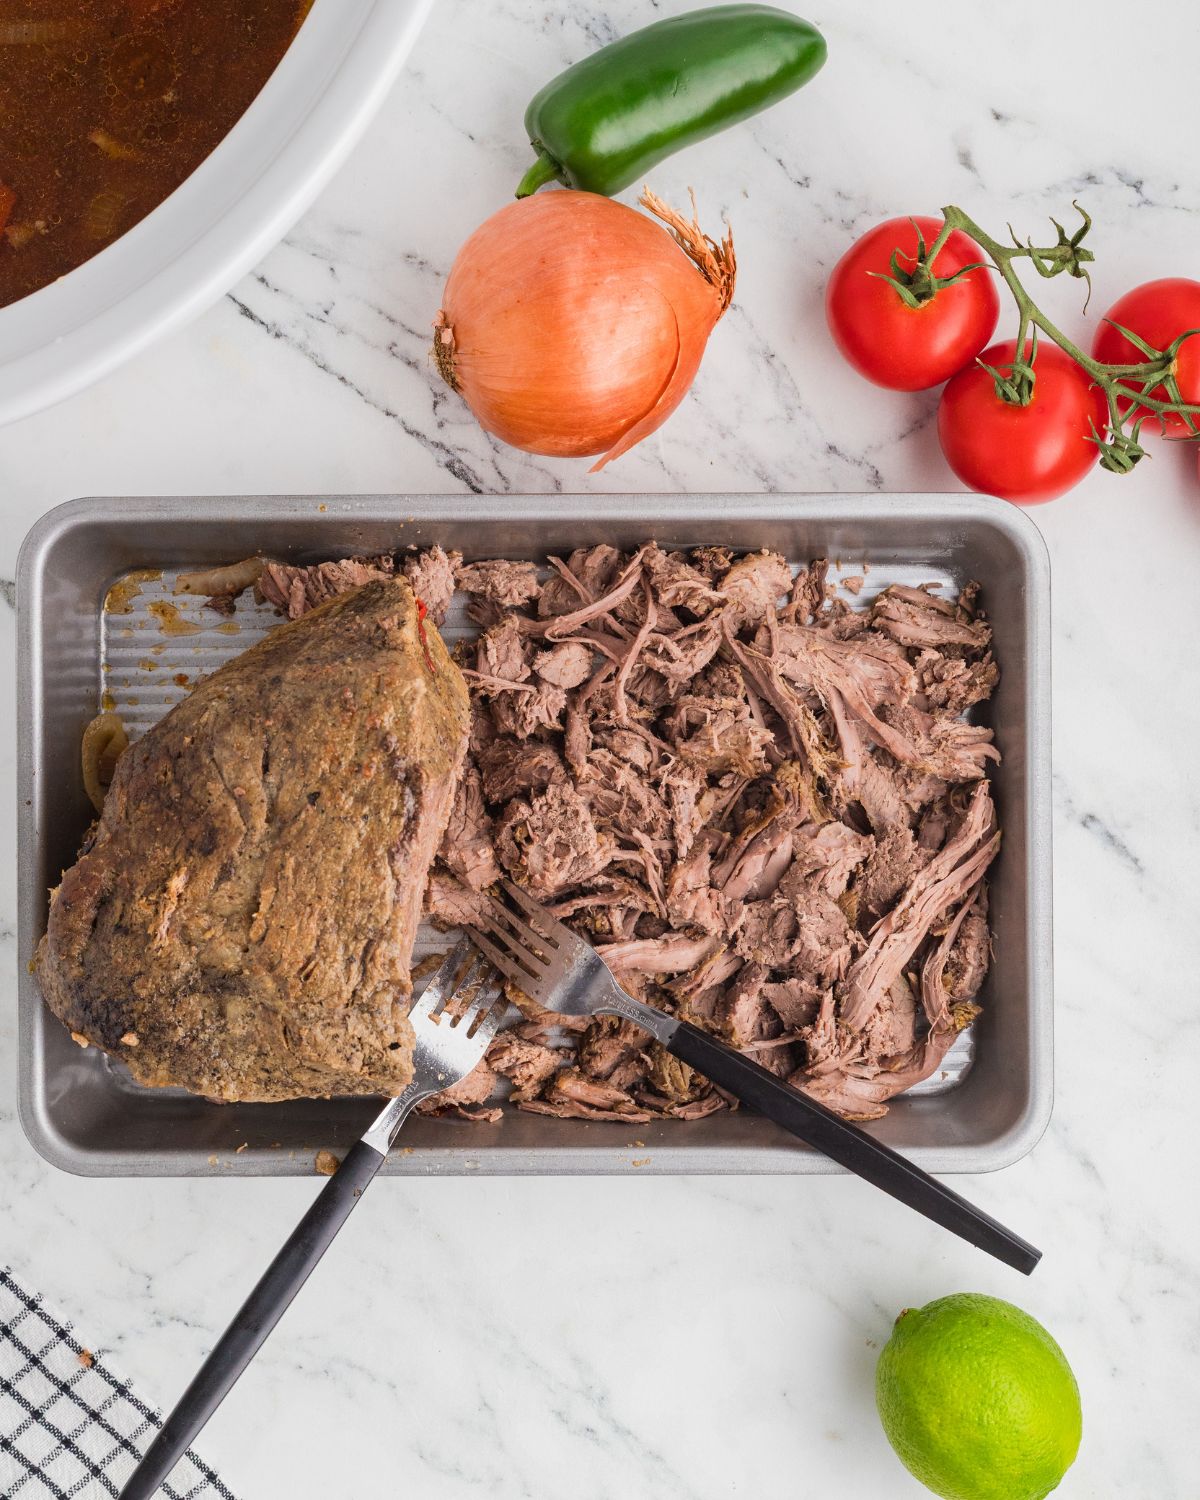
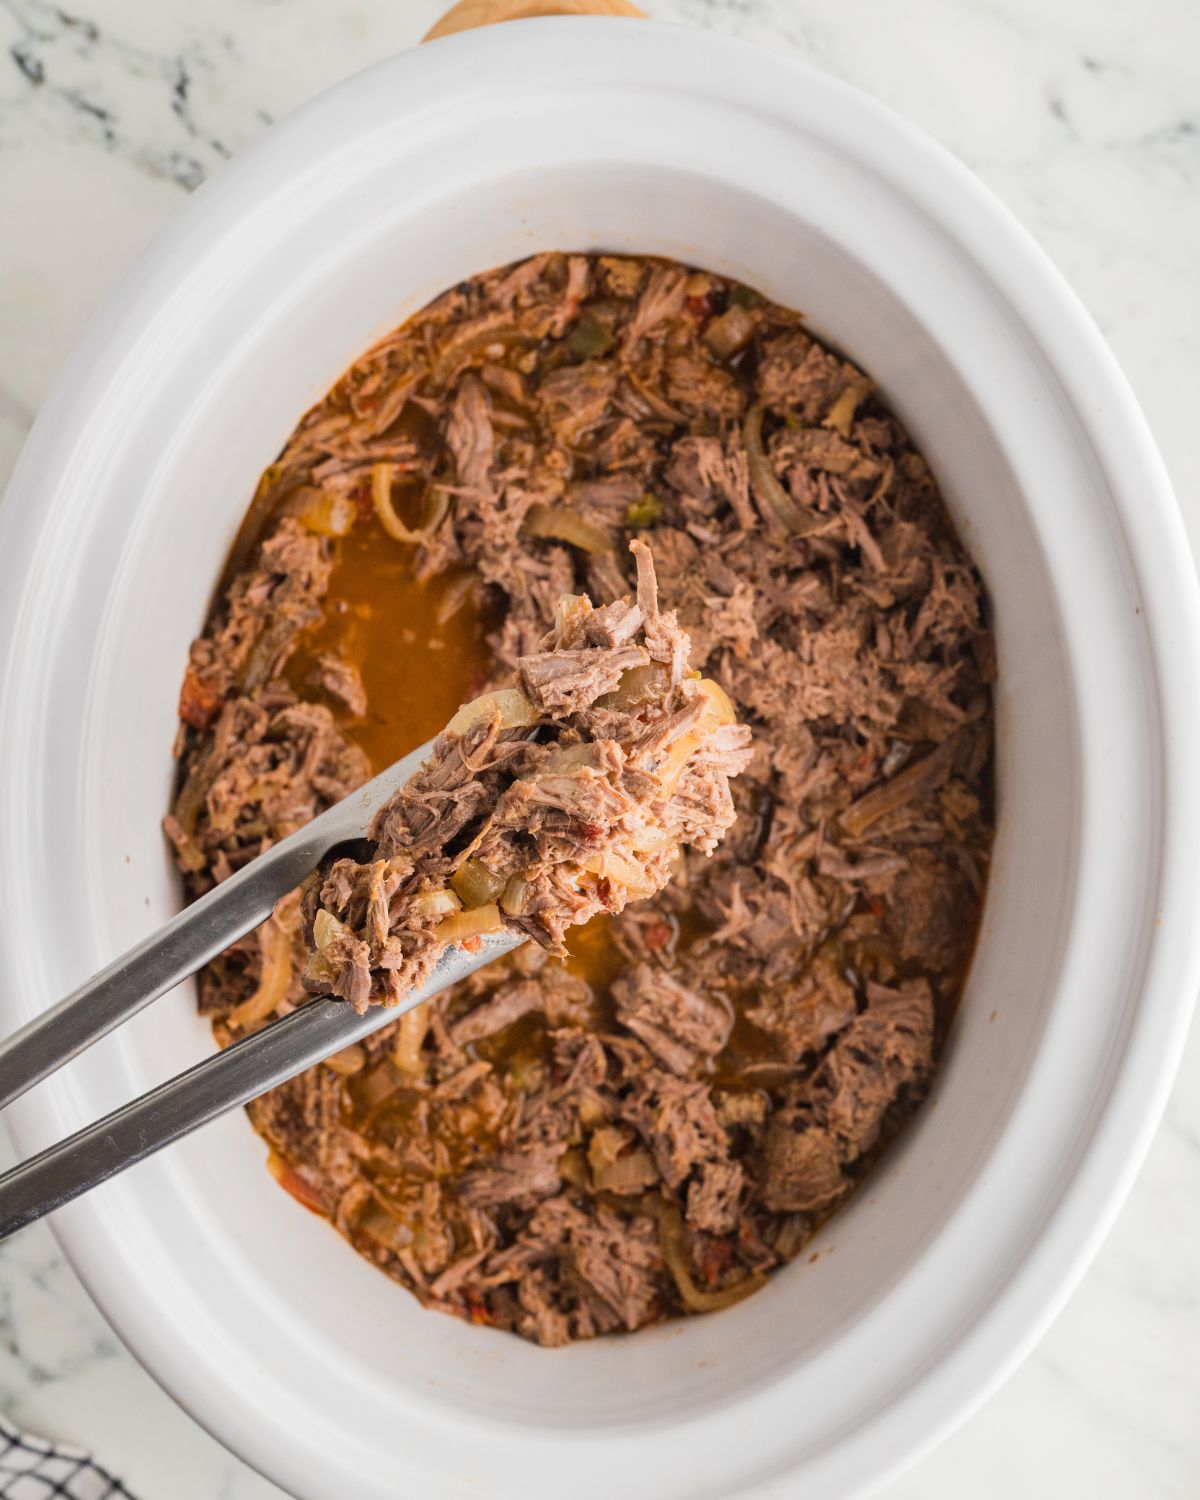
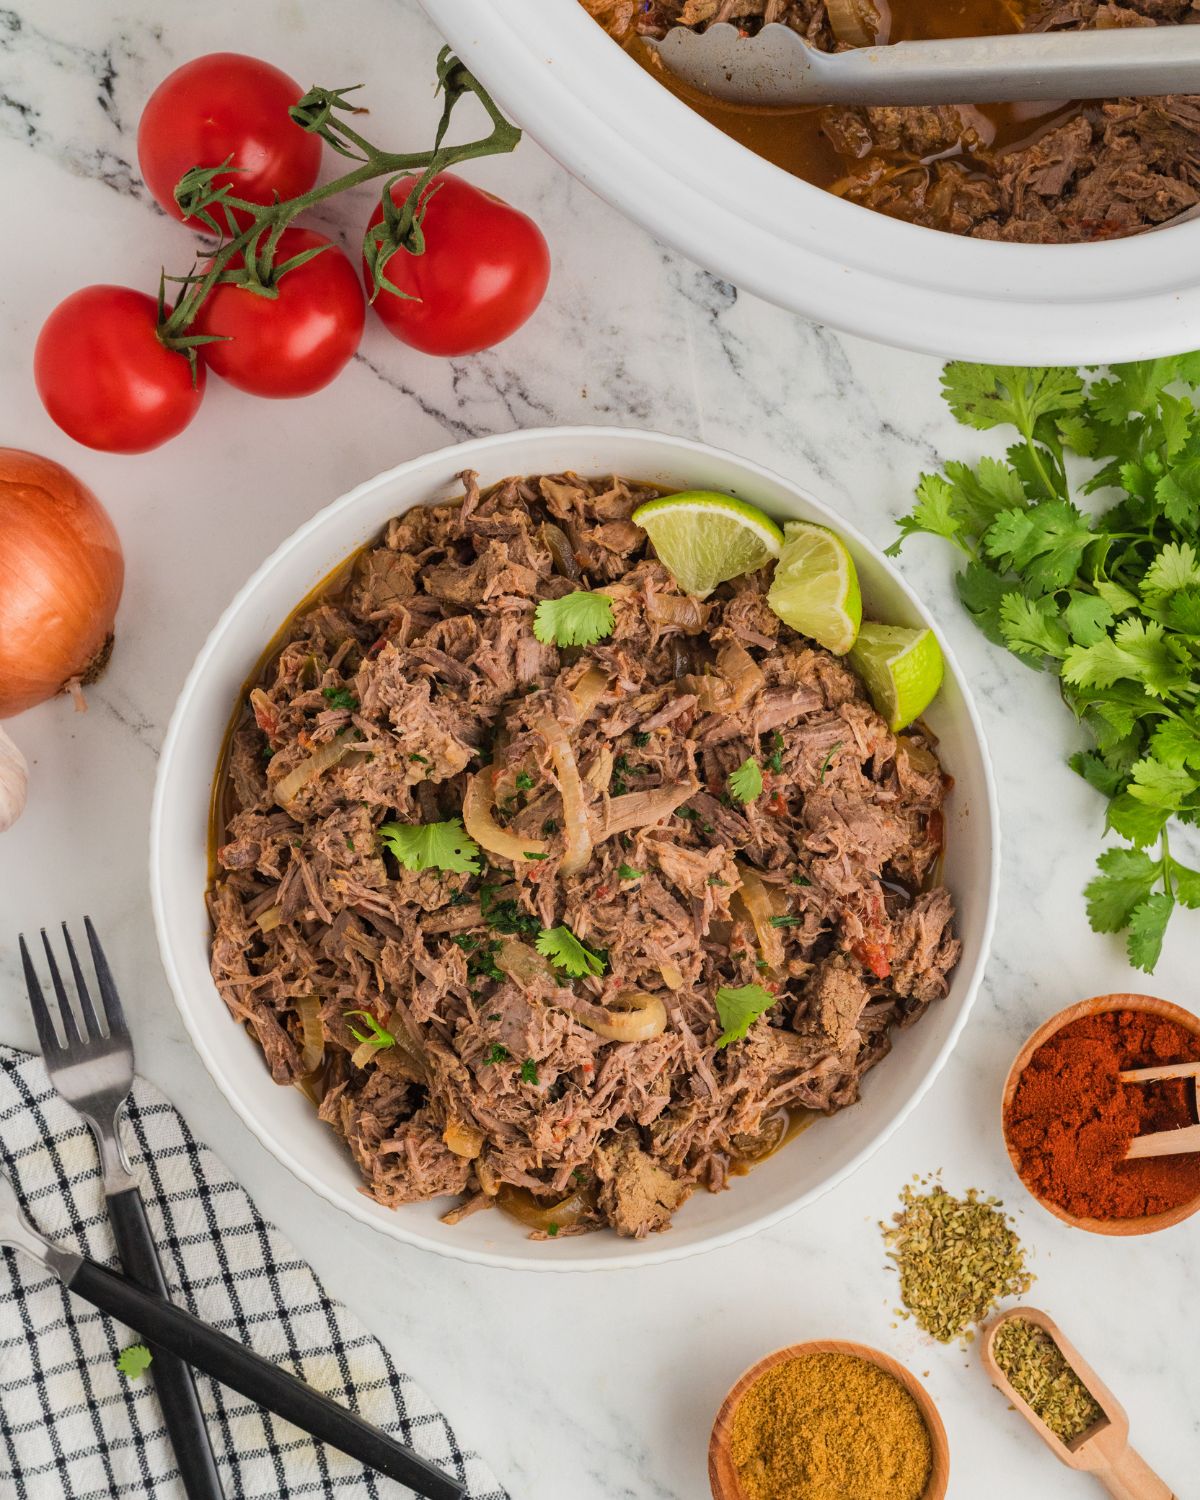
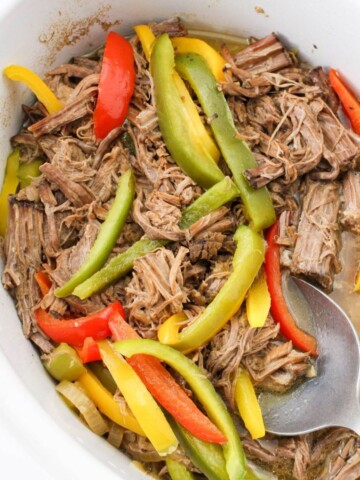
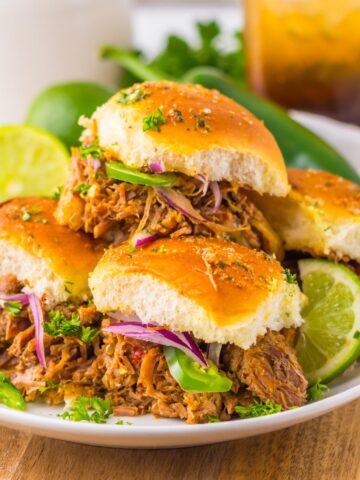
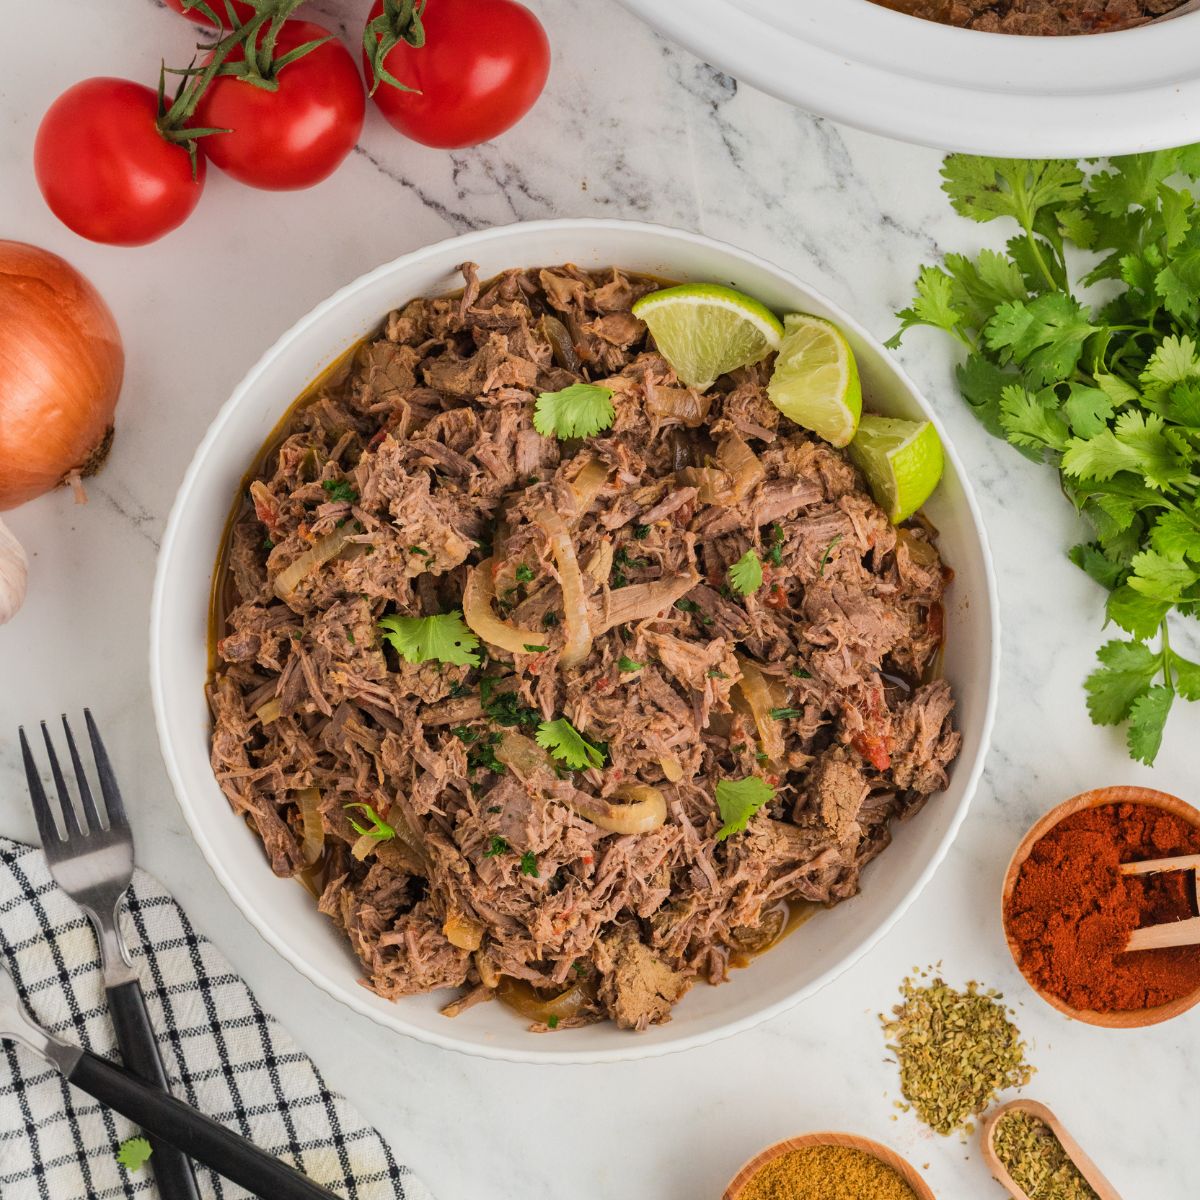
Mouthwatering Slow Cooker Mexican Shredded Beef is a set-and-forget recipe using real ingredients. It is perfect for busy people who want a great dinner without fuss. The beef is juicy, tender, and flavor-packed. Perfect for everything from tacos to enchiladas, quesadillas, and beef burrito bowls. Great for feeding a crowd too.

Main Ingredients to make Slow Cooker Mexican Shredded Beef

Mexican Rump Roast Seasonings
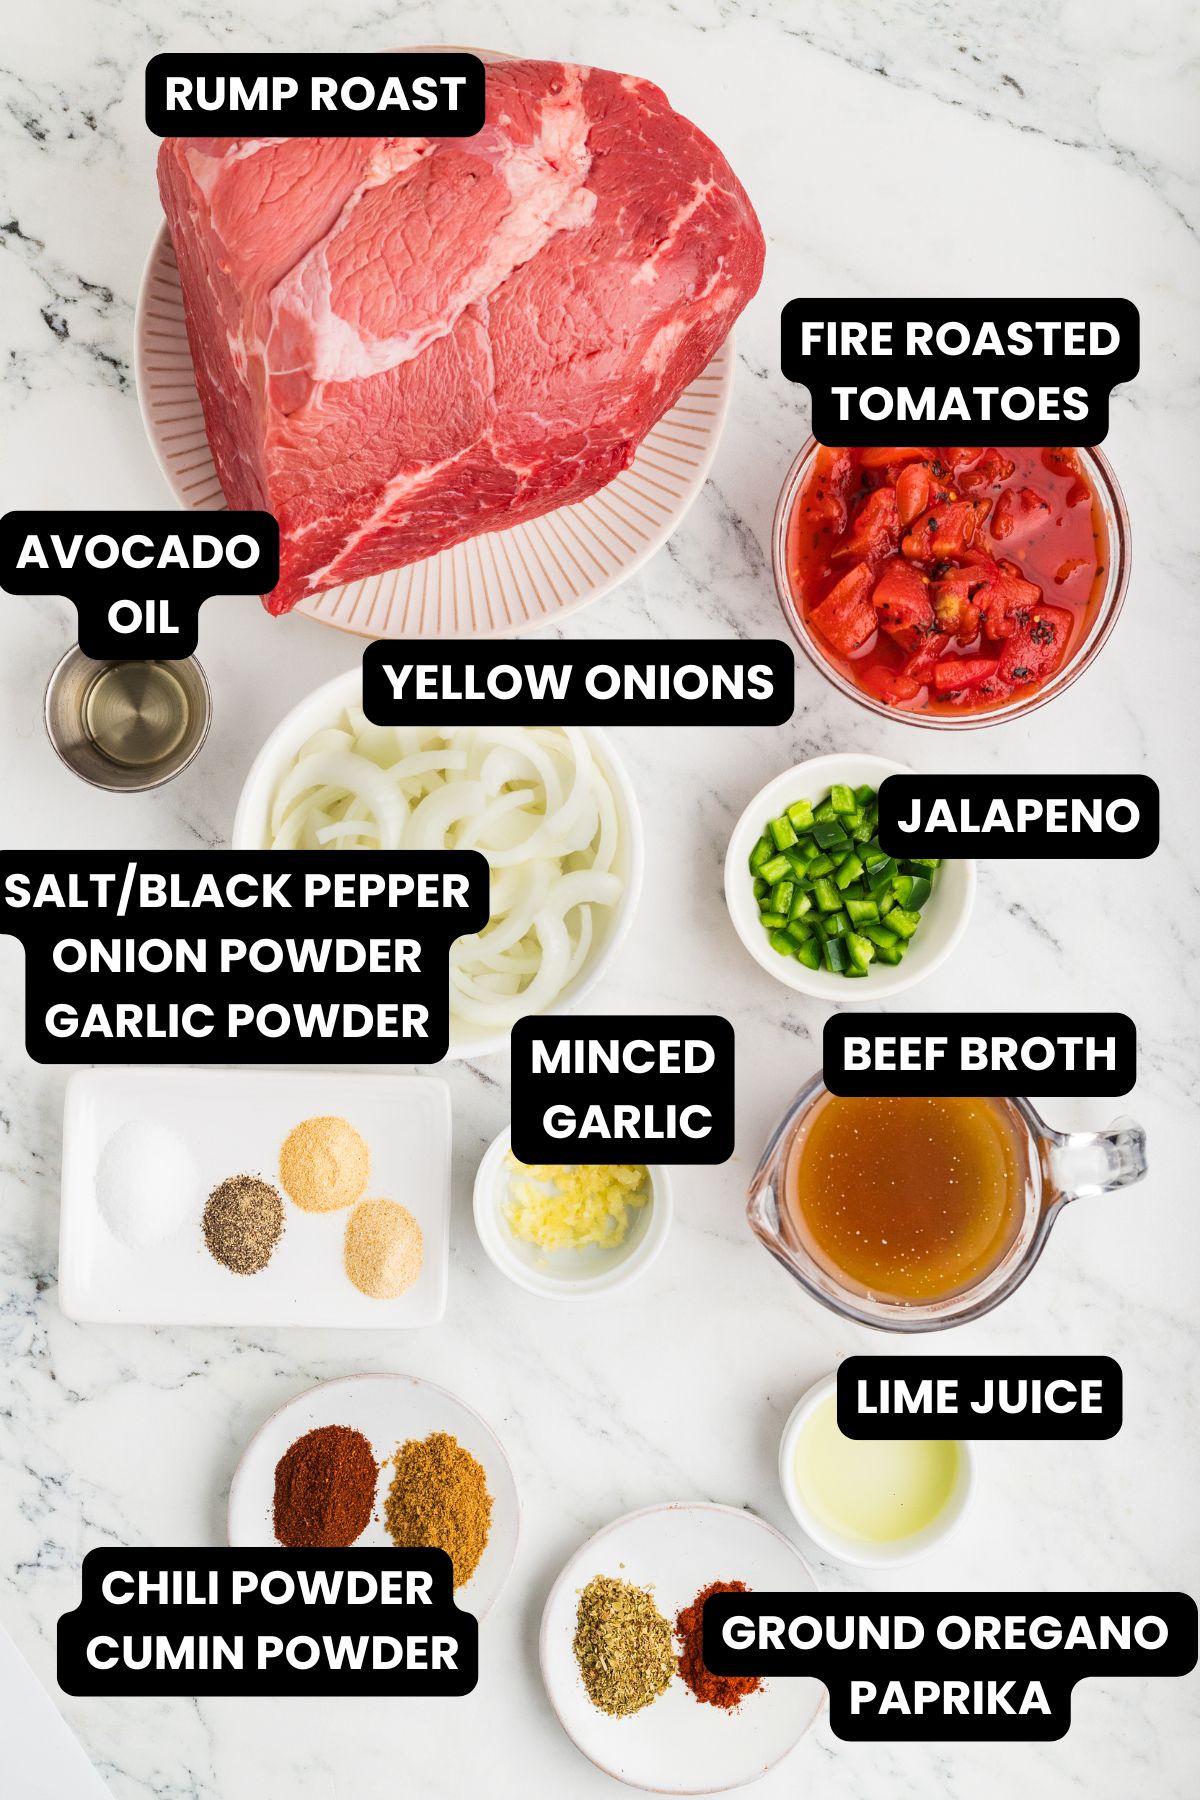
- Beef rump roast: It is affordable and holds up in the slow cooker. Chuck roast and bottom round also work.
- Fire-roasted diced tomatoes, including the juices: I prefer fire-roasted because it adds a nice smoky flavor to the meat and juices.
- Peppers: Deseeding the jalapeños reduces the spiciness. Poblano peppers are sweeter.
How to make the Best Slow Cooker Mexican Shredded Beef

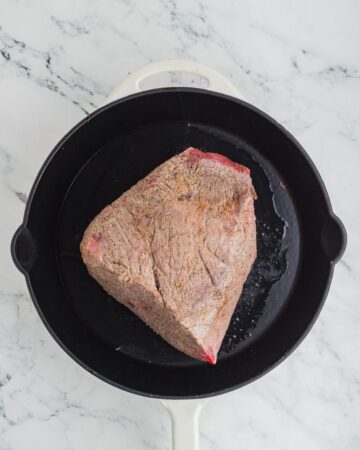
- Season the roast and sear on all sides to brown the meat. This is optional, but it does add flavor to the meat and juices.

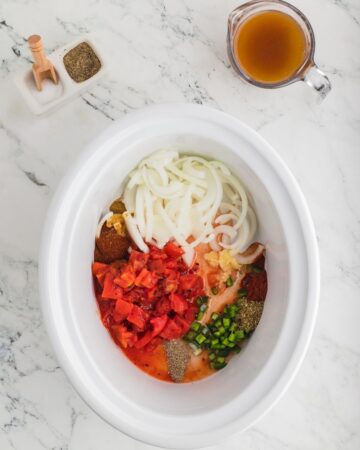
- Add the vegetables and spices to the slow cooker.

- Add the beef broth and meat to the slow cooker

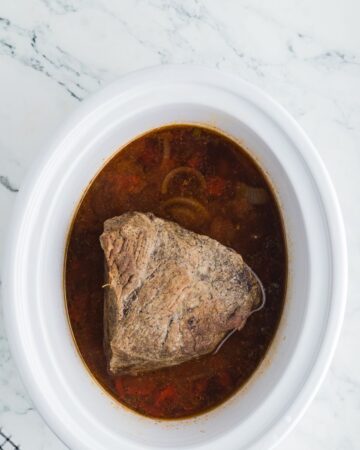
- Slow cook on Low for 7 to 8 hours or High for 4 to 5 hours.

Make-ahead, storage, and freezer tips
Storage: Keep in the fridge for up to 2-3 days in an airtight container.
The beef freezes beautifully for up to 3 months—I use a food saver.
Thaw overnight and use in any of your favorite recipes.
Freezer Instructions: The shredded beef freezes well. I use a food saver for storing the meat.
My tip: When you find the beef on sale, buy two and freeze one for another busy day. Defrost overnight in the fridge and use the beef in any of your favorites.
Make Ahead: This is a great make-ahead dinner. Make ahead up to 2 days. Store overnight in the refrigerator and use the beef in any of your favorites.
Variations for Mexican Shredded Beef
Here are some ways to change the flavor of this dish.
- Rump Roast: Rump roast is my favorite cut for this recipe. A tougher cut of meat that holds up in slow cooking. Other great choices are chuck roast and bottom round. I have found the rump roast to be so affordable and easy to use.
- Spices: Use store-bought or Homemade taco seasonings for seasoning the meat.
- Liquid: Replace ½ cup of the broth with dark beer or red wine for a richer flavor.

Serving Suggestions
Other Mexican-inspired recipes to try are Slow Cooker Pork Carnitas, Slow Cooker Chicken Enchilada Soup, and the classic Frito Pie recipe, all delicious!
For side dishes, try our Corn Tomato Salad, Mexican Bean Salad, or our Watermelon Cucumber Feta Salad
Don't forget a batch of tasty Skinny Pineapple Mango Frozen Margaritas. They are amazing and about 180 calories per serving!
FAQs for the best Mexican Shredded Beef
The beef should be fork-tender when cooked through.
If the beef won't shred easily, it usually means one of two things: it wasn't cooked long enough, or you're pulling against the grain. Check the meat with a fork—it should fall apart easily.
If it's resistant, give it another 30 minutes to an hour on low. Make sure you're also pulling along the grain, not against it. Using two forks works better than one for this recipe.
The internal temperature should be around 190–195°F (88–90°C) if you're using a meat thermometer.
Absolutely. Sear the roast the same way, then transfer to a large Dutch oven or heavy pot. Add the vegetables, spices, and broth. Bring to a simmer, then cover and cook on low heat for 3–4 hours, depending on the size and cut of your roast. Check it halfway through. The meat should be fork-tender and easy to shred.
For slow cooking, estimate 2 hours of cook time per pound of meat on low, 1 hour per pound on high.
It is not necessary, but it does add flavor to the roast.
Recipe Ideas for Shredded Mexican Beef
Feel free to create many recipe ideas, from rump roast tacos, quesadillas, beef burrito bowls, and beef enchiladas.
Toppings for Mexican Pulled Beef
- Pico De Gallo
- Roasted Tomatillo Salsa
- Homemade Guacamole
- Sour Cream and Salsa are also wonderful options.
To adjust measurements, click the number of servings on the recipe card to the exact number of servings you need.
📖 Recipe

Slow Cooker Mexican Shredded Beef
Ingredients
Beef Rump Roast
- 4 ½ pounds beef rump roast, trimmed
- 1 teaspoon kosher salt
- ½ teaspoon black pepper
- ½ teaspoon garlic powder
- ½ teaspoon onion powder
- ½ teaspoon avocado oil Note 2
Mexican Sauce
- 1 large onion (peeled, cut in half, sliced into ¼ inch half moons)
- 3 cloves garlic (peeled and minced)
- 10 ounce can, fire-roasted diced tomatoes include the juice
- 1 large jalapeño, seeded and diced
- 1 cup fat-free beef broth Note 3
- 2 Tablespoons lime juice Note 4
- 1 teaspoon chili powder
- 1 teaspoon ground cumin
- 1 teaspoon dried oregano
- ½ teaspoon paprika
- ½ teaspoon black pepper
- ½ teaspoon kosher salt
- fresh parsley or cilantro optional garnish
- lime wedges optional garnish
Instructions
Slow Cooker Instructions
- Season the 4 ½ pounds beef rump roast, trimmed with 1 teaspoon kosher salt, ½ teaspoon black pepper, ½ teaspoon garlic powder, and ½ teaspoon onion powder.
- If your slow cooker has a saute option, use the saute option, or heat a large pot or Dutch oven over medium heat, add the ½ teaspoon avocado oilSear roast to brown on all sides. Set aside.
- Into the slow cooker, mix in 1 large onion (peeled, cut in half, sliced into ¼ inch half moons), 3 cloves garlic (peeled and minced), 10 ounce can, fire-roasted diced tomatoes, 1 large jalapeño, seeded and diced, 1 cup fat-free beef broth, 2 Tablespoons lime juice, 1 teaspoon chili powder, 1 teaspoon ground cumin, 1 teaspoon dried oregano, ½ teaspoon paprika, ½ teaspoon black pepper, and ½ teaspoon kosher salt.
- Add the browned beef to the slow cooker.
- Cook on low for 7 to 8 hours or high for 4 to 5 hours. The cook time will vary slightly depending on the slow cooker and the size of the roast. Note 1
- Use a fork to shred the beef. Taste for seasoning. If needed, adjust any seasoning. Serve with fresh parsley or cilantro and lime wedges over rice.
- Serve as tacos, quesadillas, nachos, enchiladas, burritos, endless options
Stovetop Instructions
- After step 1, remove the beef from the pot, set aside.
- Into the pot, saute the onion for 2 to 3 minutes. Onions will begin to soften. Mix in the garlic, and saute another minute to blend flavors.
- Stir in diced tomatoes, beef broth, lime juice, diced jalapenos, chili powder, cumin, dried oregano, black pepper, and salt.
- Add the browned beef back into the pot. Reduce heat to low, simmer for about 3 - 4 hours. (depending on the size of the beef) The meat should be fork tender when cooked completely. Shred with claws or forks. Ready to serve.
Video
Notes
Nutrition
Chopped Cucumber Tomato Salad Recipe
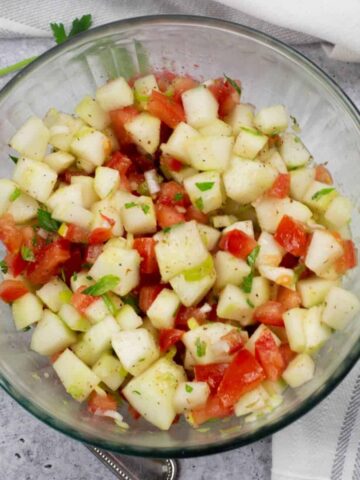
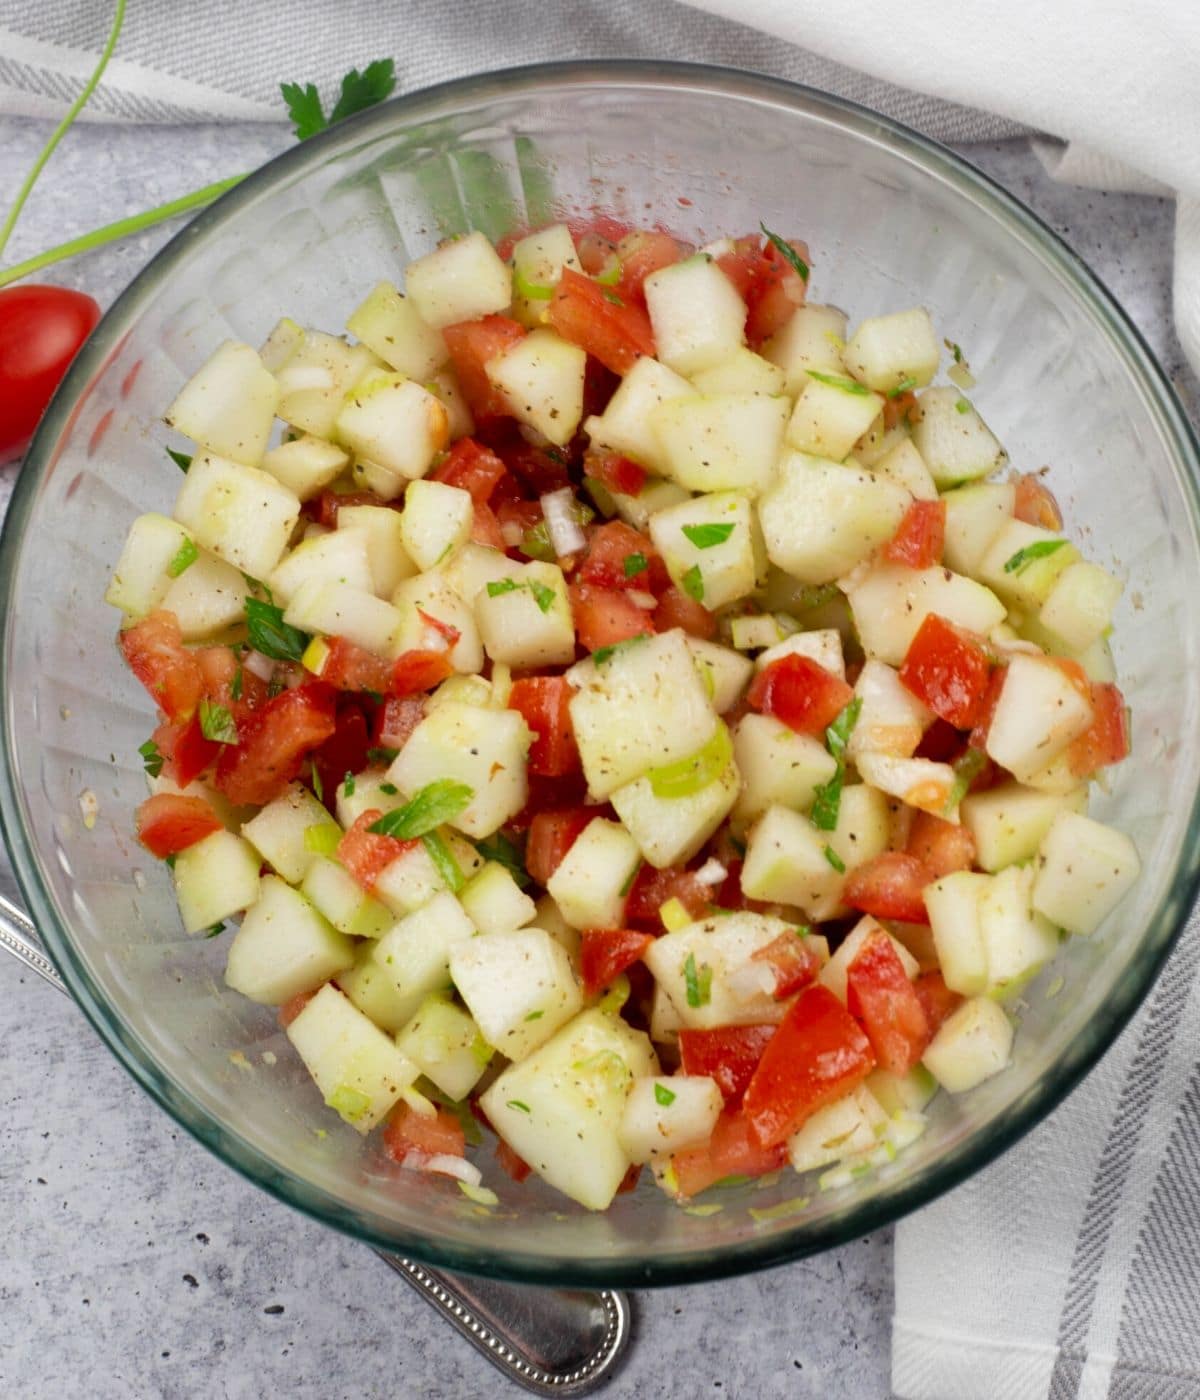
Cucumber tomato salad is a favorite budget-friendly recipe that is ready in minutes and a great side salad to any meal. I make this year-round. During the summer, we enjoy this salad daily with garden-grown veggies.
Every deli I frequent sells this salad for a crazy price. I've got to tell you, its a delicious salad that takes minutes to put together. Make it ahead of time and it stores well in the fridge so you can enjoy it over a few days
...One Skillet Sausage and Cabbage Recipe
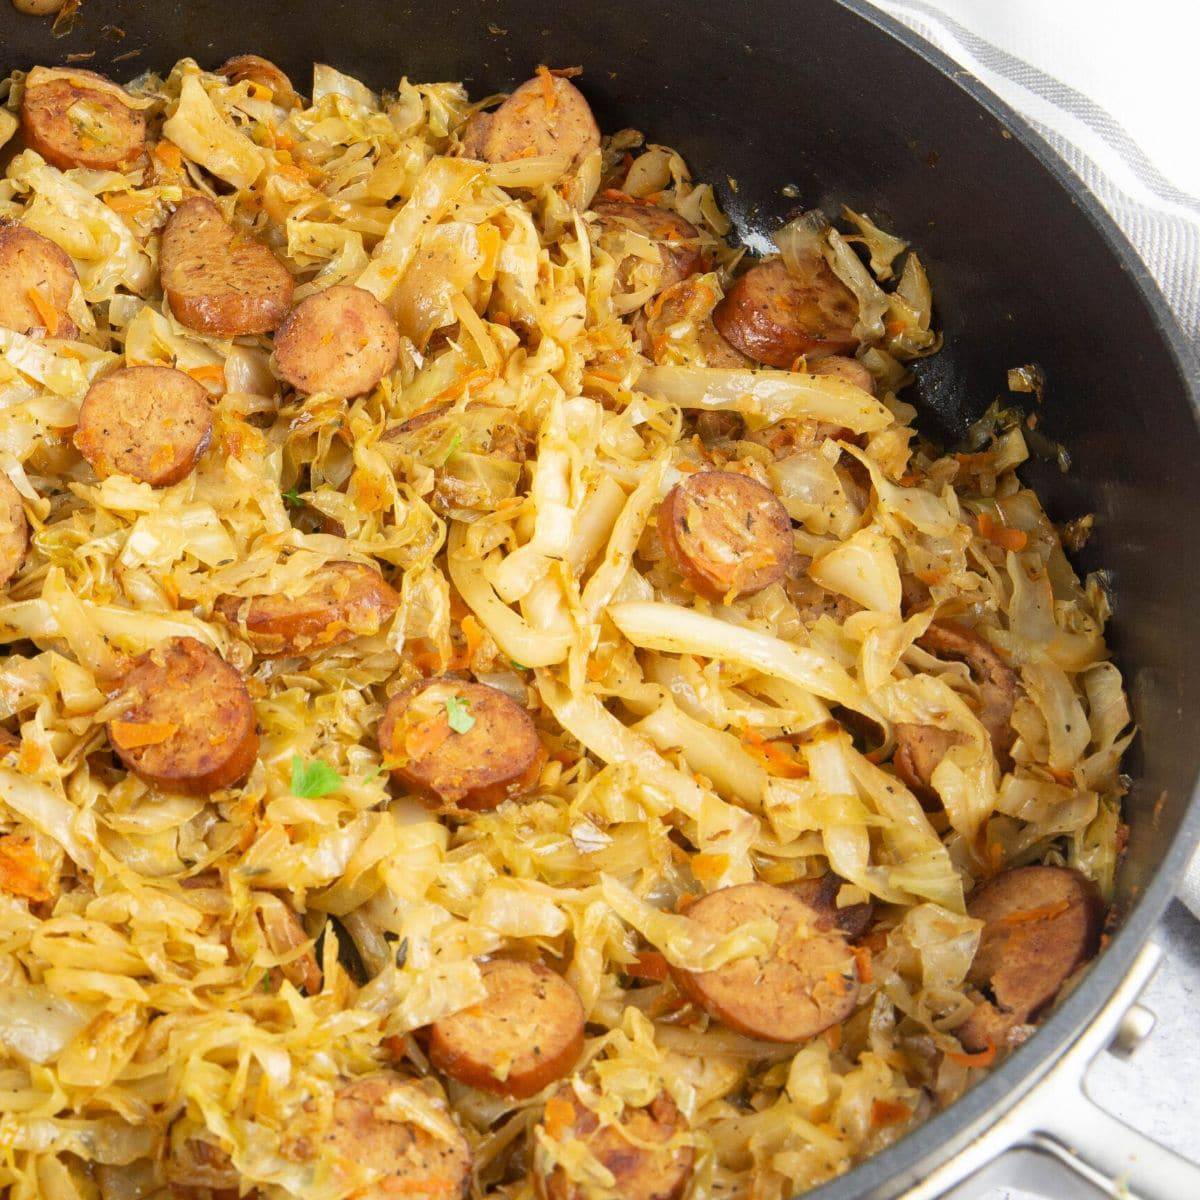
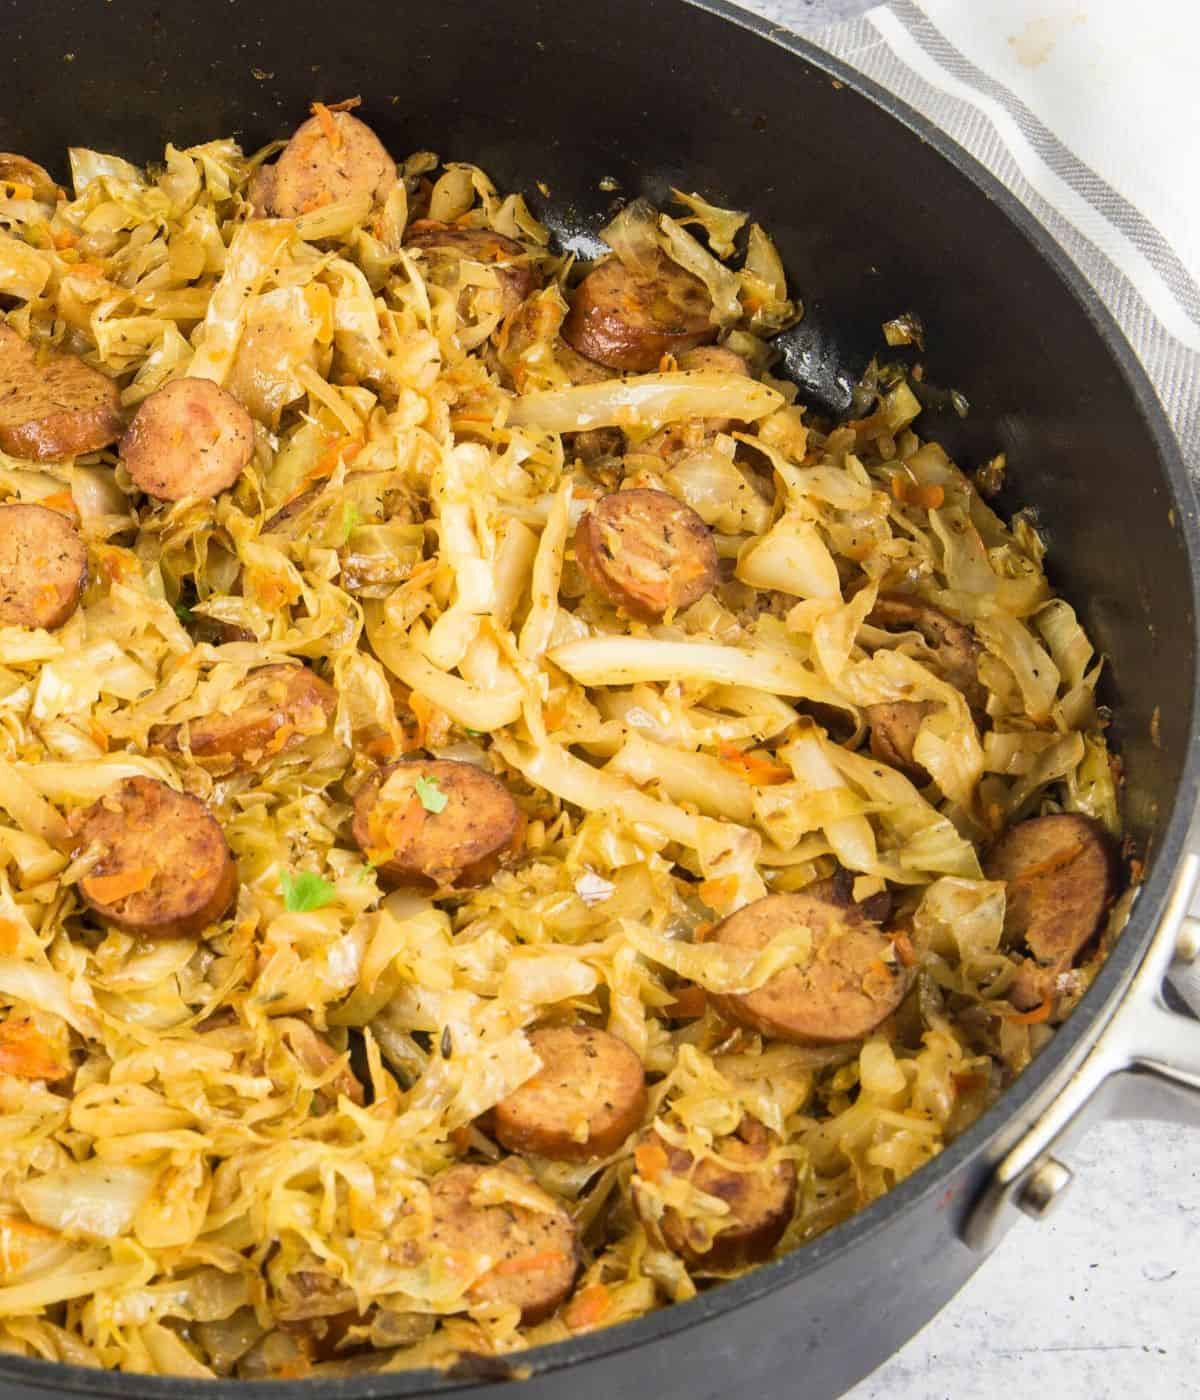
One skillet sausage and cabbage is full of robust flavors. It's an easy recipe that is sure to be a hit. Pure comfort food for the whole family. A hearty combo to fill you up with just a few budget-friendly ingredients in less than 30 minutes.
We are celebrating this delicious skillet meal with amazing flavors from smoked sausage and cabbage. Both of which have decent pantry shelf lives so I've been ordering them through grocery delivery.
Sausage and Cabbage Recipe
A one-skillet dish is always at the top of my favorites meals. Easy family dinners are the best. I love how easy this recipe is to prepare and it's ready in 30 minutes.
The smokiness of the sausages blends with the cabbage and you have a low-carb dinner. Adding a little beer or chicken stock into the skillet intensifies the flavors.
Ingredients
Smoked sausage: The recipe used smoked chicken sausage. Feel free to swap out and use turkey or pork sausage, kielbasa, or chorizo.
Green Cabbage: We have used Savoy in the recipe with tasty results.
Carrots: Adds another level of flavor to the dish.
Garlic/onion: Whenever possible I add these two to any dish for flavor.
Apple Cider Vinegar: Adds a little flavor and moisture to the dish.
Ground Thyme: Adds a bit of seasoning.
Sausage and Cabbage Recipe Variations:
- Add ½ cup of your favorite beer or chicken stock to the cabbage while it cooks.
- Mix in ½ to 1 teaspoon Cajun Seasoning to the cabbage as it cooks.
- In lieu of shallots, use a diced yellow onion.
Slicing the cabbage
Use a knife, food processor, or mandolin, (check here for my favorites) to get your cabbage sliced thin. Looking for a short-cut, you can purchase shredded cabbage in the produce section of your grocery store.
Step by step, how to make sausage and cabbage
- Saute the smoked sausage for a few minutes per side to brown. Remove and set aside.
- Stir in the shallots and garlic in olive oil.
- Add in the sliced cabbage, apple cider vinegar, thyme, salt, and pepper to the skillet and stir occasionally to soften. If adding, add beer or chicken stock (see variations) now.
- Stir in shredded carrots and saute for a minute or two to blend flavors.
- Add back in the cooked sausage to the mixture, stir occasionally, another 10-12 minutes until cabbage is soft. Serve.
Expert Tips
Mise en Place: Be sure to slice your sausage and veggies ahead. Measure out your ingredients to be ready to make your recipe.
Cutting the ingredients: Be sure to slice your sausage the same size. In addition, cut each veggies in accordance so they cook evenly, cabbage should be cut the same. The shallots should all be diced to the same size so they cook evenly.
Storage: Leftovers keep well covered for about 3 days. Always refer to the experts at USDA for specific info on storing leftovers.
Can I freeze this recipe: This is a fabulous recipe but freezing cabbage is not recommended. The texture will change.
- Anolon Saute Pan: This is my favorite saute pan. Non-stick, easy clean-up.
- Serving Spoons: Love these spoons. We use them often.
Don’t forget to shop at the Everyday Eileen store on Amazon
One skillet meals are awesome. Give any of these a try: Braised Chicken and Veggies, Chicken Scarpariello with Cauliflower, or Creamy Ham and Peas Pasta. You will love Shelby's, who writes Honey Bunch Hunts, Big Mac Casserole, low-carb deliciousness.
When you make this recipe, take a pic and tag me on Instagram @everyday_eileen or #everydayeileen
I love any comments or questions, please feel free to leave them below!
Keep up to date with recipes by following me on:
FACEBOOK INSTAGRAM, PINTEREST, TWITTER
I love this recipe, it would be awesome if you give it a 5-star rating and share comments below
📖 Recipe

Sausage and Cabbage Recipe
Ingredients
- 2 Tablespoons olive oil, divided
- 1 pound smoked sausage or kielbasa, sliced thin Note 1
- 1 medium shallot, peeled and finely diced
- 2 cloves garlic, peeled and minced
- ½ teaspoon ground thyme
- 4 cups cabbage, sliced thin, 1 head, about 2 pounds Note 2
- 2 carrots, shredded
- 1 Tablespoon apple cider vinegar
- salt and pepper, to taste
- chopped fresh thyme, optional garnish
Instructions
- In a large saute pan, over medium heat, add 1 Tablespoon olive oil.
- Place the sliced sausage in the pan, saute about 5 minutes to lightly brown the sausage. Remove sausage, set aside.
- Add the remaining Tablespoon olive oil to the pan. Stir in the shallots and saute for 3 minutes to soften the shallots. Stir in the garlic and dried thyme, stir about 1 minute to blend flavors.
- Blend in the cabbage and apple cider vinegar. Season with salt and pepper. Saute, stirring occasionally about 10-13 minutes, to soften the cabbage.
- Stir in the shredded carrots and cooked sausage, saute another minute to blend flavors.
- Taste for seasoning, reseason if needed. Optional, serve with a sprinkling of fresh chopped thyme.
Notes
- Any nutritional data I provide is an approximation and actual dietary information can vary based on ingredients and proportion sizes.
Nutrition
Easy Oven Baked Chicken Breasts Recipe
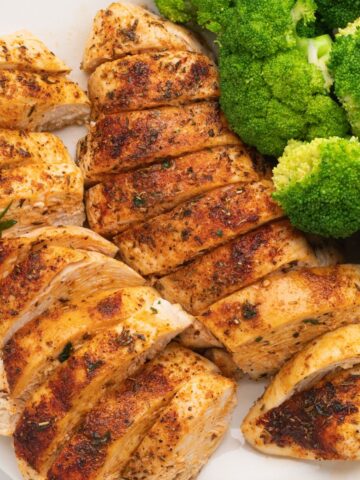
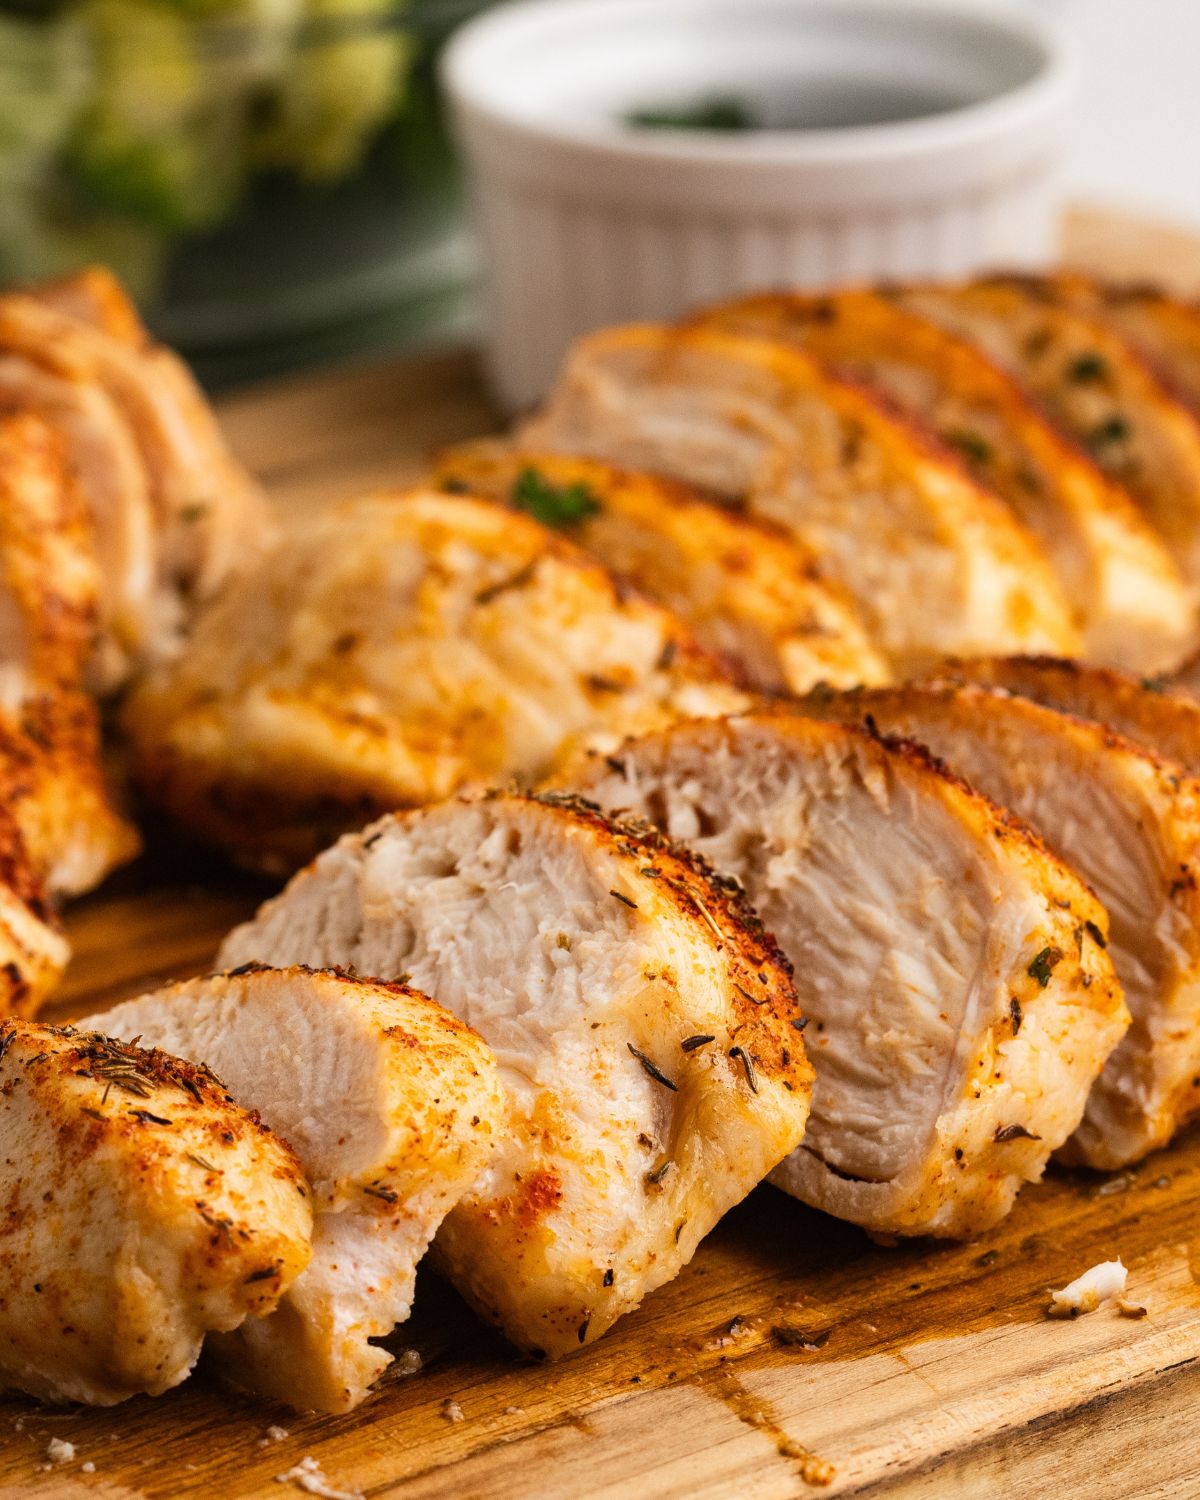
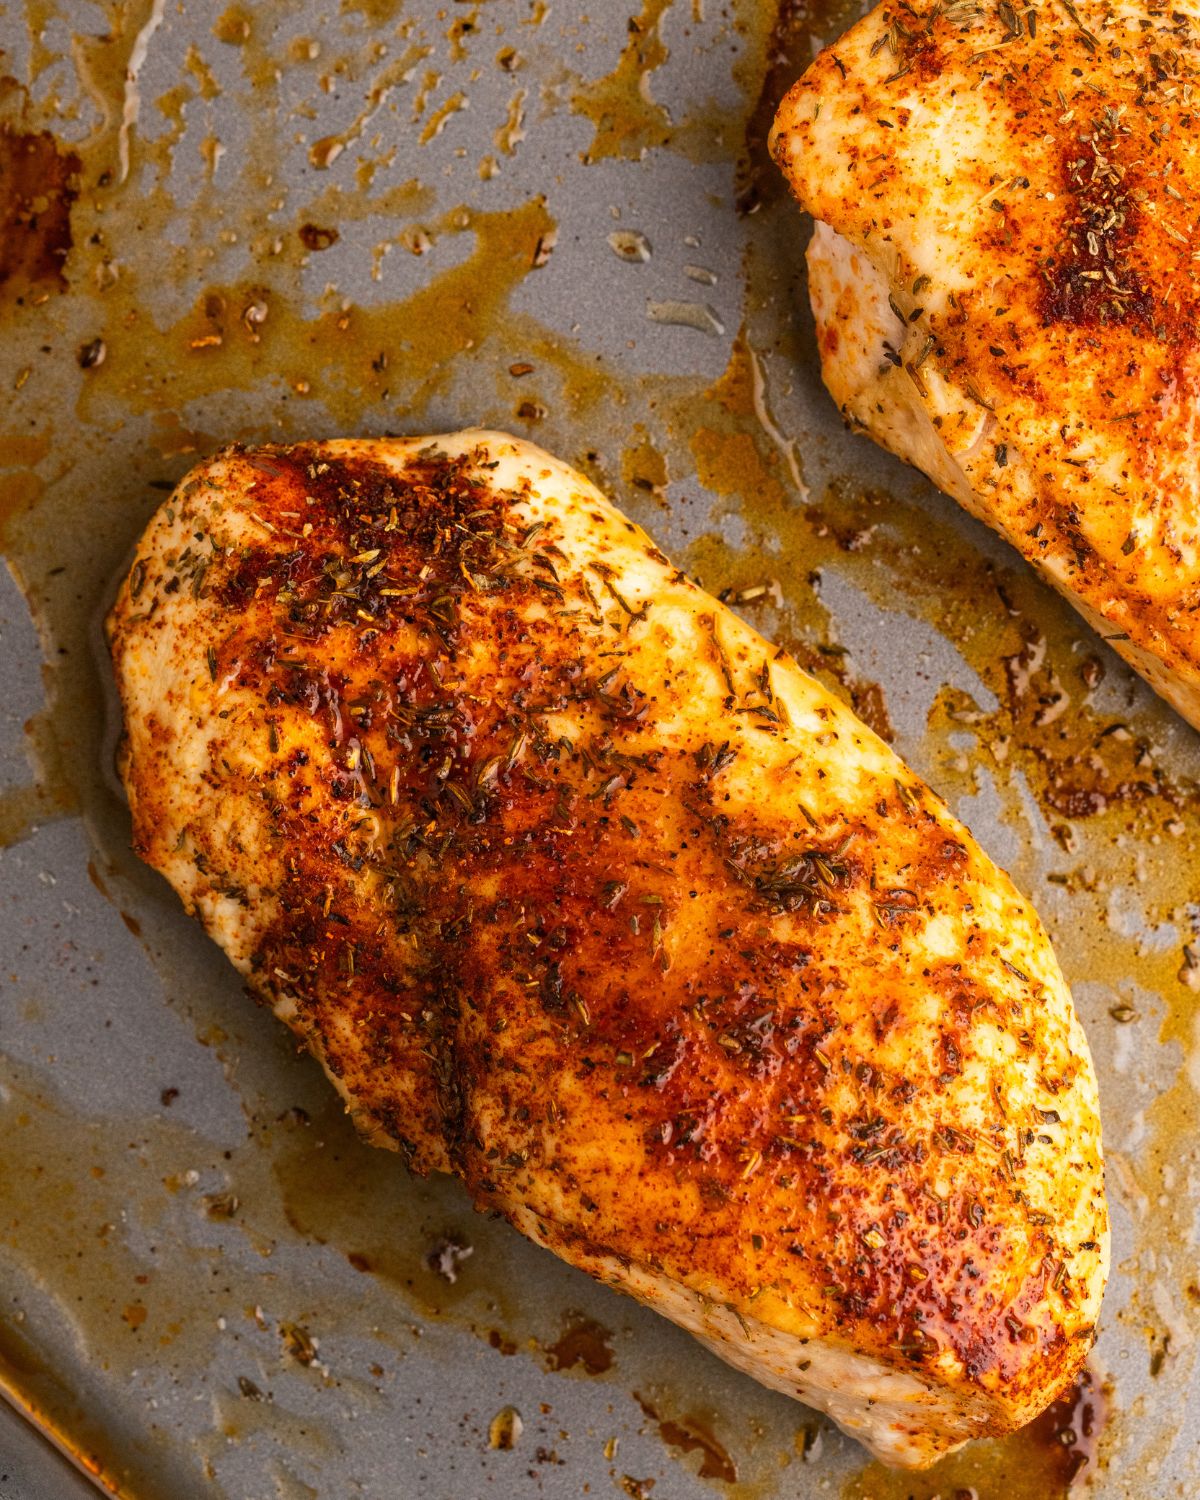
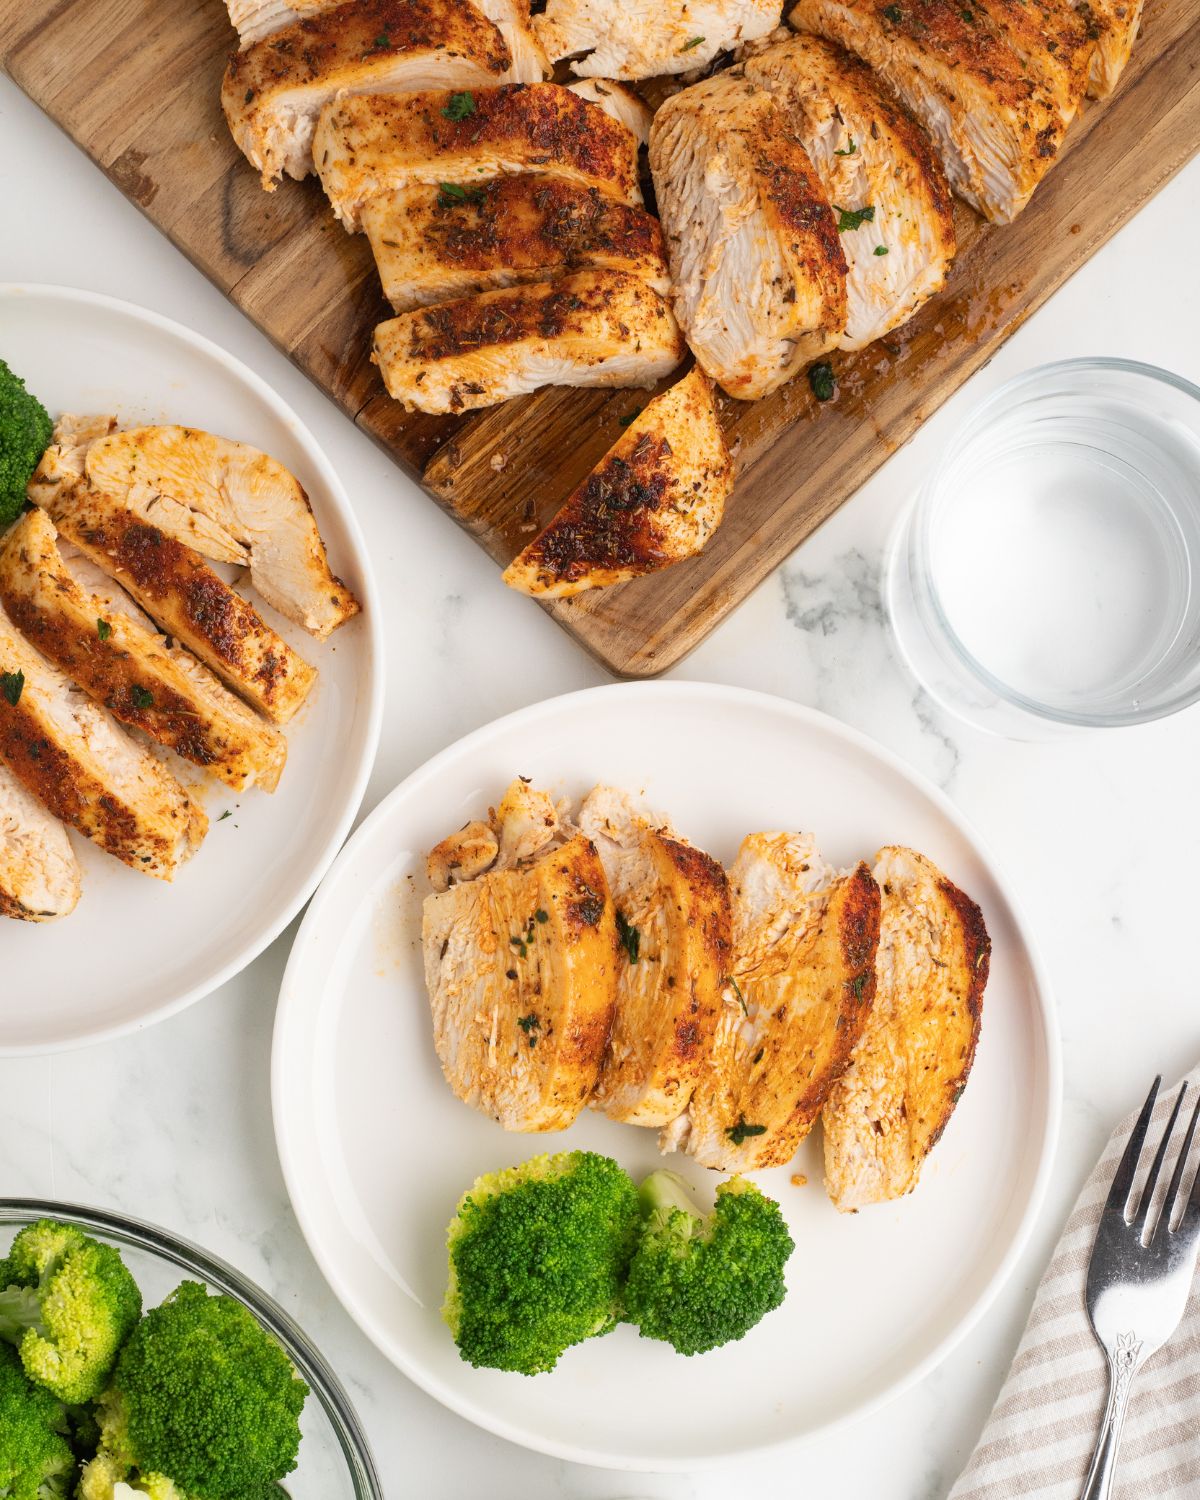
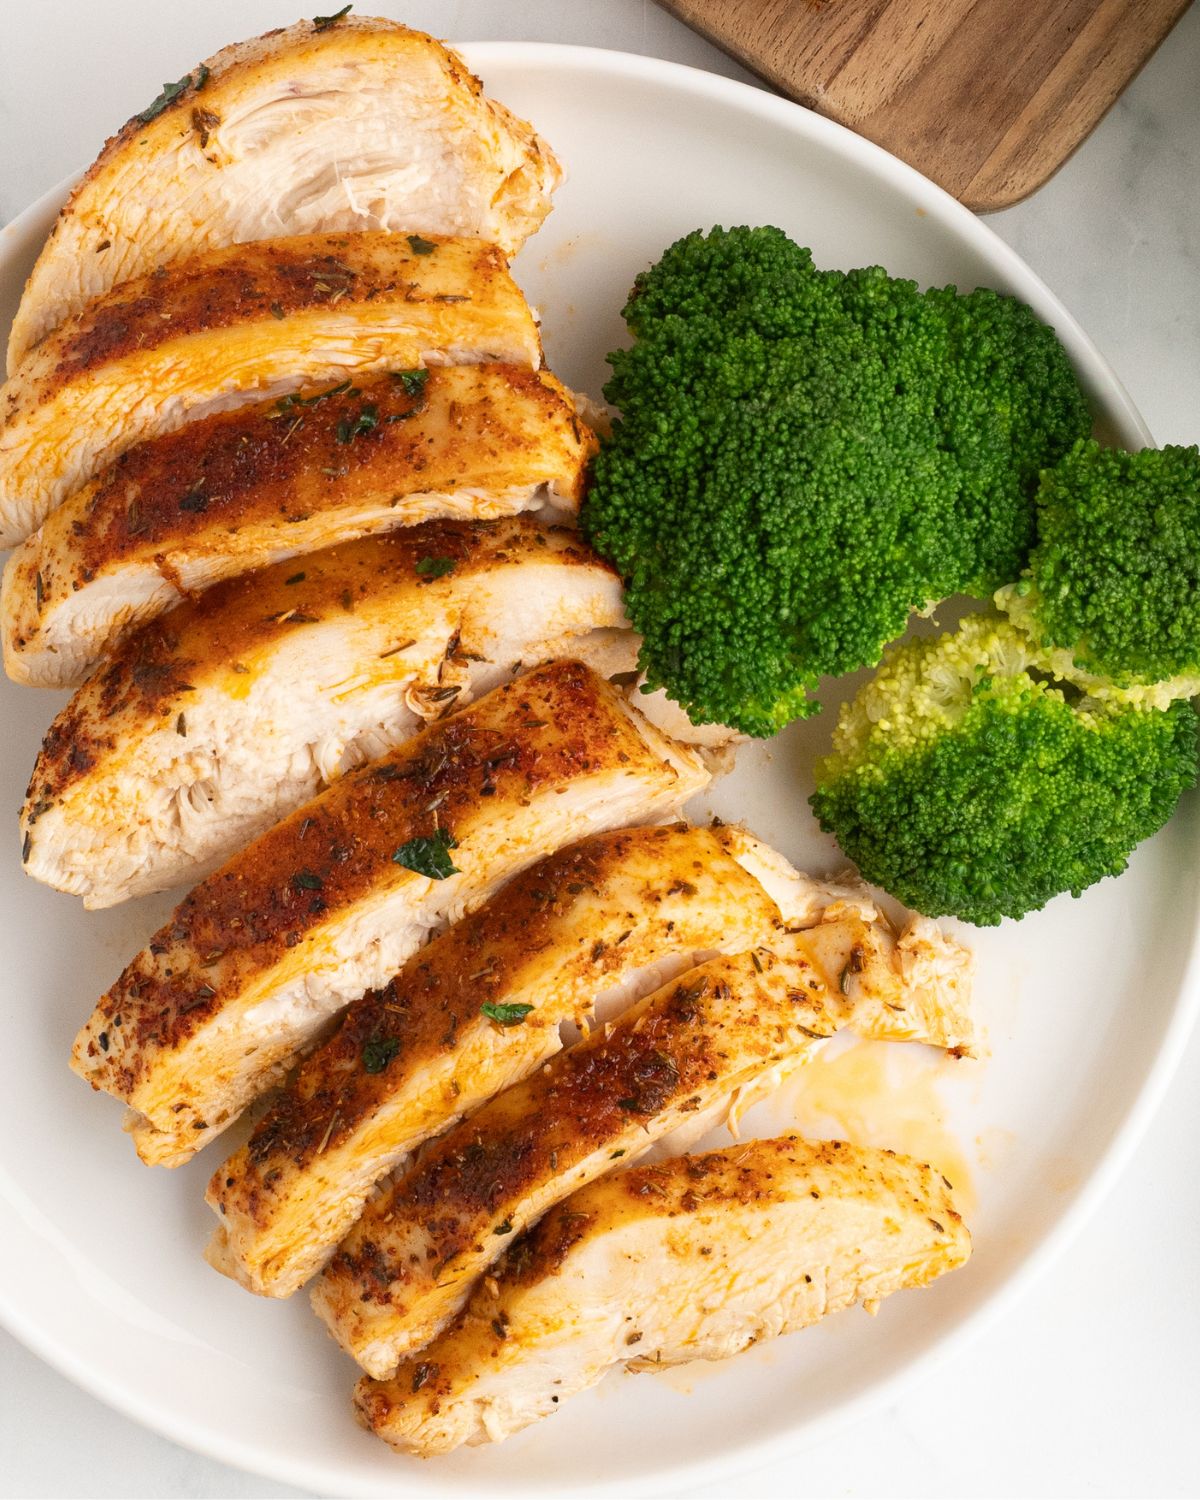
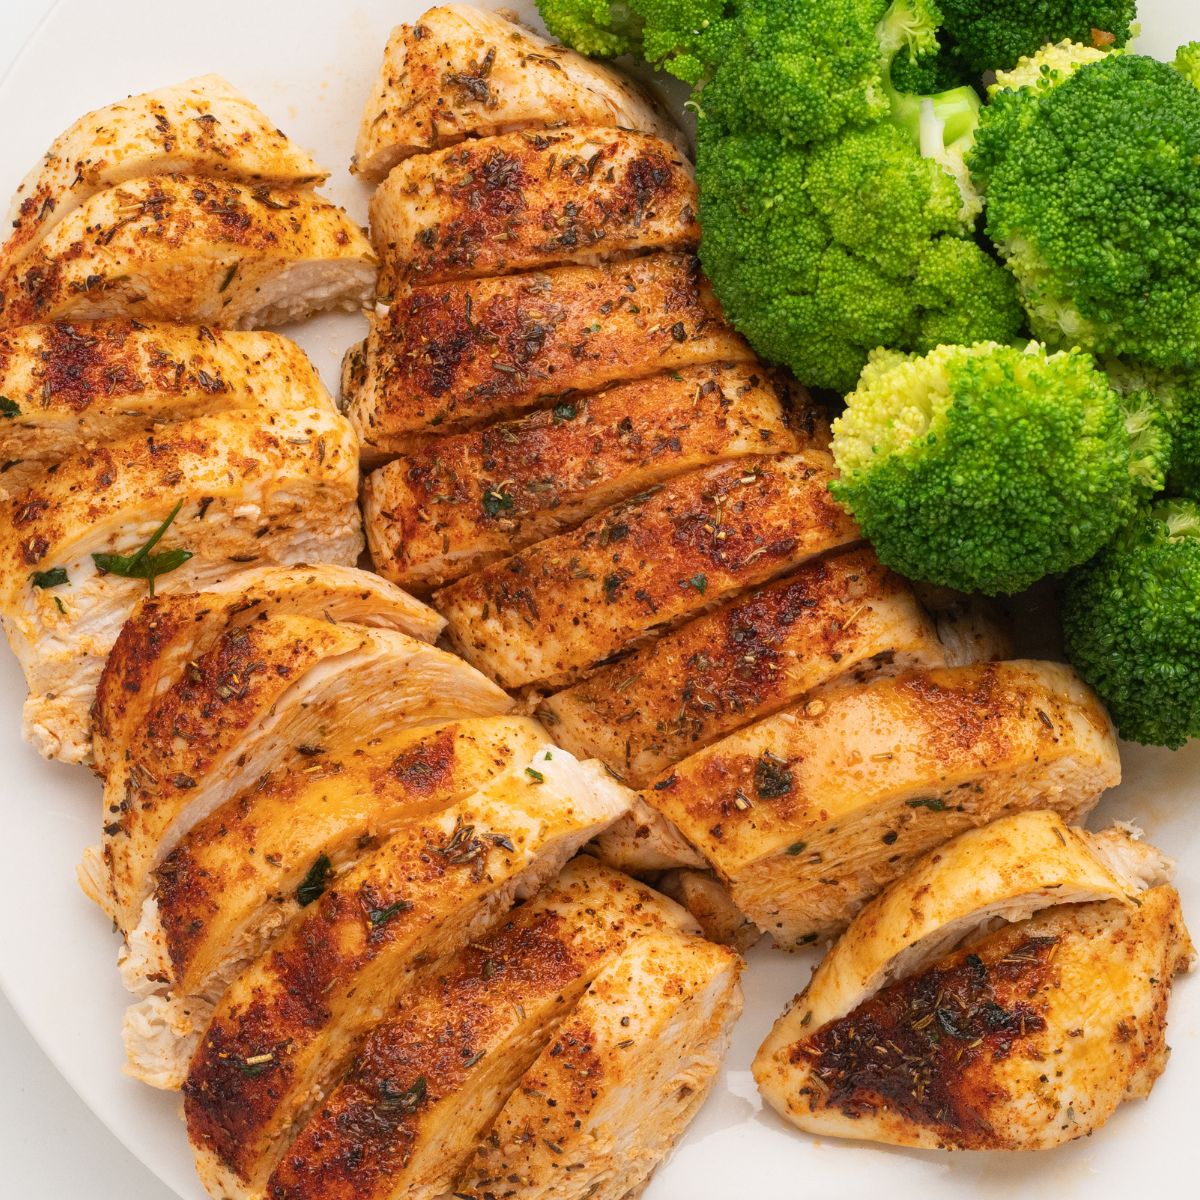
This oven-baked boneless chicken breast recipe is your go-to method for juicy, flavorful chicken every time. No more worrying if the results will be dry or rubbery. Perfectly cooked chicken in less than 30 minutes.
I've tested this method many times, and using a high-heat oven and a simple seasoning blend is foolproof. Perfect for weeknight dinners, meal prep, and healthy recipes all week long.
Bake chicken breasts at 425°F for 18–25 minutes, depending on the thickness, until the internal temperature reaches 165°F. Let the chicken rest for 5 minutes before slicing.

Highlights for Baked Chicken Breasts
- Quick and Easy: Ready in under 30 minutes.
- Simple Ingredients: Uses simple pantry spices.
- Meal-Prep: A great recipe to use for meal prep.
- Dietary Needs: Naturally gluten-free and low-carb.
- Customizable: Easy to use different seasoning blends to change up the flavors.
If you love easy, boneless chicken breasts, try grilled apricot chicken, Greek chicken marinade, or Korean BBQ chicken.
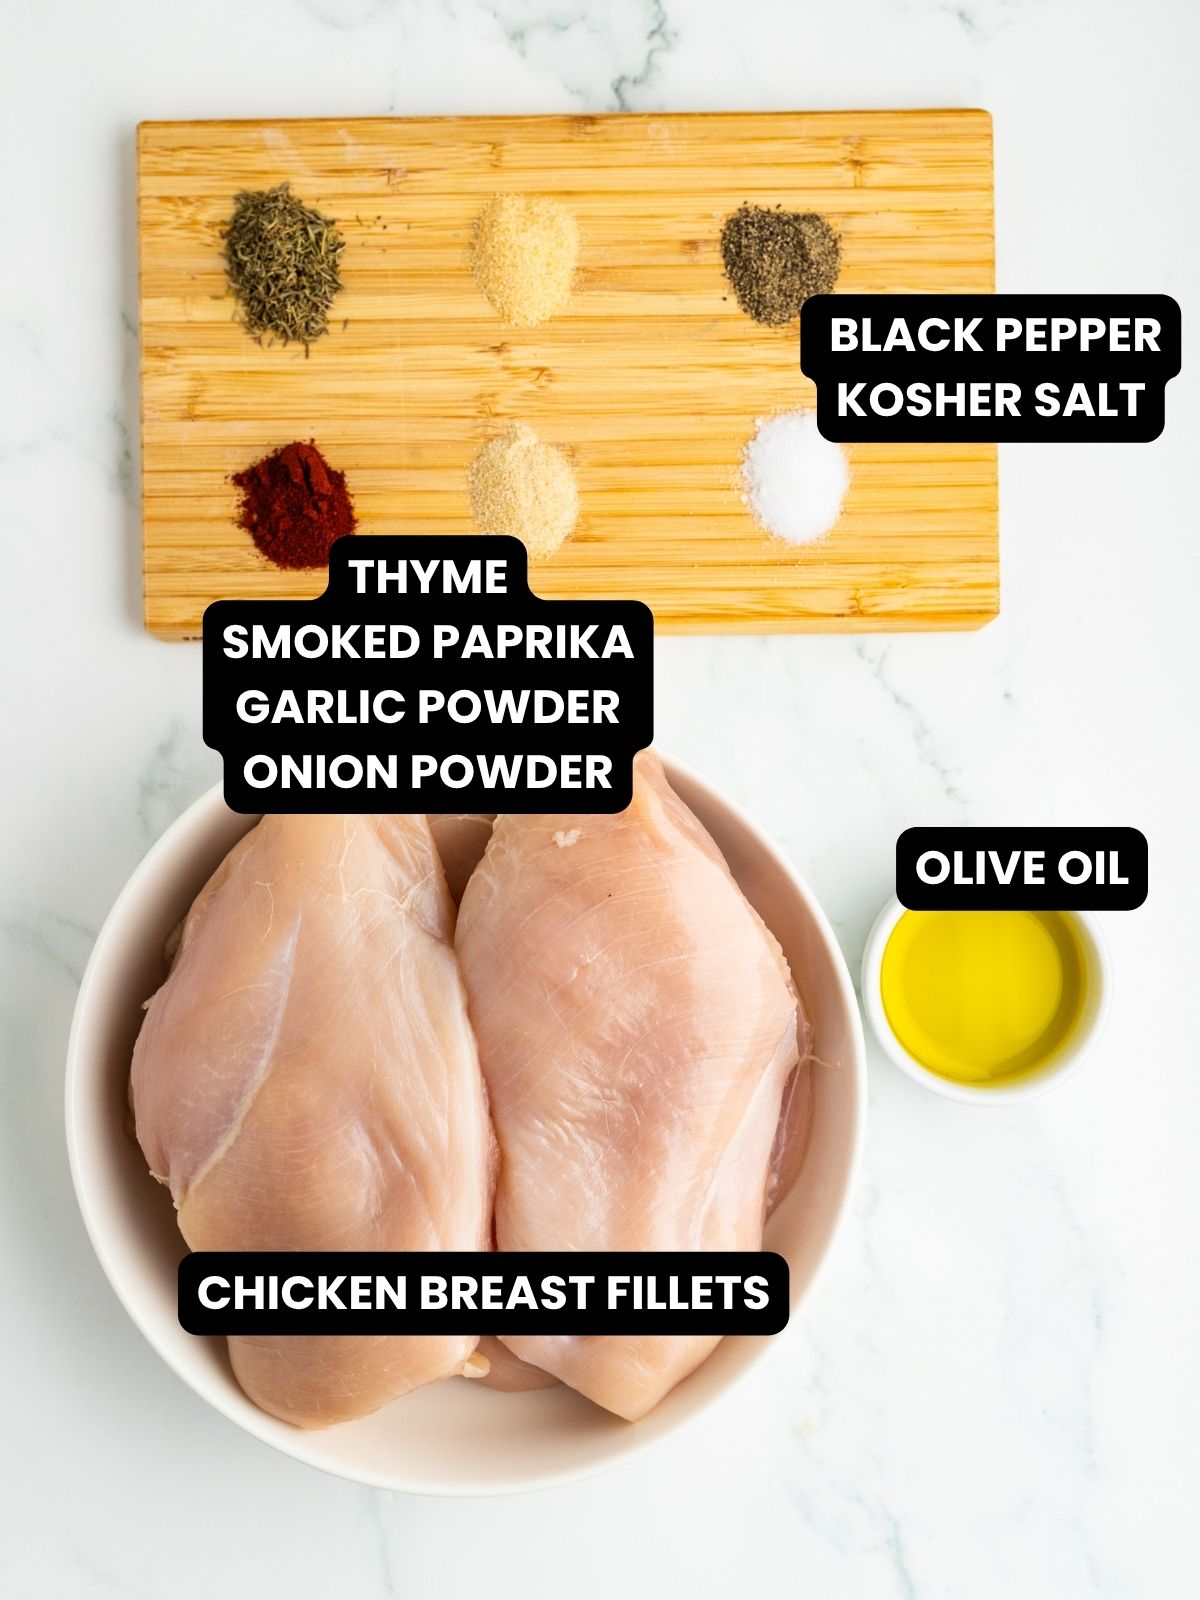
Ingredients for Juicy Baked Chicken Breasts

- 4 to 7-ounce boneless skinless chicken breasts - pound chicken to even thickness for best results.
- Olive Oil - Ensures the spices adhere to the chicken. Any favorite oil, such as avocado oil, can be used. Melted butter can also be used to brush on the chicken.
- Ground Thyme - Complements the chicken.
- Smoked Paprika - Adds color and a bit of smokiness to the flavors.
- Garlic Powder, Onion Powder - Both add flavor to the rub on the chicken.
- Black Pepper, Kosher salt - Add seasoning to the chicken.
How to Make Oven-Baked Boneless Chicken Breasts
This is an overview of the recipe. The full instructions are in the recipe card.
- Preheat oven to 425°F.
- Evenly pound the chicken between plastic wrap or parchment paper to about ½ to ¾ inches thick. Use a paper towel to pat the chicken dry.

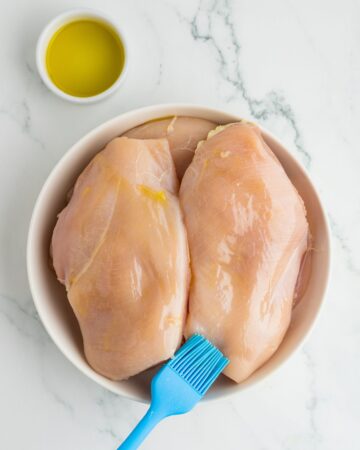
- Brush olive oil all over the chicken breast.

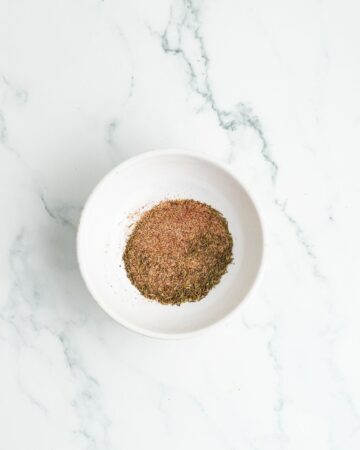
- Whisk the spices together in a small mixing bowl.

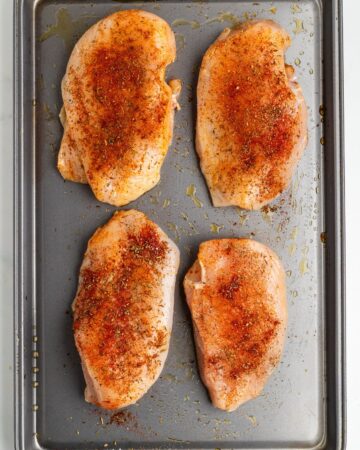
- Evenly distribute the spice blend on the chicken breasts.

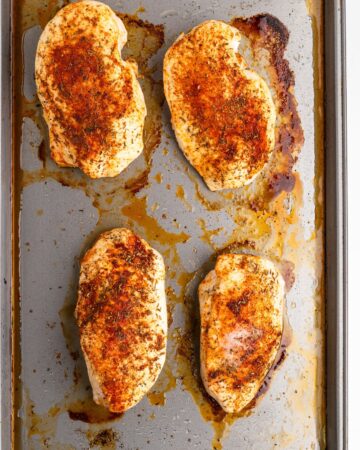
- Bake in the preheated oven for 18 to 25 minutes. The internal temperature of the chicken is 165°F. (Use an instant-read meat thermometer to verify the temperature)

- Be sure to let the chicken rest for at least 5 minutes to allow the juices to settle before slicing
This method works for both small and large chicken breasts—just adjust the baking time using the chart below.
How Long to Bake Chicken Breasts
| Chicken Breast Size | Bake Time at 425°F |
|---|---|
| 5–6 oz (thin) | 15–18 minutes |
| 7–8 oz (medium) | 18–22 minutes |
| 9–10 oz (large) | 22–26 minutes |
Tip: Always cook until the internal temperature reaches 165°F.
Make-ahead, storage, and freezer tips
"This article includes affiliate links, which may provide a small commission to me at no cost to you."
Storage - Keep leftovers in an airtight container in the refrigerator for up to 4 days.
Freezer-Friendly - After cooking, the chicken can be kept in the freezer for up to 3 months. Using a food saver is my favorite way to store anything I put in the freezer to keep away freezer burn.

Why Are My Chicken Breasts Dry
Chicken breasts are very lean, so they can dry out easily if overcooked. Here are the most common reasons:
- Low oven temperature: Leads to longer cook time and drier chicken
- Overcooking: The most common issue—always use a thermometer.
- Uneven thickness: Thicker ends take longer to cook.
- No resting time: Juices escape if sliced too soon.
Best Tips for the Best Oven- Baked Chicken Breasts
Disclaimer: "This article includes affiliate links, which may provide a small commission to me at no cost to you."
- Size of the chicken: Ensure the chicken is evenly cut and pounded so the breasts bake evenly.
- Refrigeration: Remove the chicken from the refrigerator 15 minutes before baking. This allows the chicken to come to room temperature before baking. The meat will bake faster and will not dry out.
- Internal Temperature: Per food safety guidelines, the internal temperature of the poultry should be 165°F when finished cooking. Use an instant-read meat thermometer and don't overcook the meat.
- Rest Time: Be sure to let the chicken breasts rest at least 5 minutes before slicing. This allows the chicken juices to settle, to stay moist and tender.
Avoid these common mistakes:
- Baking the chicken at a low oven temperature will dry out the chicken breasts.
- Overbaking will cause the chicken to dry out. Use an instant-read meat thermometer for accurate temperature.
- Not pounding chicken evenly will cause the chicken to cook unevenly.
Variations for making Baked Chicken Breasts
Do you want to change up this recipe?
- Seasoning: For every pound of boneless chicken, use 1 teaspoon of any of your favorite seasoning blends, such as

Oven Baked Chicken Breasts FAQs
For the best results, baking chicken breasts at high heat cooks the chicken quickly, helping reduce moisture loss when properly timed.
Bake at a high heat, 425°F/218°C, and use a meat thermometer to check the internal temperature of the chicken. Also, let the chicken rest for at least 5 minutes before slicing.
No. Bake the chicken uncovered at high heat for a crispy exterior.
For this recipe, no need to flip the chicken during baking.
Use fresh or defrosted chicken breasts for this recipe.
What to serve with oven-baked chicken breasts
Whether you are making dinner or meal planning for the week, these are great options for both.
- Easy Oven Roasted Green Beans
- Homemade Mashed Potatoes
- Roasted Potatoes
- Eggless Potato Salad
- Broccoli Cauliflower Salad
Meal Prep Ideas
These are great side salads to make ahead and serve with the oven- baked chicken breasts. Tuscan Bean Salad, Corn Tomato Salad, and Bacon Ranch Potato Salad are all great for meal planning.
Use these chicken breasts for meal prepping:
- Slice the chicken into strips for salads or grain bowls.
- Make wraps and protein bowls.
- Use this chicken in Chicken and Green Bean Casserole, Chicken Enchilada Sliders, or chicken taquitos.
- A great recipe for freezing cooked chicken for a later date.
Recipes to make with baked chicken breasts
Leftover chicken breasts are great to use in any of these delicious chicken recipes:
I love any comments or questions. Please feel free to leave them below.
Keep up to date with recipes by following me on:
FACEBOOK INSTAGRAM PINTEREST TWITTER
Thank you for your continued support. I am forever grateful.
Eileen xo
If you click the number of servings in the recipe card, you can adjust the measurements up or down for the exact number of servings you need.
📖 Recipe

Oven Baked Chicken Breasts
Ingredients
- 4(4 - 5) ounce boneless skinless chicken breasts (trimmed and pounded to an even thickness)
- 2 Tablespoons olive oil
- ½ teaspoon ground thyme
- ¼ teaspoon smoked paprika
- ¼ teaspoon garlic powder
- ¼ teaspoon onion powder
- ¼ teaspoon black pepper
- ¼ teaspoon kosher salt
- non-stick cooking spray
Instructions
- Preheat the oven to 425°F. Spray a large baking pan with non-stick cooking spray.
- Evenly distribute and brush 4(4 - 5) ounce boneless skinless chicken breasts (trimmed and pounded to an even thickness) on both sides with 2 Tablespoons olive oil .
- In a small mixing bowl, whisk together ½ teaspoon ground thyme, ¼ teaspoon smoked paprika, ¼ teaspoon garlic powder , ¼ teaspoon onion powder, ¼ teaspoon black pepper, and ¼ teaspoon kosher salt Generously rub on the chicken breasts.
- Place the seasoned chicken into the prepared baking pan. Place the pan in the preheated oven.
- Bake for 20 minutes or until the chicken reaches an internal temperature of 165°F/73°C.
- Remove chicken and let rest 5 minutes to cool. This lets the juices set and chicken will be juicy.
- Slice and serve.
Notes
Nutrition
Roasted Butternut Squash Soup Recipe
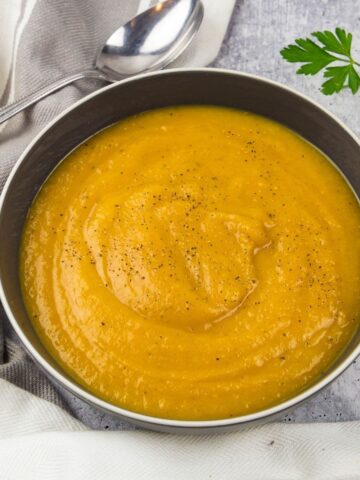
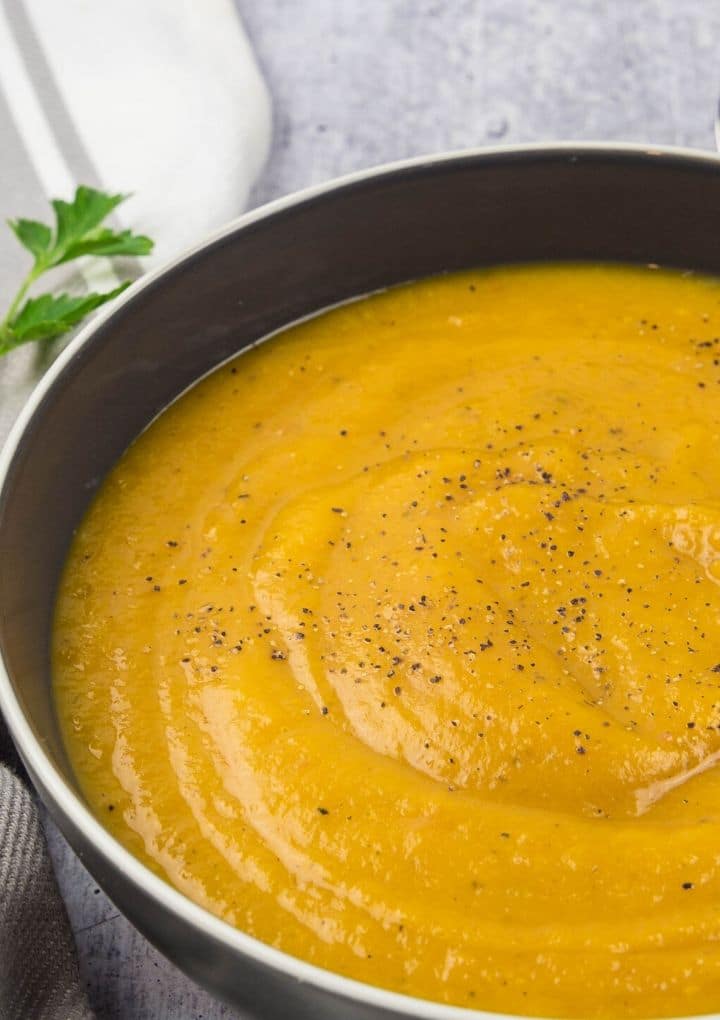
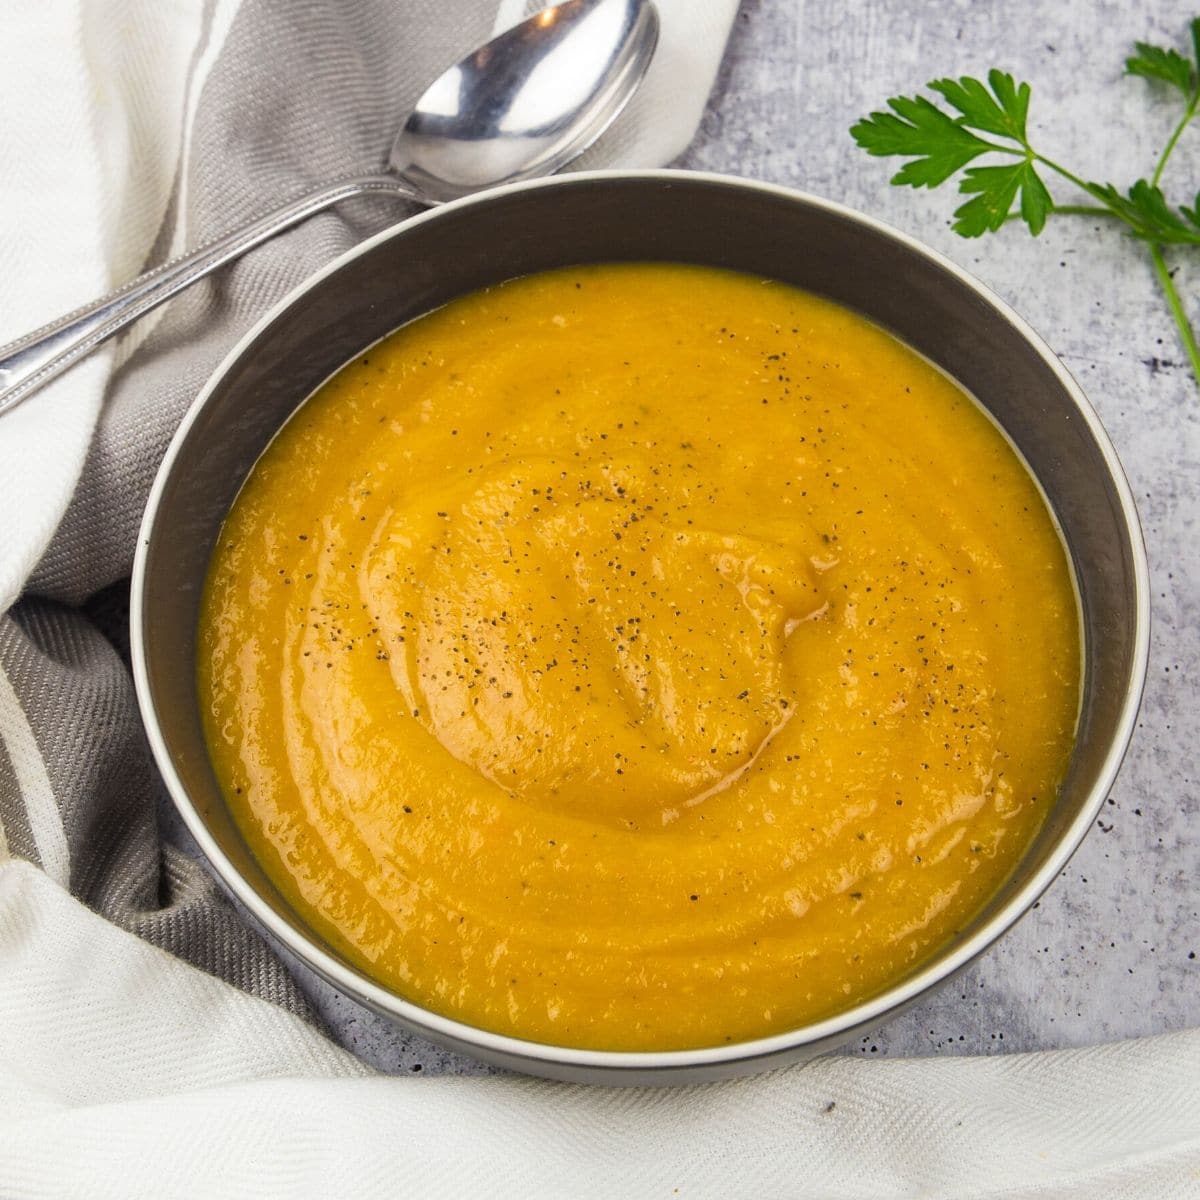
Roasted Butternut Squash Soup Recipe, creamless, smooth and slowly roasted veggies make the most decadently better for you soup. The soup flavors are robust and blend quickly together once the veggies are roasted. The soup is vegan, naturally gluten-free, low-fat, and low-calorie. Plus it freezes well and a great to any meal plan menu.
One of my family's favorites is this creamless roasted butternut squash soup! A keeper, people, actually a no-brainer and super tasty! Butternut squash has a long shelf life, and right now that's a big plus when storing veggies.
I have been making this recipe for years with many different versions! Roasting butternut squash with a little coconut oil and seasoning adds a lot of flavor to the squash! I then add the roasted squash to veggie stock, seasoning, and herbs to make a delicious creamless butternut squash soup.
Roasting Butternut Squash
The squash can be roasted in small pieces as I do in this recipe. However, you can slice the squash and remove the seeds and roast the two pieces. I tend to like the smoky flavor the cubed squash gets as it cooks.
How to store roasted butternut squash soup:
The soup can be kept in the fridge after it has been made in a well-sealed container for about 3 days.
You can freeze the soup for up to 3 months. Defrost in the fridge and reheat until warm, about 10 minutes over medium heat.
If you prefer a very creamy soup or for variety, add a can of coconut milk before pureeing the soup.
Low-fat Potato Leek Soup: Another creamless favorite soup. Potato Soup, hearty and delish!
Dairy-Free Corn Potato Chowder: A favorite chowder with fresh flavors from corn and potatoes for a delectable dinner.
Butternut Squash and Sweet Potato Soup: Another favorite soup the family loves that's so tasty and the kids don't even realize how healthy it is and it's so good.
Vegetable Barley Soup from my friend Lisa at Jersey Girl Cooks is full of flavor and nutrition.
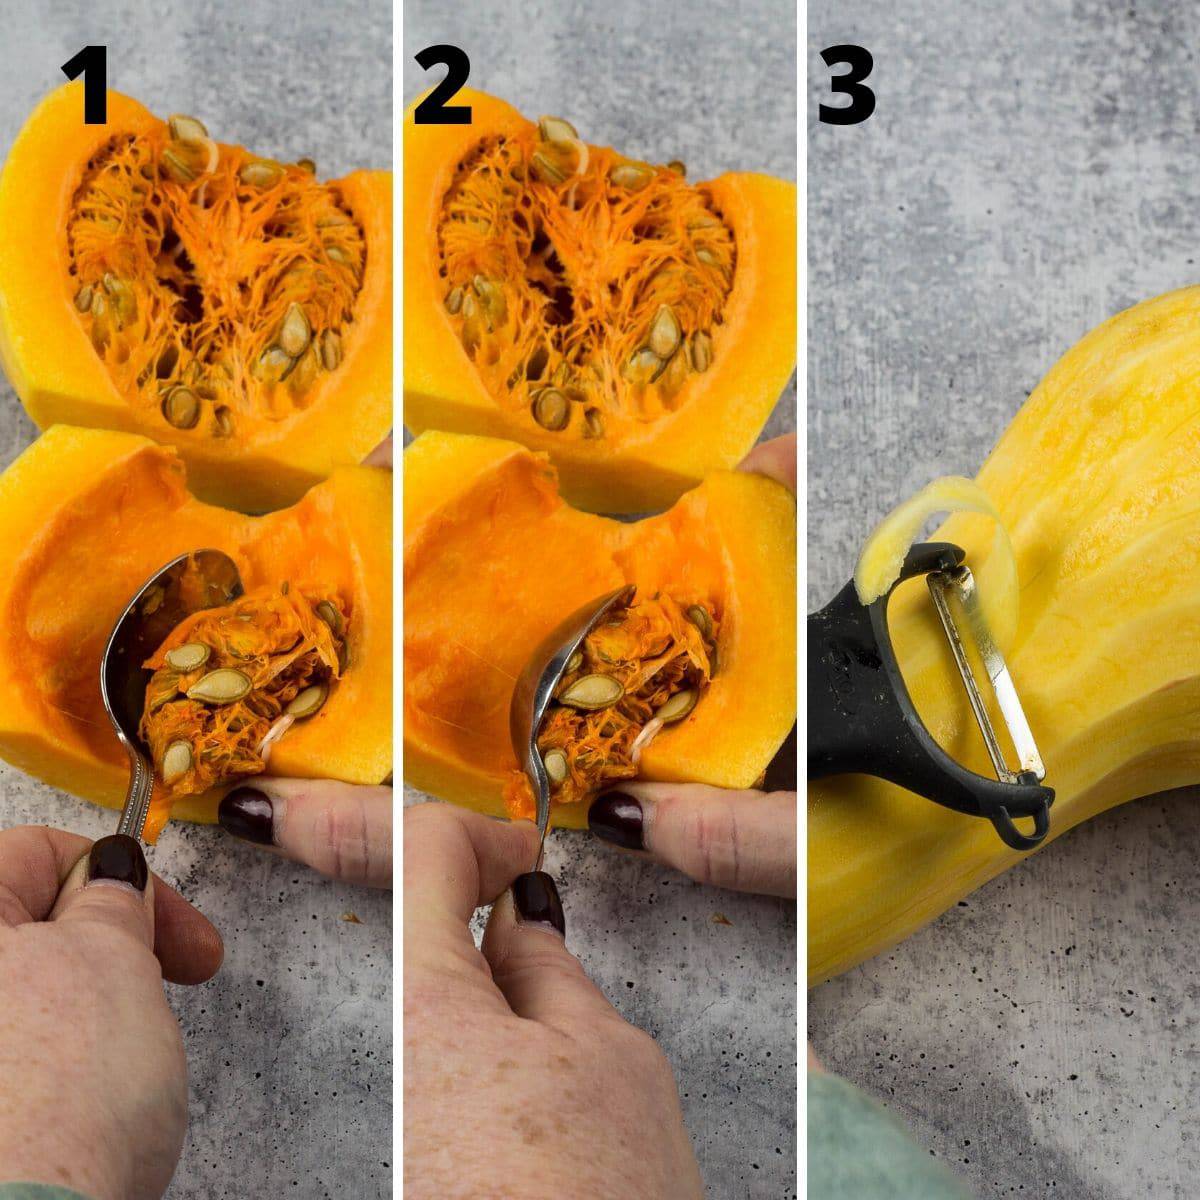
How to Peel Butternut Squash
- Slice squash in half. Remove the seeds, discard or roast some for snacking. Peel the exterior of the squash before slicing and roasting.
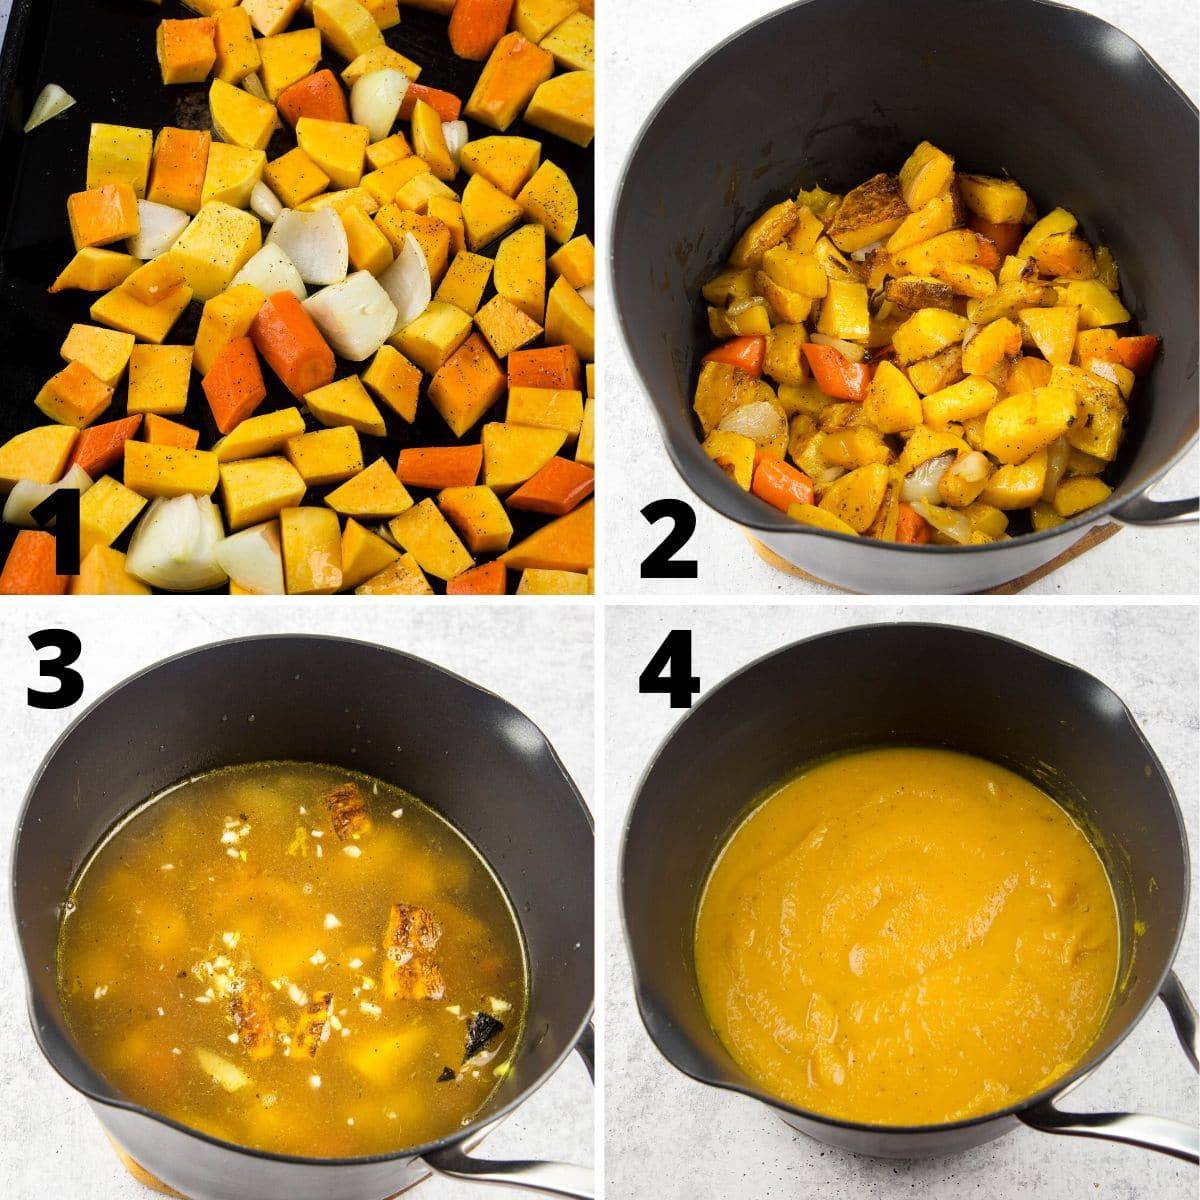
How to make a great roasted butternut squash soup recipe
- Roast veggies for about 40 minutes.
- Add the veggies to a soup or stock pot.
- Cover with veggie stock. Bring to a boil, reduce and heat for about 5 minutes.
- Puree soup, check the seasoning, serve, enjoy!
Looking for tasty Holiday Recipes, try these:
Roasted Bourbon Maple Turkey Breast
Slow Cooker Homemade Apple Cider
Green Beans with Mushrooms and Shallots
When you make this recipe, take a pic and tag me on Instagram @everyday_eileen or #everydayeileen
I love any comments or questions, please feel free to leave them below!
Keep up to date with recipes by following me on:
FACEBOOK INSTAGRAM, PINTEREST, TWITTER
📖 Recipe

Creamy Roasted Butternut Squash Soup
Ingredients
- 1 large butternut squash, sliced in half, seeded, cut into 2-inch cubes about 2-3 pounds
- 2 large carrots, peeled, cut in 2-inch slices
- 2 ribs celery, cut into 1-inch slices
- 1 large onion, peeled and quartered
- 2 cloves garlic, peeled
- 32 ounces vegetable stock, homemade or store bought Note 1
- 2 Tablespoons coconut or olive oil
- salt and pepper, to taste
Instructions
To Roast Butternut Squash
- Preheat oven to 400 degrees.
- Place prepared squash, carrots, celery, and onions on a baking tray.
- Sprinkle with oil. Season with salt, pepper, and thyme.
- Roast for 40 minutes, flipping veggies halfway through baking. Veggies should be fork tender when cooked through.
- During the last 5 minutes, add the garlic cloves.
- Once veggies are cooked, remove from the oven.
- In a large Dutch Oven, over medium heat, add the vegetable stock and roasted veggies.
- Bring to a boil. Reduce heat to low, simmer for about 5 minutes
- Use an immersion blender to blend the soup until smooth. If you do not have an immersion blender. Place half the soup in a blender. place top and cover top with a towel. Hold towel on top and blend until smooth. Do the same with second half of soup.
- Soup will be ready to serve. This is an easy make-ahead soup. Can re-heat on the second day. Also perfect as a make-ahead soup. Freezes well, I prefer no longer than 3 months. Defrost in the fridge. Reheat and enjoy.
Notes
- Any nutritional data I provide is an approximation and actual dietary information can vary based on ingredients and proportion sizes.
Nutrition